Creating Star Filter Effects on Image Highlights
With the Glint node, you can create star-shaped rays around all the bright points in an image.
|
|
|
|
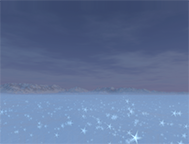
The original image with |
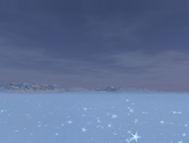
The image after using |


Tip: This effect can be helpful for adding realism to scenes with water and bright sunlight.
Using the Glint Node
To use the Glint node:
| 1. | Select Draw > Glint to add a Glint node after the image you want to add star-shaped rays to. |
| 2. | From the channels dropdown menu and checkboxes, select the channels to which you want to apply the effect. |
| 3. | In the no. of rays field, enter the number of rays you want coming out of the bright points in your image. For example, if you want to create five-pointed stars, enter 5. |
| 4. | To change the threshold for how bright the highlights in the input image need to be to cause the glint effect, adjust the tolerance slider. Only the pixels above the threshold bloom with the effect. |
|
|
|
|
Low tolerance value. |
High tolerance value. |

| 5. | To determine the length of the rays, adjust the length slider. To give every other ray a different length and determine that length, adjust the odd ray length slider. |
| 6. | To determine how many steps the rays are formed of, enter a value in the steps field. The more steps you use and the shorter the rays are, the smoother the rays become. |
|
|
|
|
The steps value set to 3. |
The steps value set to 5. |

| 7. | To rotate the star-shapes, adjust the rotation slider. Increasing the value rotates the rays clockwise, whereas decreasing the value rotates them counter-clockwise. |
| 8. | To change the color in the beginning of the rays near the center point of the stars, adjust the from color slider. To change the color in the end of the rays, adjust to color. By default the from color is set to white, and the to color to black. |
|
|
|
|
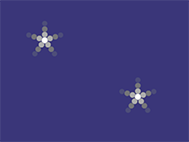
From color set to white |
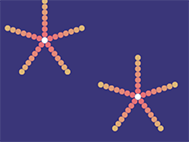
From color set to pink |
| 9. | If needed, you can also make the following adjustments: |
• If you want to change the aspect ratio of the stars, adjust the aspect ratio slider.
• By default, the brightest image on the rays is used as the center point for the star. However, if you prefer the images forming the rays to be added up in forming the center point, uncheck max.
• To only output the Glint effect without merging it into the original input image used to create it, check effect only.
|
|
|
|
Effect only disabled. |
Effect only enabled. |

• To mask the shape that is used to create the rays, check w and select the mask channel from the dropdown menu.
• To perform a gamma correction on the highlights that cause glint before the glint effect is applied, adjust the gamma slider.
• To mask the glint effect, check mask and select a mask channel using the controls on the right.
• To dissolve between the original input image and the full glint effect, adjust the mix slider.