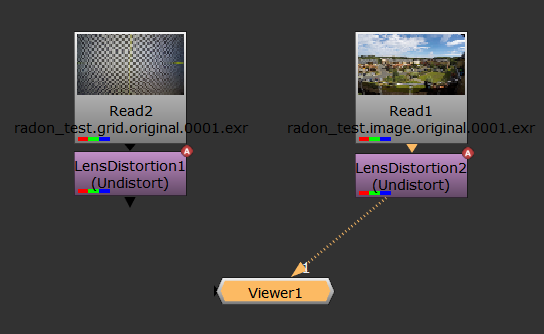
Removing Lens Distortion from an Image
After estimating the lens distortion from a reference grid, you can use the warp to remove the distortion from your sequence before performing comp work. The easiest way to do this is to copy and paste the LensDistortion node that was used to generate the warp and connect it to your sequence.
Note: You can also use STMaps to remove and apply distortion. See Working with STMaps for more information.
| 1. | Read in the sequence from which the reference grid was taken. |
| 2. | Copy and paste the LensDistortion node containing the grid analysis (described in Estimating Lens Distortion Using a Grid), then connect it to the sequence and a Viewer. |
The distortion is removed from the sequence in the Viewer.
|
|
|
|
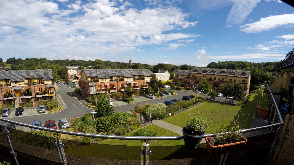
The original plate |
The undistorted plate |
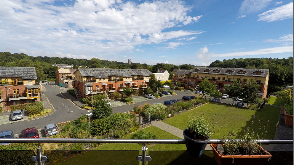
You may notice that the lines expand beyond the bounding box of the footage, which can mean you're losing image data.
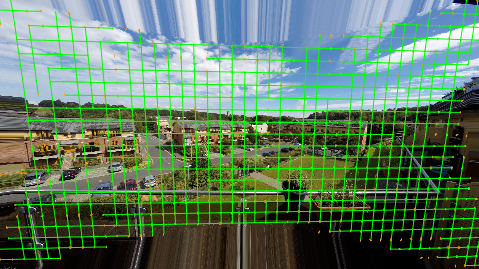
| 3. | You can control the bounding box manually using the BBox and Output Format controls on the LensDistortion tab. Any areas of the image where there is no data are overscanned, meaning the last pixel available is duplicated to the edge of the format. |
The areas at the top and bottom of the image in the center show overscan.
You can now apply your VFX work before redistorting the plate back into its original state.
Tip: You can also preserve overscan data by increasing the bounding box. The BBox > Manual control allows you to edit the bounding box manually by enabling Output Format > BBox control.
| 4. | You can now track, matchmove, composite, and so on in the undistorted space before redistorting the image. See Applying Lens Distortion to an Image for more information. |