Warping Shots with GridWarpTracker
Images are warped by moving points in the tracked grids to a new location. The From grid represents the starting position of pixels in the image and the To grid is used to control their destination. Warping an image in GridWarpTracker is the same for both tracking methods, so it doesn't matter if you're using Tracker node data or SmartVector data, the results are similar.
If you have a NukeX or Nuke Studio license, you can use up to six adjustment grids to make incremental changes to grid point positions, giving you greater control and more freedom to roll back any changes you made without affecting the data in the To grid. See Warping Using Adjustment Grids for more details.
To warp an image in GridWarpTracker:
| 1. | Scrub to the frame within the tracked range where you drew the original grid. |
| 2. | Disable the link |
Note: Disabling the link allows you to warp the image immediately when you move points. Enabling the link copies the keyframes from one grid to the other, so changing the position of points has no effect as both grids are moving together.
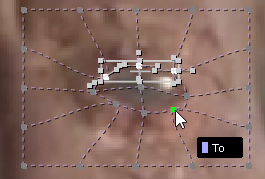
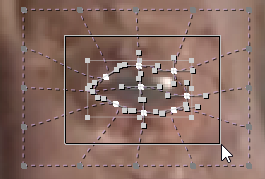
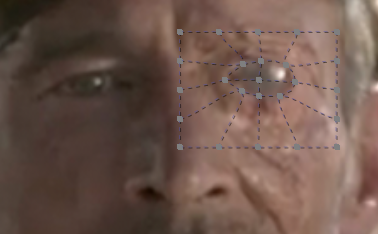
| 3. | Select the points you want to warp by holding Shift and clicking the points or by marquee selecting multiple points. |
|
|
|
Tip: Enable the transform handle ![]() button above the Viewer if the multi-selection handle is not displayed.
button above the Viewer if the multi-selection handle is not displayed.
| 4. | To apply the warp to other frames, relative to the reference frame, enable the ripple |
• off - ripple edit is disabled.
• all - ripple all frames in the sequence.
• from start - ripple frames from the first frame to the current frame.
• to end - ripple frames from current frame to the last frame.
• range - ripple all frames within the from and to fields.
Note: The Viewer has a red outline when ripple is active to remind you that changes to this frame are applied to other frames in the sequence.
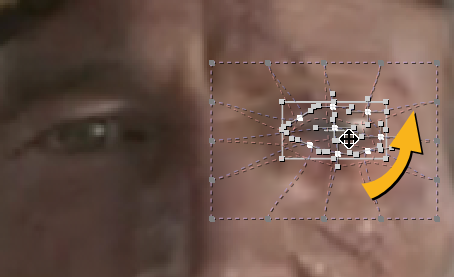
| 5. | Drag the handle to adjust the points and warp the image between the From and To grids. |
The Viewer displays a low resolution preview of the warp until the scanline render is complete. If you want to turn off the preview, disable the persistent preview ![]() button.
button.
Tip: You can hide grids by clicking the eye ![]() button in the grids list to reduce clutter in the Viewer.
button in the grids list to reduce clutter in the Viewer.
GridWarpTracker adds keyframes automatically when you move grid points. If you always want to add keyframes manually, disable autokey by clicking the ![]() button above the Viewer.
button above the Viewer.
| 6. | Play through the sequence to check that your changes are applied correctly. |
|
|
|
|
Original image. |
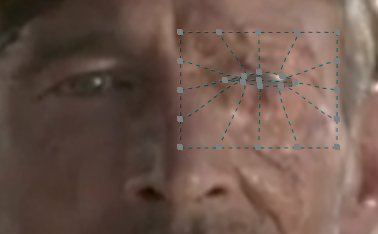
Warped image. |


|
|
|
|
|
Rippled keyframes across the sequence. |
||


Warping Using Adjustment Grids
You can add up to six adjustment grids to make incremental changes to grid point positions, giving you greater control and more freedom to roll back any changes you make without affecting the data in the To grid.
You can hide and lock adjustment grids in the same way as the From and To grids, but you can also disable individual adjustment grids to control the warp. For example, you could experiment with creative decisions on the size of an eye with different adjustment grids.
Note: Adjustment grids are only available with NukeX or Nuke Studio licenses.
| 1. | Click the add grid |
The To grid is copied into adjustment1 grid.
| 2. | Double-click the adjustment grid and give it descriptive name. For example, eye_closed. |
In the example, the prosthetic eye is closed by the first adjustment grid.
| 3. | Click the |
| 4. | Add another adjustment and rename it eye_wide. |
In the example, the prosthetic eye is opened wide by the second adjustment grid.
| 5. | You can now enable and disable the adjustment grids to close and open the eye in the sequence. |
|
|
|
|
|
|
|
|