Streaming Viewer Output Over the Internet with NDI®
Network Device Interface, or NDI, is a network protocol from NewTek that enables you to send video, audio, and metadata signals over standard IP networks in real-time. NDI allows you to easily share a Nuke Viewer's output with anyone else on the same network.
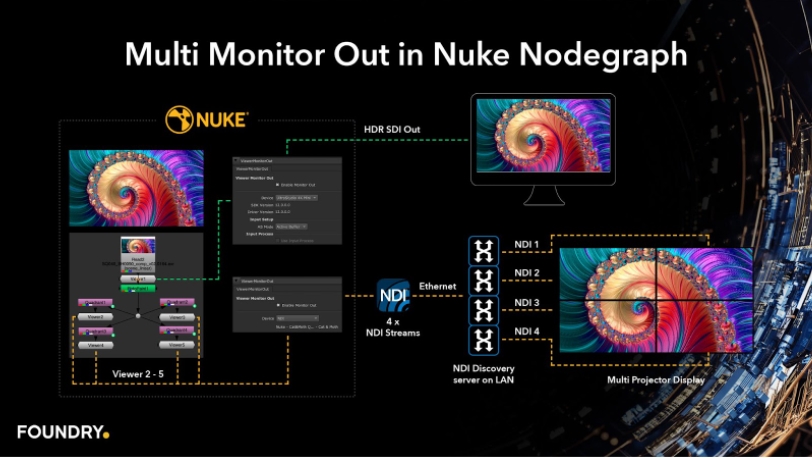
Nuke's monitor out functionality is controlled by Viewer nodes, so you can compare or combine multiple streams from as many Viewers as you like. Each Viewer can be enabled separately to output your shots to multiple output devices, whether they're dedicated monitor out devices, NDI streams, or Nuke's native Floating Window. The example shows five Nuke Viewers in total. The first Viewer at the top of the image is feeding an HDR SDI monitor using a dedicated AJA or Blackmagic Design card and the other four are combined over NDI connections to a remote multi-projector display.
See Comparing and Combining Multi-Viewer Output with NDI for more details.
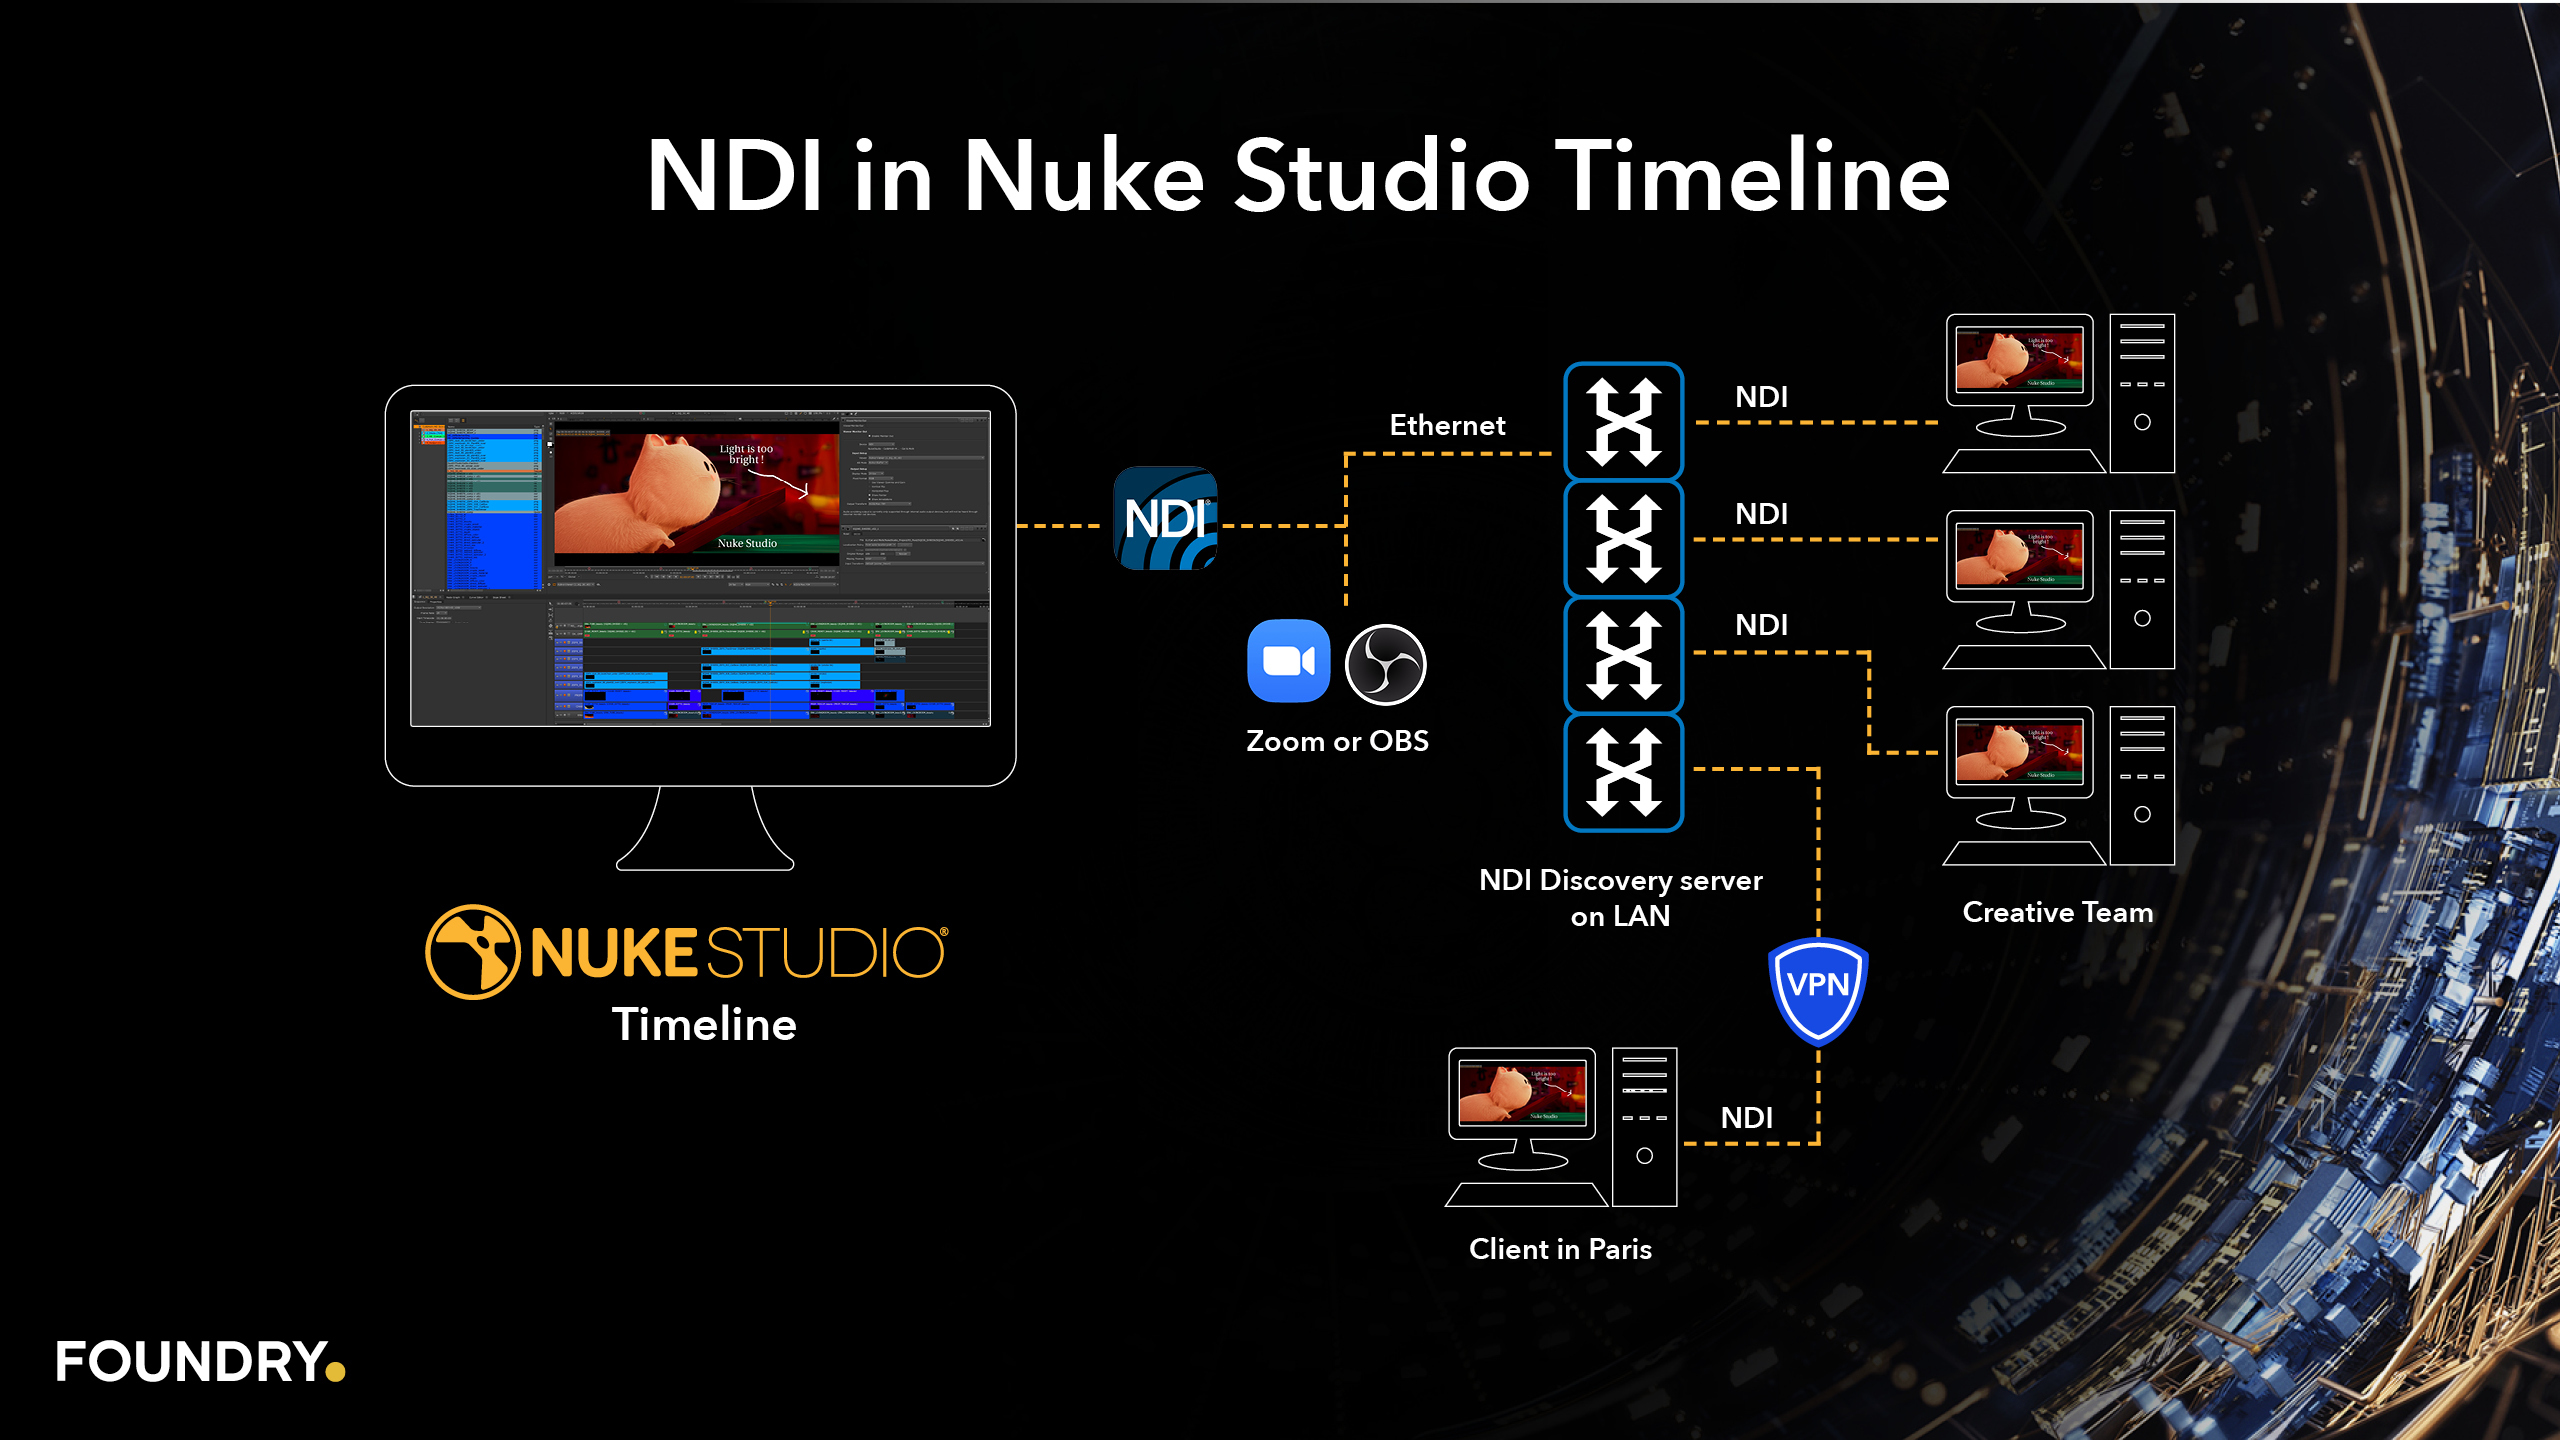
Nuke Studio's monitor out is controlled by the ViewerMonitorOut node, which only allows you to stream one timeline Viewer to a dedicated monitor out device, NDI stream, or Nuke's native Floating Window. Sharing your Viewer over an NDI connection is a great way to collaborate in a review session with your creative team on the same local network or over VPN to remote customers.
Installing the NDI Tools
To view an NDI stream, you need the NDI Studio Monitor (Windows) or NDI Video Monitor (macOS) application installed on your machine. The monitor searches your network for NDI signals from Nuke or Nuke Studio and allows you to select the stream you'd like to view.
NDI Studio Monitor and NDI Video Monitor are available for download as part of the NDI Tools on Windows and macOS here:
Note: NDI streams require you to bypass the operating system's firewall software on the remote machine to work correctly. Installing the NDI Tools on the remote machine should set exceptions in the firewall automatically, but you can add exceptions manually as described under Setting Up an NDI Stream from Nuke and Nuke Studio and Adding Firewall Exceptions on macOS.
Setting Up an NDI Stream from Nuke and Nuke Studio
-
On the local machine in Nuke or Nuke Studio, go to Edit > Preferences, or press Shift+S, and navigate to Panels > Viewer Monitor Out.
-
Ensure that Enable NDI is checked.
-
In the monitor out Properties, set the monitor out Device to NDI to start broadcasting the stream over the network.
-
Set the Display Mode for the receiver device of the NDI stream. If you don't change this, Nuke broadcasts the source resolution of the project over NDI. However, this format may not be supported on the receiving device, so you can set the NDI stream to scale to a specific resolution and frame rate here.
-
On the remote machine, download and install the NDI Tools for your operating system from the links under Installing the NDI Tools.
-
Launch the NDI Studio Monitor (Windows) or NDI Video Monitor (macOS), depending on your operating system:
• Windows - In the NDI Studio Monitor, click the options
 icon at the top-left and then select the required stream.
• macOS - In the NDI Video Monitor, click the NDI menu at the top of the screen and then select the required stream.
The stream name is shown in the Viewer Properties and on the NDI stream for identification and is constructed as follows: [Application] - [Project or Script] - [Viewer]
For example: Nuke - cat_and_moth - Viewer2

To display the Properties panel:
• Nuke - click the cog ![]() icon in the bottom-left of the Viewer Monitor Out panel or double-click the Viewer node.
icon in the bottom-left of the Viewer Monitor Out panel or double-click the Viewer node.

• Nuke Studio - click the cog ![]() icon in the bottom-left of the Viewer Monitor Out panel.
icon in the bottom-left of the Viewer Monitor Out panel.

Note: If the Display Mode is set from a timeline sequence, the NDI resolution is auto-scaled. Whereas the node graph viewer outputs an absolute pixel-for-pixel view, center cropping or padding, based on the resolution of the NDI signal. For example, a 3K (2880x1620) resolution comp set to output from the node graph viewer to UHD (3840x2160) would appear padded on a UHD device because the image is smaller than the frame size being broadcast, whereas the same 3K (2880x1620) comp set to output to HD (1920x1080) would appear cropped on the receiver side.
The Viewer is output through the NDI Studio Monitor or NDI Video Monitor.
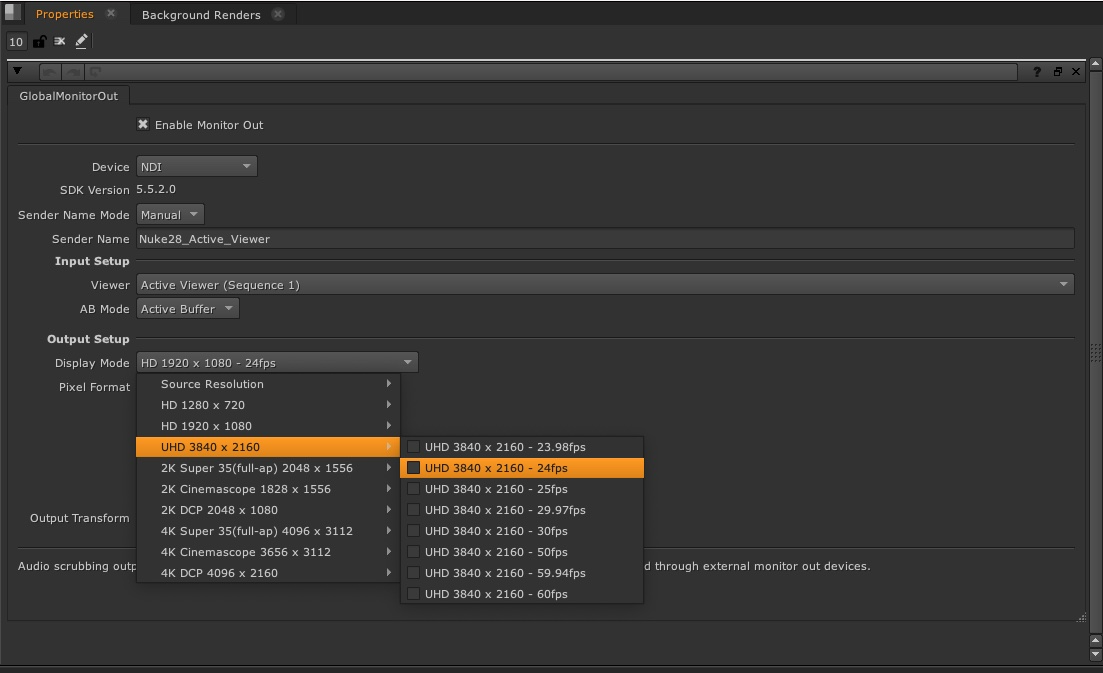
NDI output showing a custom named stream set in Sender Name and the Display Mode resolution set to UHD 3840 x 2160 24fps.
Note: When NDI is enabled in Monitor Out, audio will only play through the NDI stream.
Comparing and Combining Multi-Viewer Output with NDI
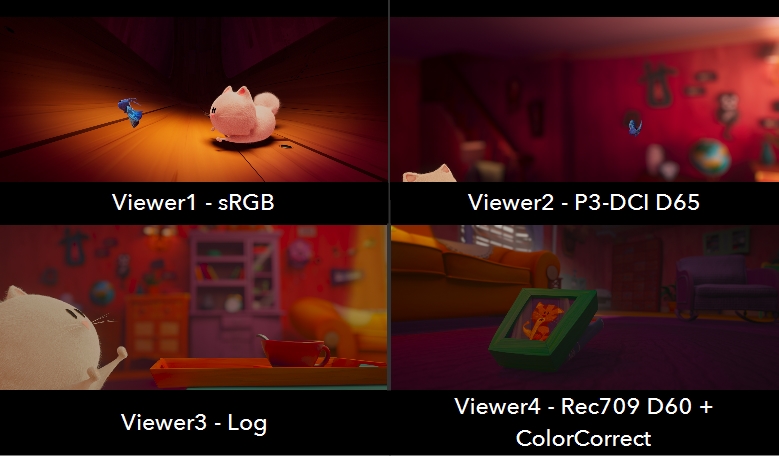
Nuke's monitor out functionality is controlled by Viewer nodes, so you can compare or combine multiple streams from as many Viewers as you like. Each Viewer can be enabled separately to output your shots to multiple NDI streams. For example, using four Viewers and four NDI streams, you could compare the format of multiple shots.
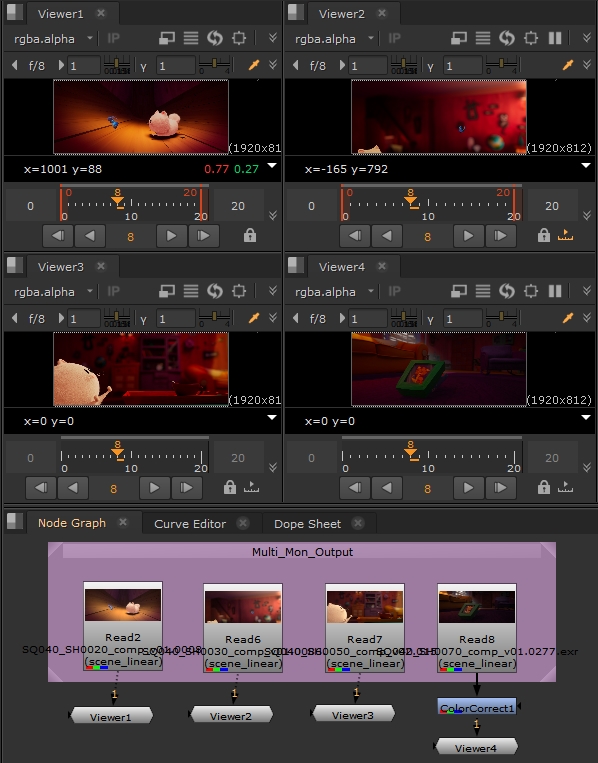
You can switch the Output Transform on each Viewer independently to check color consistency between the shots.
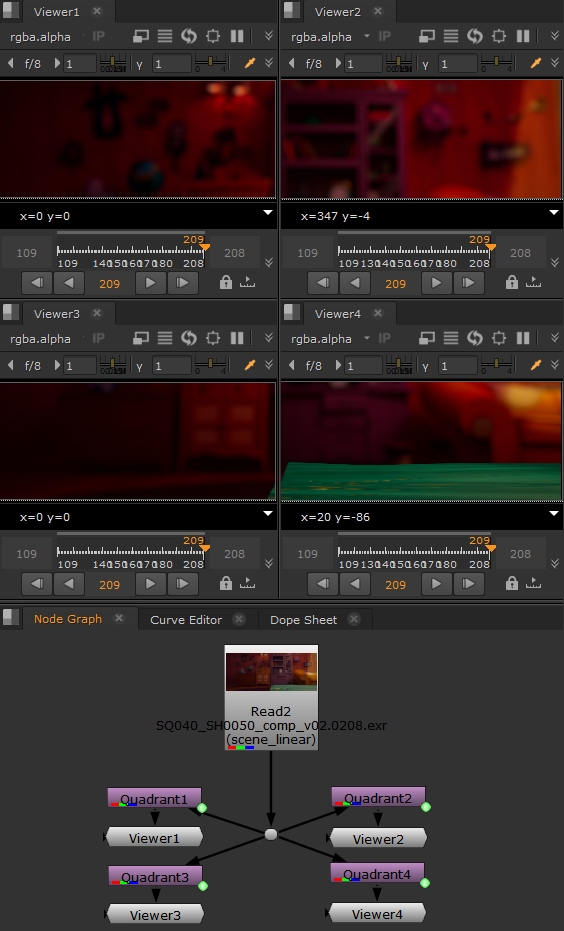
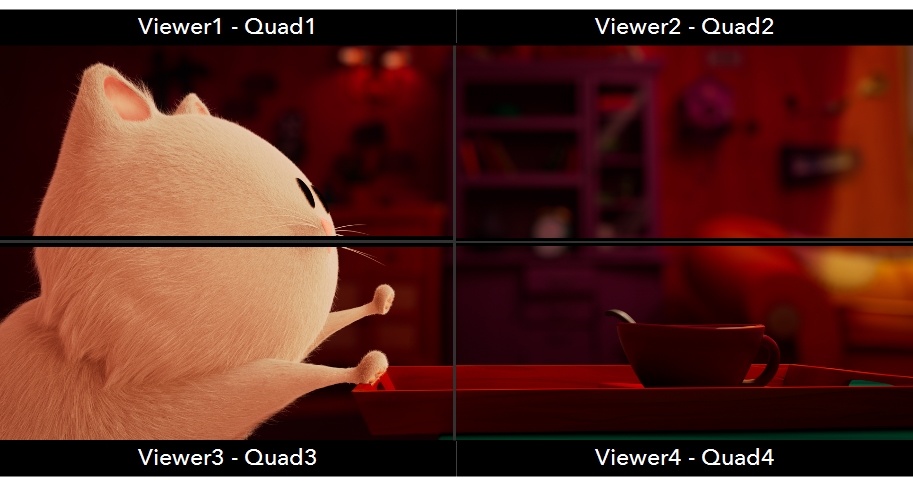
Using a similar four-Viewer setup, you could send four quadrants over NDI to four projectors to produce a larger image somewhere else on the same network.
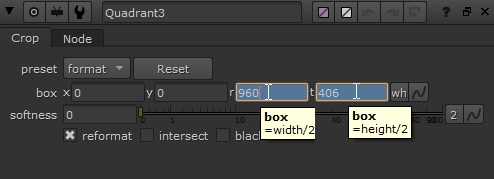
Each quadrant is a Crop node that defines which part of the overall image is handled by each Viewer. For example, Quadrant3 is set up as shown here, with simple expressions to handle different formats.
Adding Firewall Exceptions on Windows
Installing the NDI Tools on the remote machine should set exceptions in the firewall automatically, but you can add exceptions manually as follows:
-
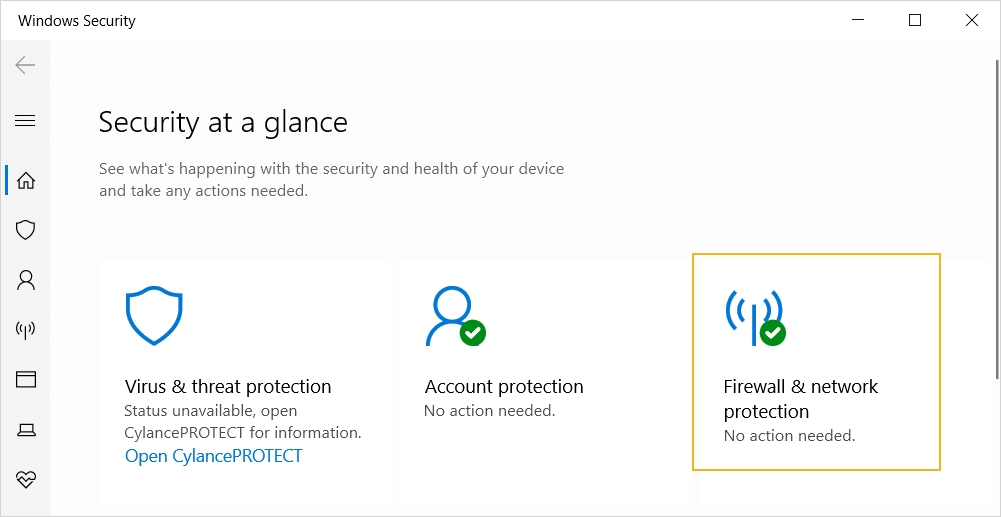
Click the show hidden icons button on the right-hand side of the taskbar and then click Windows Security,
-
Click Firewall & network protection.
-
-
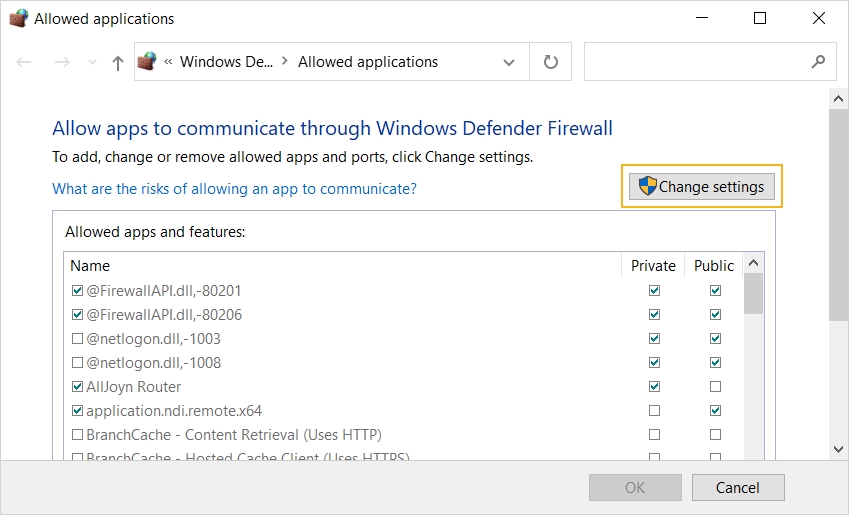
Click Allow an app through the firewall.
-
Click Change settings to enable editing.
-
-
Scroll to the bottom of the window and click Allow another app.
-
Enter the file path to the NDI Studio Monitor executable or click Browse to locate the .exe using the explorer. NDI Studio Monitor is installed here by default:
-
Click Add and then click OK to complete the firewall exception.
![]()
OR
Click the Windows Start button and type Windows Security and then click Windows Security.
The Windows Security dialog is displayed.
The Allowed applications dialog is displayed.
C:\Program Files\NDI\NDI 5 Tools\Studio Monitor\Application.Network.StudioMonitor.x64.exe
Refer to your operating system's documentation or speak to your network administrator for more details. For more information on the NDI Tools and network configuration best practice, see:
https://ndi.video/tech/
Adding Firewall Exceptions on macOS
Installing the NDI Tools on the remote machine should set exceptions in the firewall automatically, but you can add exceptions manually as follows:
-
Launch System Preferences.
-
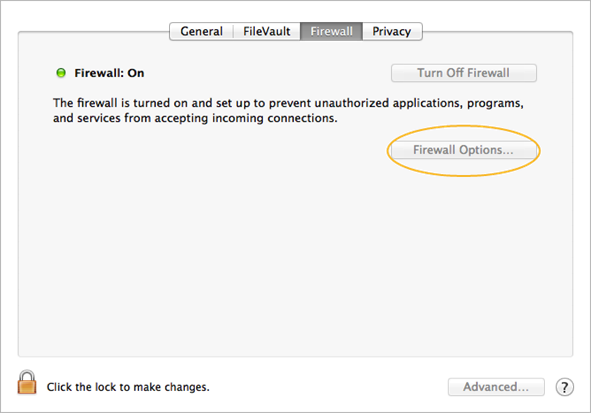
Click Security & Privacy and go to the Firewall tab.
-
Click the Firewall Options button.
-
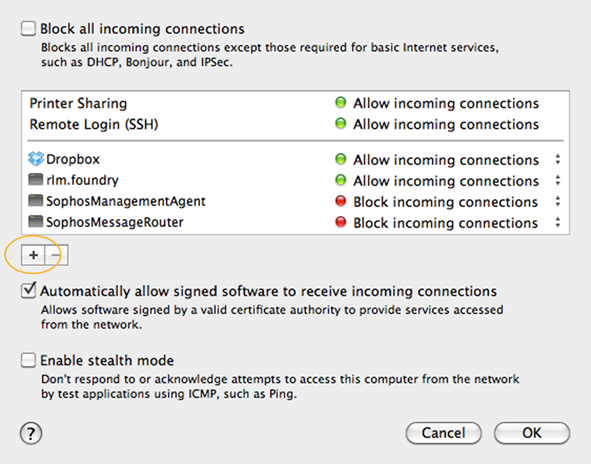
Under the list of incoming connections, click on the + button.
-
Enter the file path to the NDI Video Monitor application or click Browse to locate the .app using the Finder. NDI Video Monitor is installed here by default:
-
Select NDI Video Monitor.app and click Add and then OK to complete the firewall exception.
Note: You may need to click the lock icon at the bottom-left to enable changes.
/Applications/NDI Video Monitor.app
Refer to your operating system's documentation or speak to your network administrator for more details. For more information on the NDI Tools and network configuration best practice, see:
https://ndi.video/tech/
