Managing Timelines
Timelines contain video and audio shots that reference the source clips in your project. Once the conform process is complete, the timeline displays your clips in context and enables you make finer edits. Timelines can contain any number of video sequences and audio tracks with each track containing shots that reference the source clips in your project - making changes to shots in the timeline does not affect the original source clip.
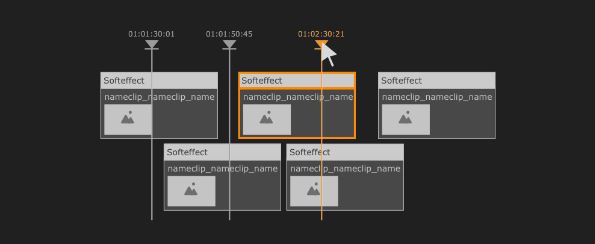
Nuke Studio also features real-time soft effects on the timeline and the ability to add shots containing .nk scripts. See Adding Effects on the Timeline and
Note: Conformed EDLs only support one video sequence. If you’ve created multiple EDLs from the same edit, you can add each one into the timeline using the right-click New Track > New Track(s) from EDL/XML option or the Import Track button in the spreadsheet tab. See Adding Tracks to the Timeline.

• Video Toggles - quickly turn off and on video tracks during playback. Hold Alt and click to solo the selected track. You can also enable and disable track blending and masking. See Blending Tracks on the Timeline for more information.
• Disk Caching Controls - click and hold to display the disk caching options for the current timeline. See Caching Frames in the Disk Cache for more information.
• Timecode - displays the timecode or frame number depending on the Time Display mode selected. You can adjust the scale using the Scale Slider or by using the mouse wheel.
• Playhead Position - displays the playhead location synchronized with the contents of the Viewer.
• Video Tracks - contain all video sequences for the current timeline.
• Audio Tracks - contain all the audio clips for the current timeline.
• Audio Toggles - quickly mute audio or set the track output during playback to left, right, or mono.
• Track Lock - secure the selected track to disable all editing tools.
Tip: Selecting tracks while holding Ctrl/Cmd allows tools to affect multiple tracks at once, such as locking, disabling, and resizing tracks.
Video tracks in multi-track timelines are read from the highest number track downward, for example Video 3, Video 2, Video 1. As a result, if video is present on track 3, video on track 2 in the same time slice is obscured.
Tip: Nuke Studio automatically selects clips as the playhead passes over them on the timeline, so you can make changes to shots without needing to manually select them first. Automatic shot selection is also reflected in the spreadsheet.
In this example, although the playhead crosses clips on two video tracks, only the clip in Video 3 is displayed in the Viewer.
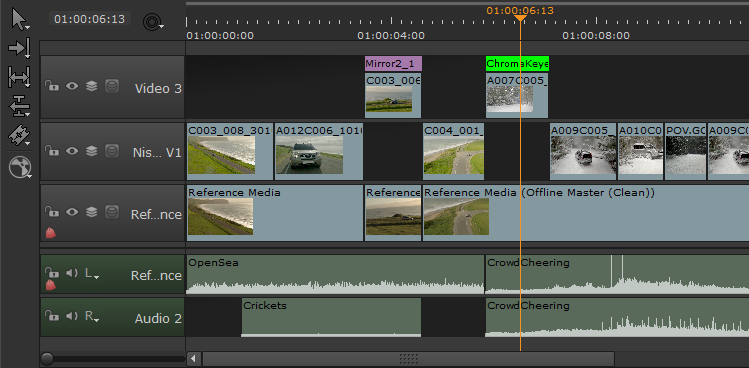
Audio tracks, on the other hand, play back simultaneously - all the audio tracks crossed by the playhead in the example play back together, creating a complete audio backing for the video.
Tip: Enabling Preferences > Panels > Timeline > show frame end marker draws an extra line on the timeline to the right of the playhead, indicating the end of the current frame.
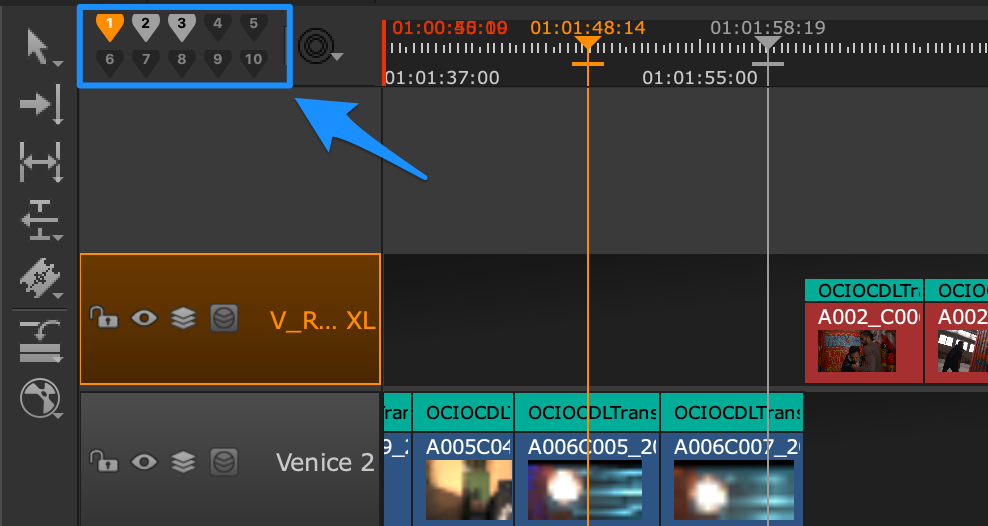
Multi-playhead
Nuke Studio allows you to work with up to 10 playheads on the timeline, each with its own dedicated In and Out points. Once a playhead has been added to the timeline, you can switch between them with the hotkeys 1 - 0, or via the panel to the top left of the timeline. Each playhead can also provide input to the A/B Compare buffers independently.
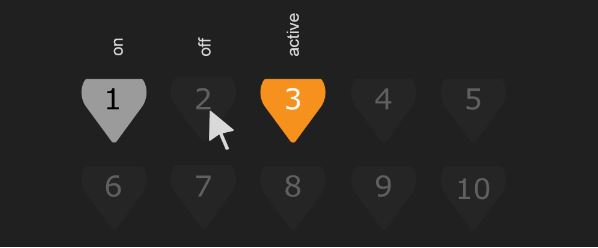
The playheads have 3 states:
• Active - Single-click on the playhead and it changes color to orange. The clip under the active playhead is rendered in the viewer.
• On - The playhead is visible on the timeline and is shown in gray color.
• Off - Double-click to turn a playhead off and remove it from the timeline.
Note: When you activate a new playhead for the first time, it will appear on the timeline at the same point as the current playhead. Drag the new playhead to focus on the next area of the timeline that you wish to work on.