Applying Changes to Selected Views
By default, Nuke Studio applies any changes you make to all views. To apply changes to a particular view only (for example, the left view but not the right), you can:
• Split the views into separate tracks. Separating views allows you to apply effects, such as a Transform or Timewarp, to individual views without affecting the other views. See Splitting Views to Tracks for more information.
• Split the view off in the soft effect’s Properties. Splitting properties allows you to perform the same operation on multiple views, but with different values for each, such as a Grade or ColorCorrect. See Splitting Views in the Properties Panel for more information.
Splitting Views to Tracks
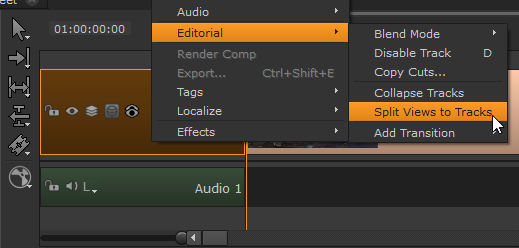
| 1. | Right-click a multi-view shot on the timeline and select Editorial > Split Views to Tracks. |
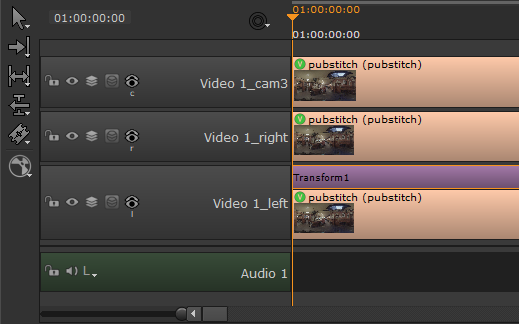
| 2. | Right-click the track to which you want to add the soft effect, select Effects and then the required soft effect. For example, adding a Transform to the left view applies the effect to only the left view track. See Adding Effects on the Timeline for more details on adding effects to shots. |
You can create comps or export multi-view shots and effects in a similar way to regular shots. See
Splitting Views in the Properties Panel
| 1. | Right-click the track to which you want to add the soft effect, select Effects and then the required soft effect. For example, adding a ColorCorrect a multi-view shot. |
See Adding Effects on the Timeline for more details on adding effects to shots.

| 2. | Select the view you want to make changes to using the buttons above the timeline Viewer. |
| 3. | Open the effect’s Properties and click the view button |
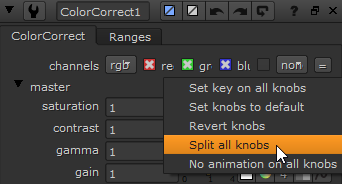
| 4. | Select Split off [view name]. For example, to apply changes to a view called left, select Split off left. You can also split all the effect’s controls by selecting Split all knobs from the right-click menu. |

An eye appears on the split view button ![]() . Any changes you make using the control in question are only applied to the view you chose to split off. Changes to controls that have not been split off are still applied to all views.
. Any changes you make using the control in question are only applied to the view you chose to split off. Changes to controls that have not been split off are still applied to all views.
You can create comps or export multi-view shots and effects in a similar way to regular shots. See
Showing Separate Values for Each View
Once you have split off a view, you can apply changes to the existing views separately. Click on the arrow on the left side of a split control to divide the control into values for each view.
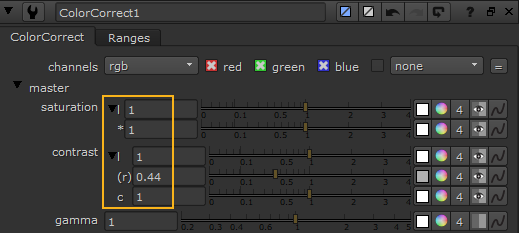
In the example, the left view is split for the saturation control and left and cam3 views are split for the contrast control.
Note: The * (asterisk) denotes there is more than one unsplit view remaining for the saturation control and ( ) denotes that the right view is the only unsplit view for the contrast control.
Unsplitting Views
| 1. | In the effect’s controls, click the view button |
| 2. | Select Unsplit [view]. For example, to unsplit a view called left, you’d select Unsplit left. |
The view is unsplit, and all changes you made to individual views are lost.