Using O_DisparityToDepth
Note: O_DisparityToDepth requires upstream disparity vectors to operate correctly.
To generate a z-depth map for a stereo clip, do the following:
|
1.
|
If disparity vectors do not yet exist in the script, you need to insert an O_DisparityGenerator node after your image sequence to calculate the disparity vectors. See DisparityGenerator for how to do this. |
Tip: O_DisparityGenerator's Alignment control can reduces noise on the vertical component of disparity and produce smoother variations in depth, but requires solve data upstream. See Solver for more information on calculating solve data.
|
2.
|
Select Ocula > Ocula 4.0 > O_DisparityToDepth to insert an O_DisparityToDepth node either after the O_DisparityGenerator node if you added one in the previous step, or after the image sequence. |
|
3.
|
Connect a pre-tracked Nuke stereo camera to the Camera input of O_DisparityToDepth. |
|
4.
|
Open the O_DisparityToDepth controls. From the Views to Use menu, select which views you want to use for the left and right eye when creating the z-depth map. |
|
5.
|
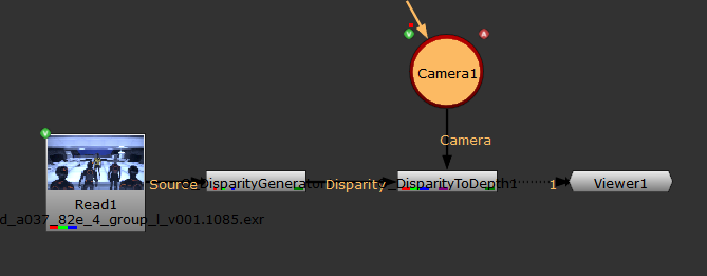
Connect a Viewer to the O_DisparityToDepth node. Your node tree should now look something like this: |
|
6.
|
Select depth from the channel dropdown above the Viewer. |
|
7.
|
Select the red channel (R) from the RGB dropdown. |
|
8.
|
Adjust the gain and gamma controls to display the z-depth map more clearly. |
|
9.
|
To render out the stereo clip with the depth map stored in the depth channel, select Image > Write to insert a Write node after O_DisparityToDepth. In the Write node controls, select all from the channels dropdown menu. Choose exr as the file type. Render the clip. |
When you need to use the same clip again later, the z-depth map is loaded into Nuke along with the clip. To view it, select depth from the channel dropdown.
Using O_DisparityToDepth with DeepMerge
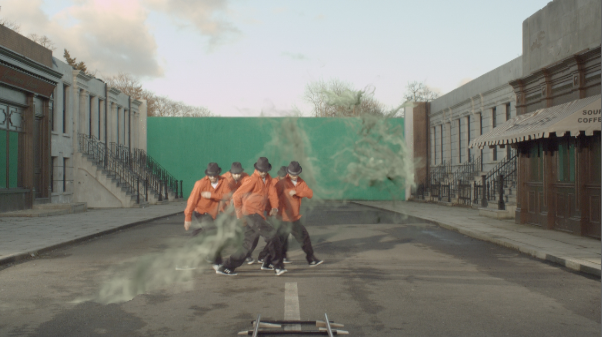
You can use choose to use DeepMerge with O_DisparityToDepth to insert objects at specific depth positions. For example, if you have an image of dancers, you may want to add in smoke around them.
Note: The original image or image sequence you are using must contain an alpha channel for DeepMerge to operate correctly.
To use O_DisparityToDepth with DeepMerge, you can do the following:
|
1.
|
Ensure your footage has an alpha channel and repeat steps 1 to 5 from the previous section to calculate the depth from disparity. |
|
2.
|
Insert a DeepFromImage node after the O_DisparityToDepth node by selecting Deep > DeepFromImage. |
|
3.
|
Insert a DeepMerge node after the DeepfromImage node, and change the input from the DeepMerge node so that the DeepFromImage node is connected using the B input. |
|
4.
|
Now, insert a separate DeepRead node by selecting Deep > DeepRead and navigate to the deep footage that you want to insert into your original image. In this case, we are inserting smoke around dancers in a stereo scene. |
|
5.
|
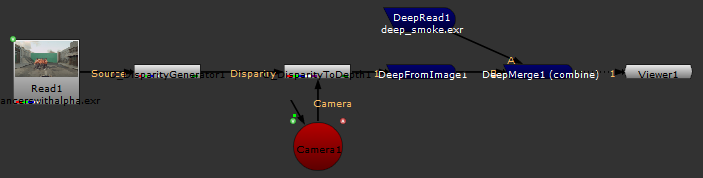
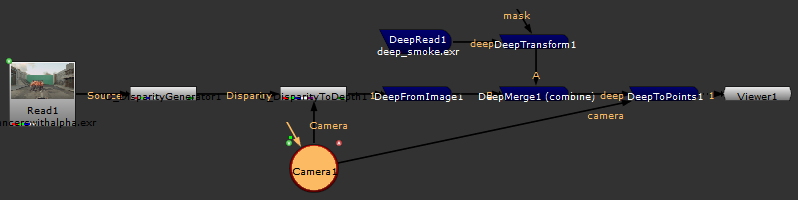
Attach the DeepRead node to the A input of DeepMerge. Your node tree should now look something like this: |
|
6.
|
The smoke does not appear in the image. This must mean that the depth values of the image and the deep smoke are vastly different; one is too far in front of the other to be visible. |
|
7.
|
You can visualise the different depth positions by using a point cloud. To do this, insert a DeepToPoints node after the DeepMerge node. |
|
8.
|
Attach the camera input of the DeepToPoints node to the existing camera. This shows you a 3D view with a camera detailing the xyz coordinates of the footage in space. |
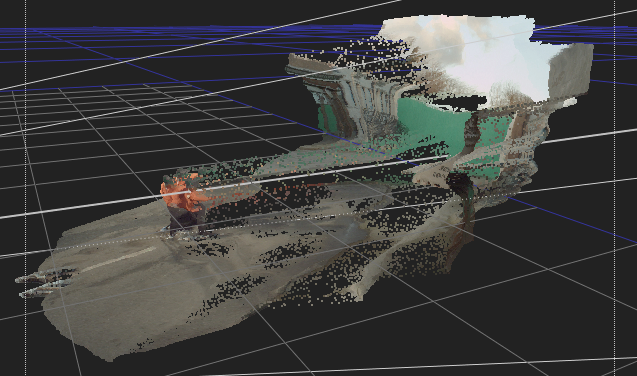
As you can see, the smoke footage is much too far back and also too large.
|
9.
|
To change the position and scale of the smoke footage, insert a DeepTransform node after the smoke footage DeepRead node and before the DeepMerge node. Your node tree should now look something like this: |
|
10.
|
Open the DeepTransform controls. To move the position of the smoke footage forward, you need to increase the z value in the translate control. To decrease the depth of the smoke footage, you need to increase the zscale value. This is a divisor, so numbers above 1 decrease the depth. |
|
|
|
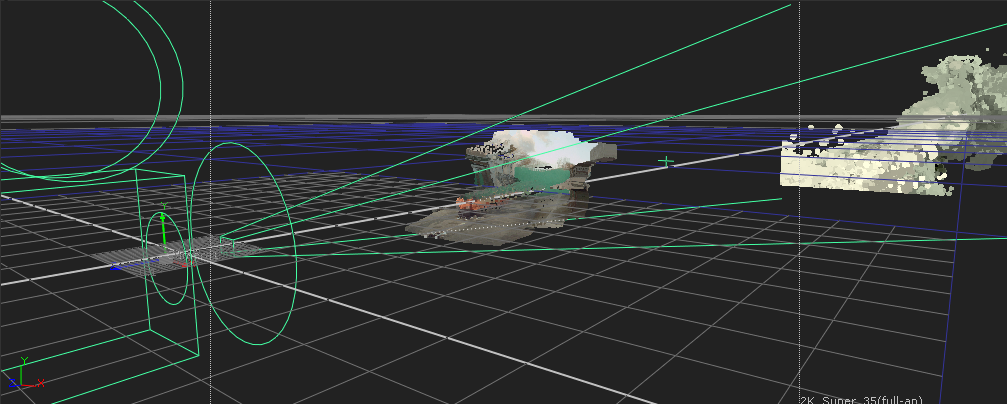
The DeepToPoints view of the original stereo image from the side .
|
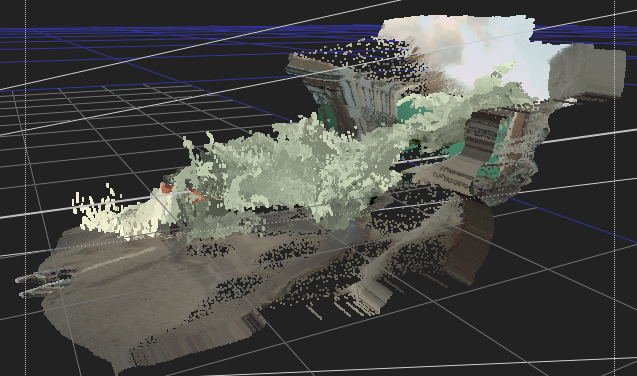
The DeepToPoints view of the smoke footage and the original stereo image
from the side .
|
|
|
|
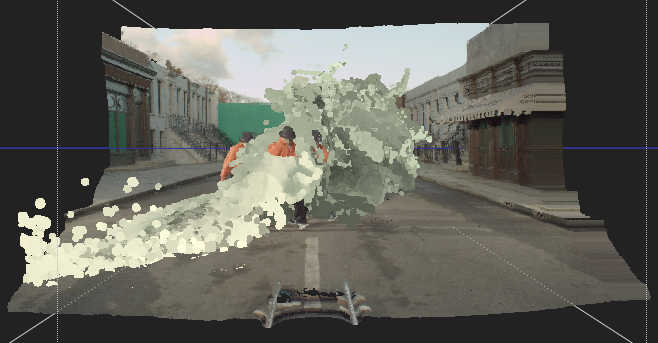
The same DeepToPoints view of the original stereo image from the front.
|
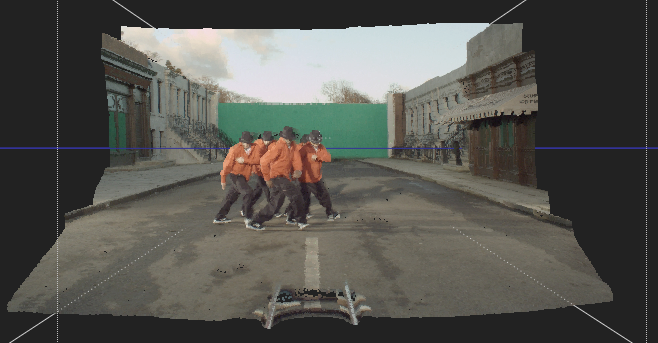
The same DeepToPoints view of the smoke footage and the original stereo image
from the front.
|
|
11.
|
Press D over the DeepToPoints node to disable it and display the result. Press Tab to revert back to 2D. |