O_FocusMatcher Example
In this example, we correct the focus distribution in the right view of a stereo image by rebuilding it using the pixels from the left view.
You can download the stereo image used here from our website - please see Example Images.
Step by Step
| 1. | Launch Nuke. Open the project settings (press S on the Node Graph), select the Views tab, and click the Set up views for stereo button. |
| 2. | Import lobby.exr. This image already includes both the left and the right view as well as the necessary disparity channels. |
| 3. | Attach a Viewer to the image and zoom in. Switch between the left and the right view using the Viewer controls (or the ; and ' hotkeys). As you can see, the focus distribution of the right view doesn’t match that of the left. |
|
|
|
|
The left view. |
The right view. |
O_FocusMatcher can fix this by rebuilding the right view using pixels from the left. In order to do so, it needs an upstream occlusion mask that identifies occluded pixels in each view. You can generate an occlusion mask using the O_OcclusionDetector node.
| 4. | From the toolbar, select Ocula > Ocula 4.0 > O_OcclusionDetector to insert an O_OcclusionDetector node between the image and the Viewer. |
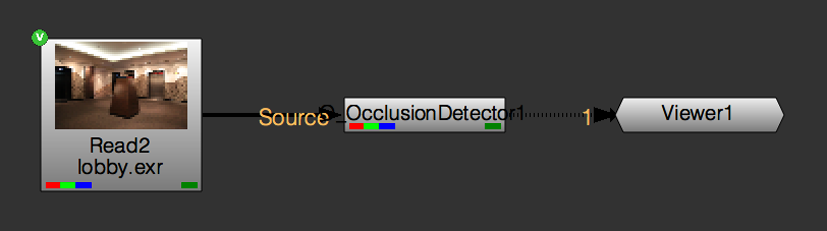
O_OcclusionDetector calculates a mask for the occluded pixels in each view and stores it in the mask_occlusion channel. You can adjust the mask using the O_OcclusionDetector controls, but for this example, we’re going to go with the default settings.
| 5. | Next, add an O_FocusMatcher node after O_OcclusionDetector. |
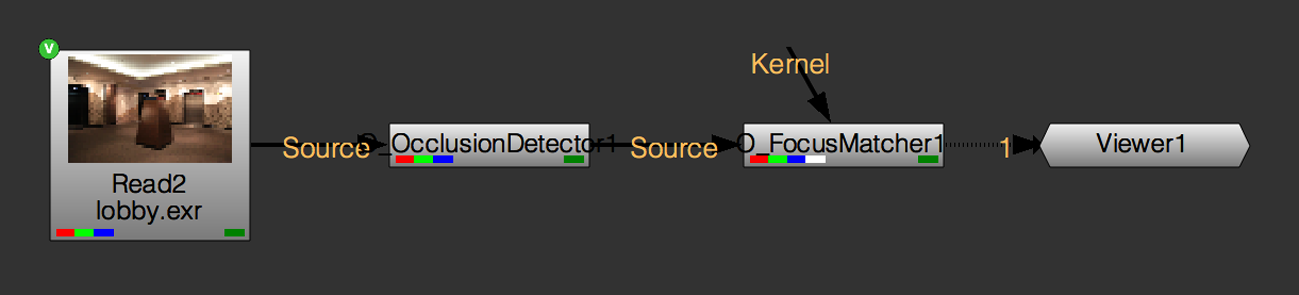
| 6. | By default, O_FocusMatcher is set to rebuild the left view to match the focus of the right. We need it to do the opposite, so set the Match menu to Right to Left. |
O_FocusMatcher now rebuilds the right view using pixels from the left. If the upstream disparity map is accurate and there are no occlusions (pixels visible in one view but not the other), this generally produces good results. We have already generated an occlusion mask in step 4, so we can use it to check which areas are occluded.
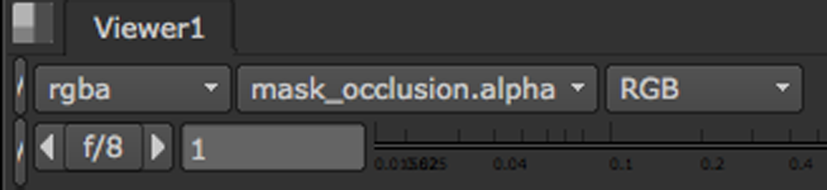
| 7. | To see the occlusion mask for the right view, select the right view from the Viewer controls and set the alpha channel menu to mask_occlusion.alpha. Then, press M on the Viewer. |
The occlusion mask is shown in a red overlay on top of the color channels. Any pixels highlighted in red are only visible in the right view but not the left.
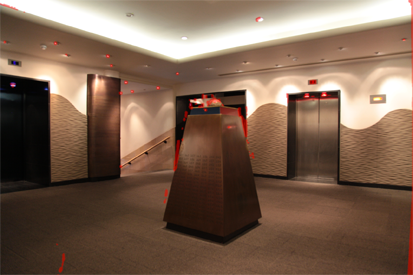
Because these pixels don’t exist in the left view, they cannot be used to rebuild the right view. In other words, O_FocusMatcher is likely to produce poor results in these occluded areas.
| 8. | To get the best result, adjust the Local Matching and Occlusion controls. If required, you can manually edit the occlusion mask using a RotoPaint node (see Creating and Editing Occlusion Masks). |
| 9. | You now have your final result, so compare the rebuilt right view to both the original right view and the left view in the Viewer. You should see that the focus distribution of the right view better matches that of the left. |