Reviewing and Editing the Results
| 1. | Set Display to Keyframe Matches, if it's not displaying them already, and make sure you are viewing a keyframe. |
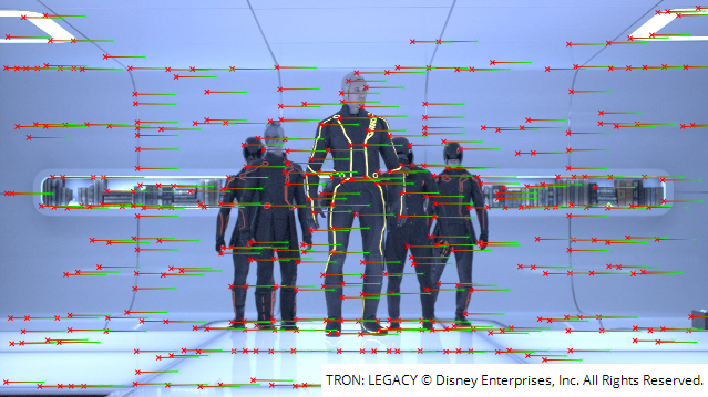
The features and matches used to calculate the camera relationship are shown in a Viewer overlay. The views set up in the Project Settings dictate the color of the features in the overlay. If you used Set up views for stereo to create the views, red indicates a feature in the left view and green a feature in the right view.
| 2. | You can specify areas of the footage to ignore using a mask in either the Ignore input or the alpha of the Source image. In the O_Solver controls, set Mask to the component you want to use as the mask. |
Note: Features generated on reflections often produce bad feature matches, but you can add user matches around reflective areas if the auto-matches are poor. See Adding User Matches for more information.
| 3. | To preview how well the detected features describe the alignment of the stereo camera, set Display to Preview Alignment. |
Preview Alignment shows the aligned matches at keyframes, but also calculates matches at non-keyframes. This allows you to review how well the interpolated solve works and whether additional keyframes are required.
|
|
|
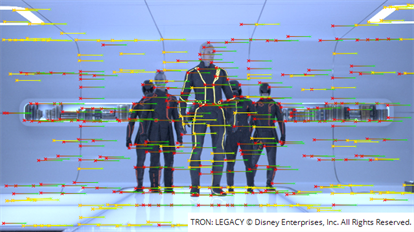
Display set to Preview Alignment. |
| 4. | Ideally, most lines in the overlay should be horizontal. Any matches that aren’t horizontal and have a vertical error greater than Error Threshold are pre-selected and displayed in yellow. These are considered poor matches. If you scrub through the timeline and find frames with a lot of yellow matches, add more keyframes for O_Solver to analyze or add user matches manually. See Adding User Matches for more information. |
|
|
|
|
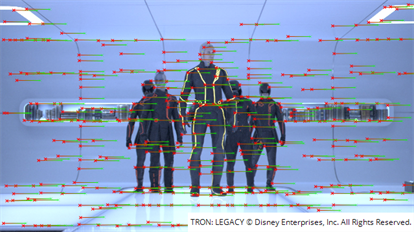
Matches displayed with a low Error Threshold. |
Matches displayed with a high Error Threshold. |
| 5. | Increase the Match Offset value to artificially increase the disparity, so you can better see how horizontal the feature matches are. Again, if you scrub through the timeline and find frames with a lot of yellow matches, add more keyframes for O_Solver to analyze or add user matches manually. See Adding User Matches for more information. |
| 6. | Next, decrease Match Offset to examine different points in the image. Accurate feature matches should sit on top of each other when you converge on them. If you can see a vertical offset between any feature matches, add more keyframes for O_Solver to analyze or add user matches manually. See Adding User Matches for more information. |
Adding User Matches
User matches assist O_Solver when calculating the camera relationship. The solve considers these manually added matches superior to the ones detected automatically by Ocula, and pays them more attention when calculating the final results.
You can add more feature matches manually if the automatic feature detection didn’t produce enough matches in some parts of the image. In cases like this, it’s a good idea to add at least four user matches (one in each corner of the image), but the more (accurate) matches you have, the better.
|
This is a feature you’ve added manually. |
|
This is a feature O_Solver has detected automatically. |
To add a feature match:
| 1. | Click the Add User Match button above the Viewer to enable add mode. |
| 2. | Locate a feature in either view that is easily recognizable in both views (for example, edges or areas of high contrast), and then click in the Viewer to place the user match. The Add User Match button stays enabled so you can continue adding user matches. |
Tip: You can also add user matches by holding Ctrl/Cmd+Alt and clicking in the Viewer.
A cross is placed in the Viewer, representing the user match in that view, and then O_Solver automatically adds a corresponding match in the other view.
| 3. | You can fine-tune matches by dragging a user match in one view to its corresponding position in the other view. By default, the two views are overlaid using a difference merge, in a 256px texture at x2 magnification. |
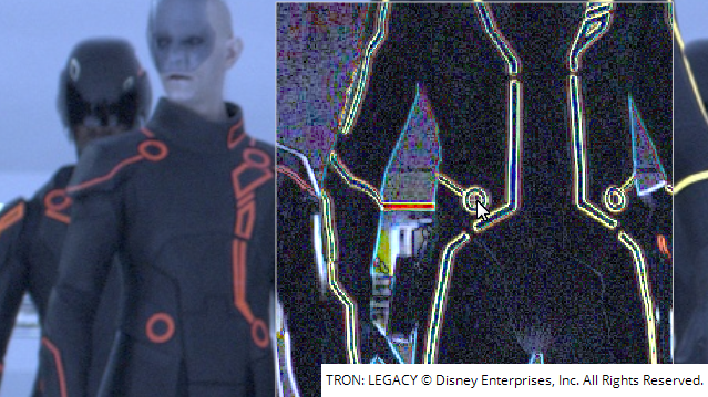
You can change the size of the overlay and magnification using the texture size and magnification dropdowns above the Viewer.
Tip: Holding Ctrl/Cmd displays the left view and Ctrl/Cmd+Shift the right view, allowing you to ping-pong between views. Holding Shift displays a left/right mix, using an over merge, to help you locate bad matches.
| 4. | If you’re not happy with the results, you can try using O_Solver on another sequence shot with the same camera setup. |
Warning: If you use another sequence to calculate the solve, check Single Solve From All Keys or you'll be taking the interpolated solve from one sequence and applying it to the frames on the other.
| 5. | Then, connect the O_Solver node to the Solver input of O_DisparityGenerator, if you intend to use the camera Alignment to generate disparity, or O_VerticalAligner. |
| 6. | Once you are happy with the results of O_Solver, proceed to Feeding the Results to Other Ocula Nodes. |