Search is based on keyword.
Ex: "Procedures"
Do not search with natural language
Ex: "How do I write a new procedure?"
Contact Support
Exporting
Exporting a Project for Colorway
To export a project from Modo, do the following:
| 1. | Select Colorway > Render Scene for Colorway. |
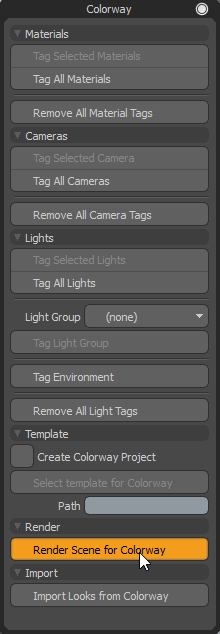
Alternatively, you can use the Render menu on the main menu bar. Select Render > Colorway > Render Scene for Colorway.
A dialog appears providing you options for the render:
• Enable Reflection/Refraction Changes - Disabling this option speeds up the render, but does not include any reflection and refraction settings from your project.
• Transparent Objects are Double-Sided - Enabling this option allows transparent objects to be read as having two sides. For example, with this enabled, a pane of glass is read as having two sides.
• Auto Tag All Materials - Enabling this option renders all materials as if they were tagged.
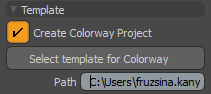
• Create Colorway Project - Enabling this option allows you to select an existing project as a template for the exporting project. For details, see Creating a Colorway Project from Template.
• DCI name pattern - If multiple .dci files are generated at once (multiple cameras have been tagged), the file names are based on the pattern defined here. By default, it uses the camera name (${camera_name}), but you can use ${scene_name} to add the name of the Modo scene, or ${camera_index} to add the index of the camera being rendered. For example, to use the camera and scene name as the file name for the .dci file, enter ${camera_name}${scene_name}.dci.
• Template path - The Colorway project to be used as a template.
| 2. | When you are happy with the settings, click OK to export your project. |
This opens a file browser.
| 3. | Navigate to the location that you want to export your project to and click Save. |
A dialog appears detailing what is tagged in your project.

You can also use this dialog to set how this performs in the future.
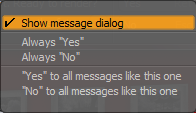
| 4. | Click Yes to confirm the render. |
A progress bar is displayed while your project is rendered.

Creating a Colorway Project from Template
You can use an existing project to serve as a basis for the newly exported project.
To do this:
| 1. | Click the Colorway button at the top of the Render layout. |
This opens the Colorway panel.
| 2. | Under Template, enable Create Colorway Project. |
| 3. | The Select template for Colorway Project option becomes active. Click the button to open a file browser and navigate to the project you want to use. |
| 4. | Select the Colorway project file (.cway) to be used as the template, then click Open. |
The selected file path is displayed in the Path field.
| 5. | Proceed with the export by clicking Render Scene for Colorway. |
Note: You can also define a template after clicking the Render Scene for Colorway button, by enabling the Create Colorway Project button.
Export creates a copy of the template project at the location specified during export. The rendered .dci files are saved in the GeneratedFiles/renders folder within the project. The newly created project's name and LiveSource paths are updated to reference the new project details.
Exporting Metadata
Any custom user channel data that is assigned to a tagged material group, tagged light or the scene item itself, is embedded within the generated .dci file on export.
Metadata added to a tagged material group is added to the part, metadata added to a tagged light is added to the light, and metadata added to the scene item is added to the project in Colorway.
You can add user channels in Modo's Channels viewport. For information on adding a user channel, see the Modo Online Help. To create a channel to be exported to Colorway, add "CW_" to the beginning of the name of the channel. Only user channels with the "CW_" prefix are exported.
All user channel metadata is exported as a string.
In Colorway, you can find the metadata in the Properties panel of the part, in the Meta tab. For more information on working with metadata in Colorway, see Editing Part Metadata.