Search is based on keyword.
Ex: "Procedures"
Do not search with natural language
Ex: "How do I write a new procedure?"
Contact Support
Managing Projects and Sequences
You can create shows or episodic shows, sequences, branches, and versions, as well as changing the sequence details.
Tip: While you're navigating in the Project Browser dialog, you can go back to a previous selection at any time by clicking on the project name in the top-left corner of the Project Browser.
Creating a Show
To create a new show, do the following:
Note:
| 1. | Open the Project Browser and click on New Show. |
The dialog updates to show you the show details you need to provide.
| 2. | Type the name of the show, as it appears on the Flix license, into the field provided. |
Note: Show names are case-sensitive and can contain up to 10 alphanumeric characters and underscores (_).
| 3. | Select an aspect ratio from the list. |
| 4. | Specify if your show is episodic by enabling the Episodic show box. |
| 5. | Select the Frame rate. |
| 6. | Click Create Show. |
The show is created and displays in the Project Browser. If the show does not display, it means you don't have a license for that show.
Creating a Sequence
To create a new sequence without any existing panels, do the following:
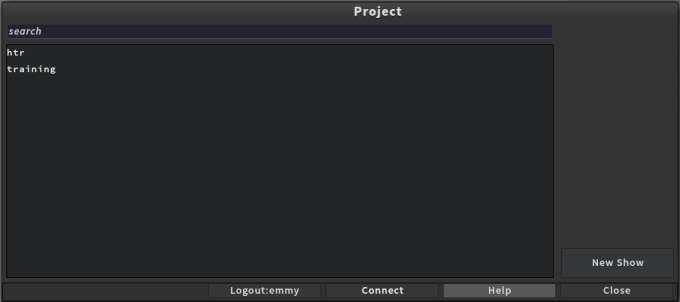
| 7. | Open the Project Browser and select a show, or search for a show by typing the name in the search bar. |
After you've clicked on a show, the dialog updates to show you the available sequences for that show.
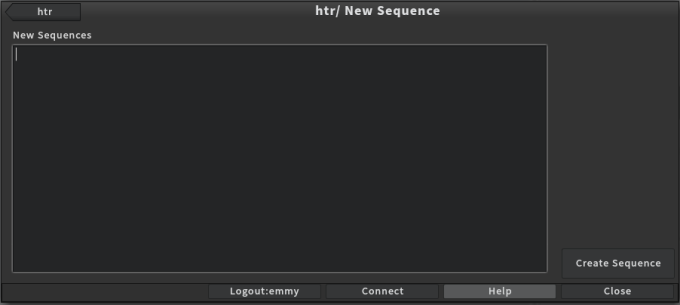
| 8. | Click on New Sequences. |
The dialog updates to show you an empty sequence name space.
| 9. | Type the name of the sequence into the space provided and click Create Sequence. If you want to create multiple sequences at once, type the name of each new sequence on separate lines, pressing Enter to create new lines. |
Editing Sequence Details
You can edit the sequence details to choose the display order in the Flix Project Browser. To edit the sequence details, follow the steps below:
| 10. | Open the Project Browser and select a show, or search for a show by typing the name in the search bar. |
After you've clicked on a show, the dialog updates to show you the available sequences for that show.
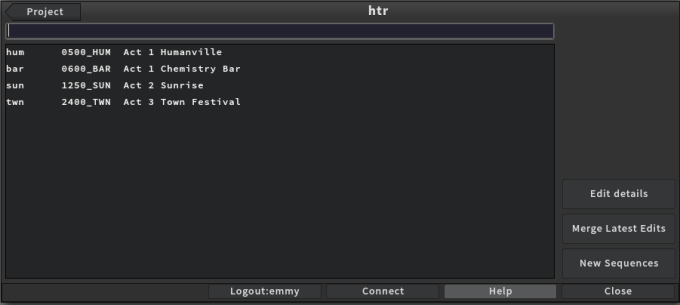
| 11. | Click Edit details, then change the Tracking index, the Act number, or the Description of the sequence. |
• If you want the Act # to appear in the Project Browser, set the Act # between 1 and 3.
When the Act # is set to 1, the sequence details are displayed at the top in the Project Browser. When the Act # is set to 2, the sequence details are displayed below the sequence details whose ACT # is set to 1. When the Act # is set to 3, the sequence details are displayed below the sequence details whose ACT # is set to 2.
For instance, if you set the Act # to 1, the flx sequence details appear as show below:

• By default, the Act # is set to 9. The Act # detail does not appear and the sequence appears at the end of the list in the Flix Project Browser.
• To hide a sequence, set the Act # detail of the required sequence to 0.
Note: The Act # detail does not appear when the Act is set to 4,5,6,7,8, or 9. But they are sorted accordingly, 4 showing before 5, 6 showing before 7, and so on.
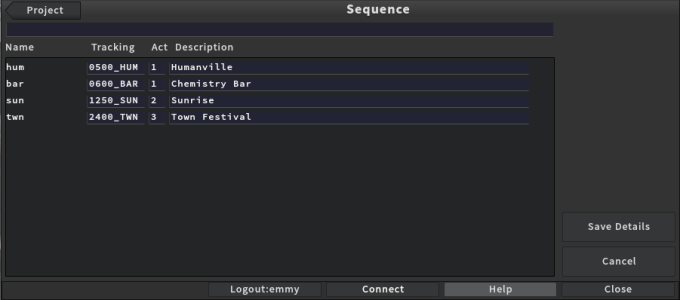
| 12. | To apply the changes, click Save details. |
To undo the changes you've just made, either click the undo button or press Ctrl/Cmd+Z.
Note: The undo button appears for each sequence you've modified.
Creating a Branch
To create a new branch, do the following:
| 1. | Open the Project Browser and select a show and then a sequence. |
The dialog updates to show you the available versions for the sequence and any branches, if applicable.
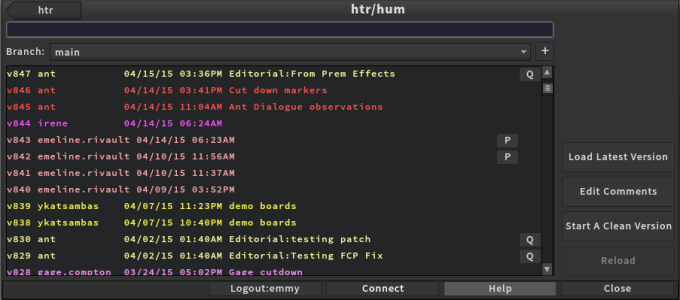
| 2. | Click on the + button. |
The dialog updates to show you an empty branch name space.
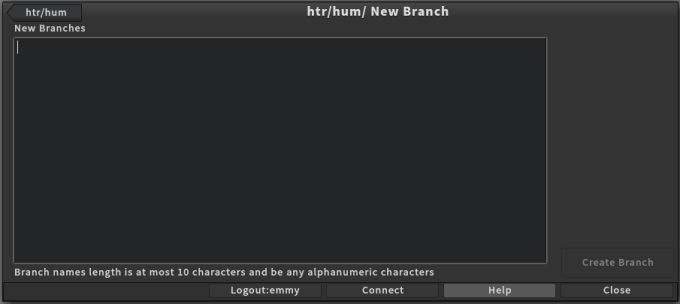
| 3. | Type the name of the branch into the space provided and click Create Branch. If you want to create multiple branches at once, type the name of each new branch on separate lines, pressing Enter to create new lines. |
Note: You can use up to 10 alphanumeric characters to name branches.