Search is based on keyword.
Ex: "Procedures"
Do not search with natural language
Ex: "How do I write a new procedure?"
Brightness Node
Access: Nodes > Filter > Brightness
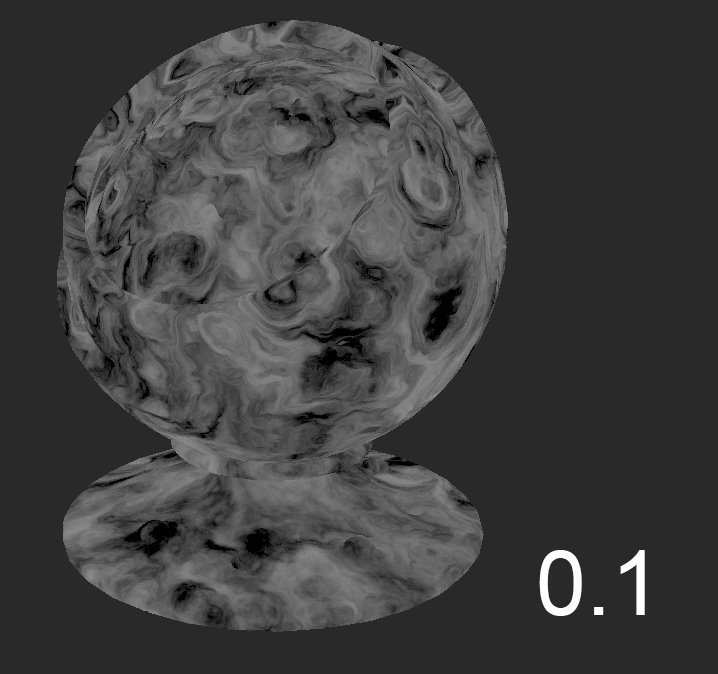
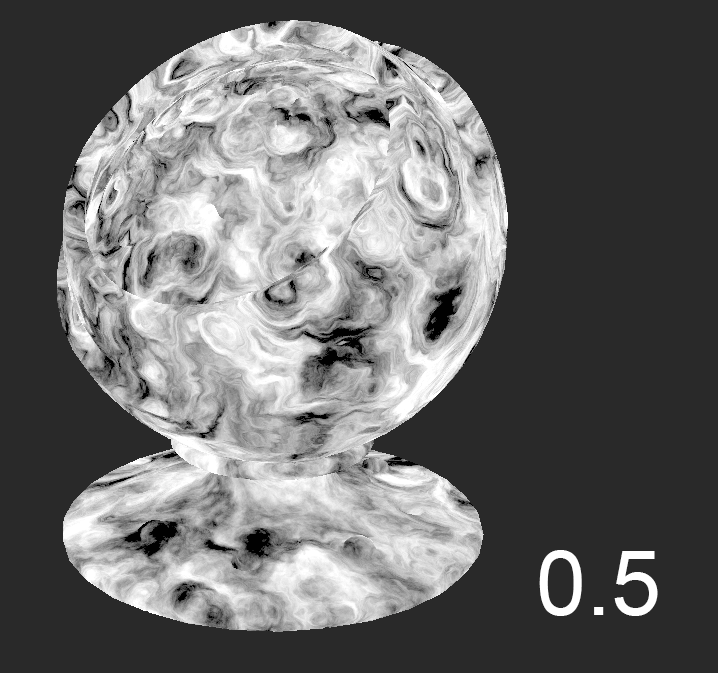
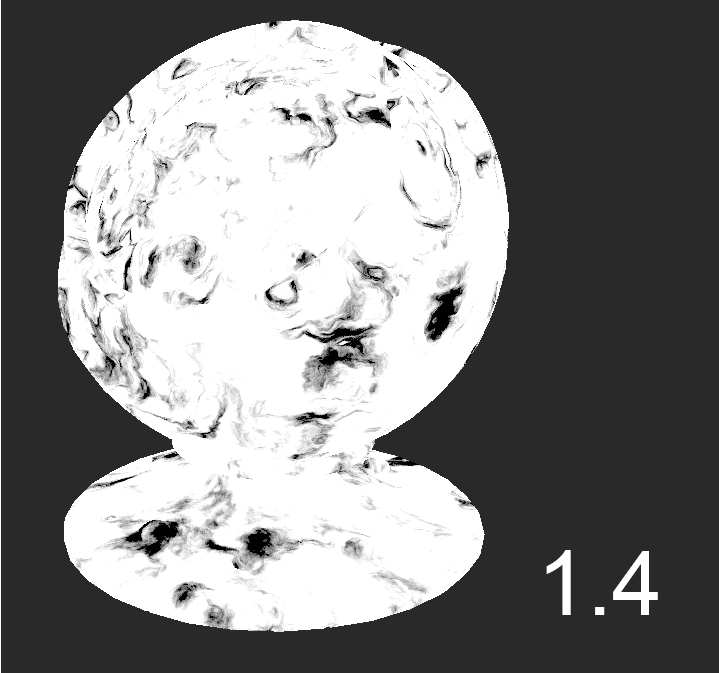
The Brightness Node is a simple node to brighten or darken your textures. A higher brightness value adjusts the brightness in a non-linear fashion, which means it will not lighten dark and light values the same amount. The Brightness node is a great way to make quick tweaks to your textures if they are too dark.

The Brightness node being used on an Oil node with different values.
Brightness Node Inputs
Input: The data that is to be adjusted by the Brightness.
Brightness Node Properties
|
Brightness text field, slider |
Adjusts the brightness of the input. Raising the value above 0.5 increases the values of the lighter values of the input but keeps the dark values similar due to the non-linear adjustment. Unlike increasing, when the slider is lowered the values are lowered linearly.
|
Brightness Node Workflow Example
Addressing Feedback with the Brightness Node
The Brightness node is a great way to make quick tweaks to your textures if they are too dark. Since it’s a node with a single slider it’s easy to make adjustments. If you only want to make a single change, there is very little ambiguity to what you are doing when you view the node. This can be important if you are sharing assets or handing your archive over to someone else as you want your project to be simple to understand.
The Base Color Map of this asset.
If you have a Base color channel that has been exported for look development, but it needs to be brighter, you can put down a Brightness node at the end of your node tree for a quick change.
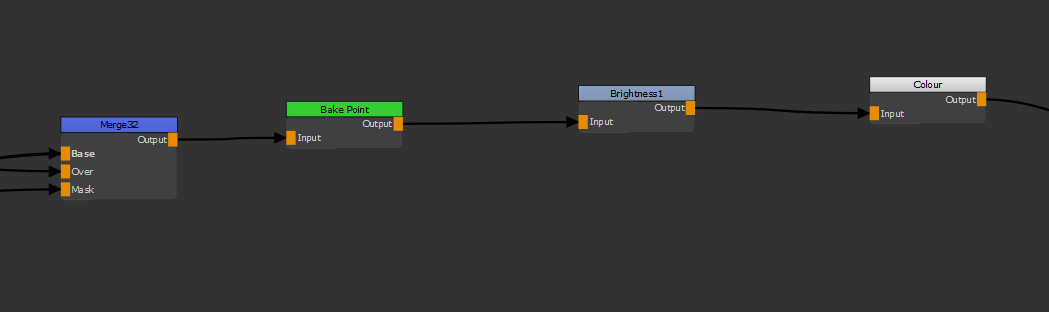
A brightness node near the end of a node tree.
Just laying down the Brightness node however, would lighten all of the textures. In the example image, there is a light piece of eye geometry in comparison to the rest of the object. The mask which has already been set up for the eye can be used so it is not affected by the Brightness node.
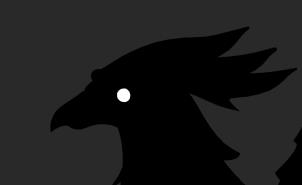
A mask isolating the eye geometry that doesn't need to be brighter.
You can add a Merge node and plug the Brightness node into the Over input and the unadjusted texture into the Base input. Then by inverting the mask of the eye you can tell Mari to use the brighter version everywhere but the eye.

Setting up the inverted mask and Brightness.
By plugging the Merge node into the Color channel, you can export the result and get it to the next person in the pipeline.
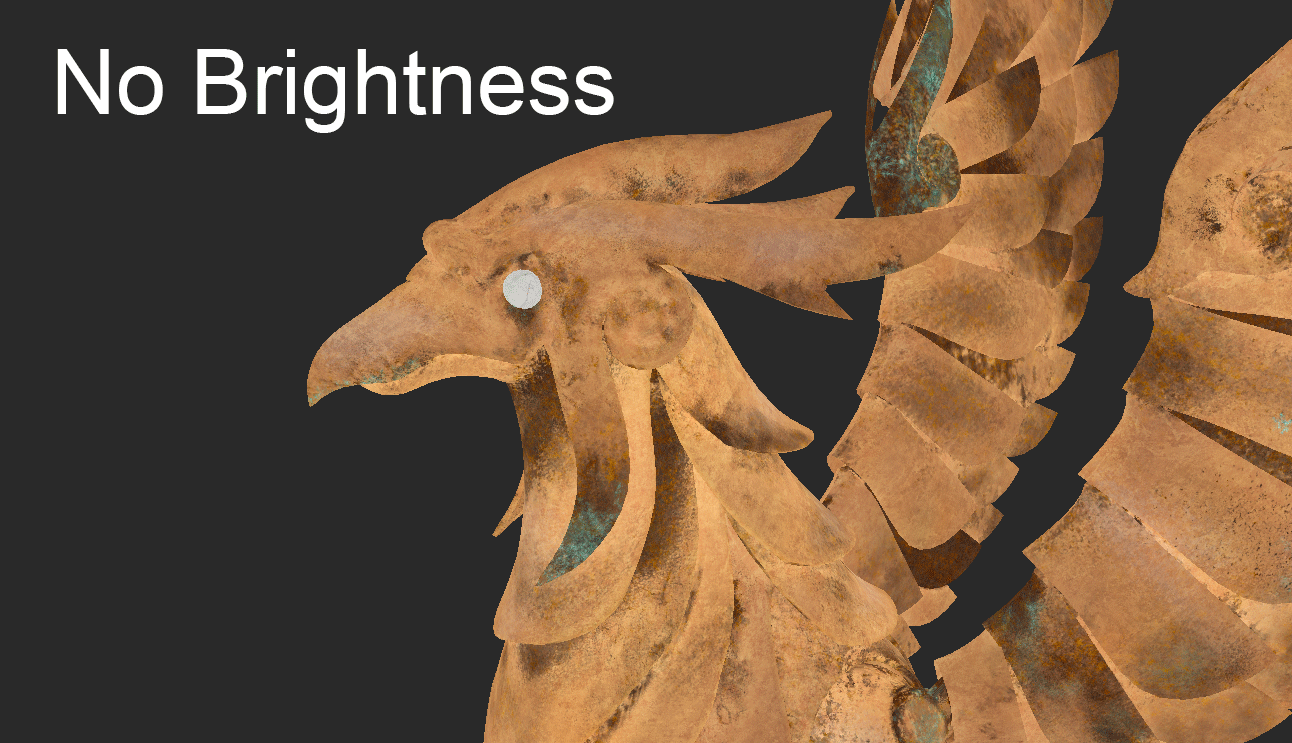
An image showing the difference with and without a Brightness node.
Although it seems like a minor change, VFX notes can be minor tweaks, so knowing the efficient way to get the change done is important.
Related Nodes
Sorry you didn't find this helpful
Why wasn't this helpful? (check all that apply)
Thanks for your feedback.
If you can't find what you're looking for or you have a workflow question, please try Foundry Support.
If you have any thoughts on how we can improve our learning content, please email the Documentation team using the button below.
Thanks for taking time to give us feedback.