Search is based on keyword.
Ex: "Procedures"
Do not search with natural language
Ex: "How do I write a new procedure?"
Object Space Linear Gradient Node
Access: Nodes > Procedural > Pattern > Object Space Linear Gradient
|
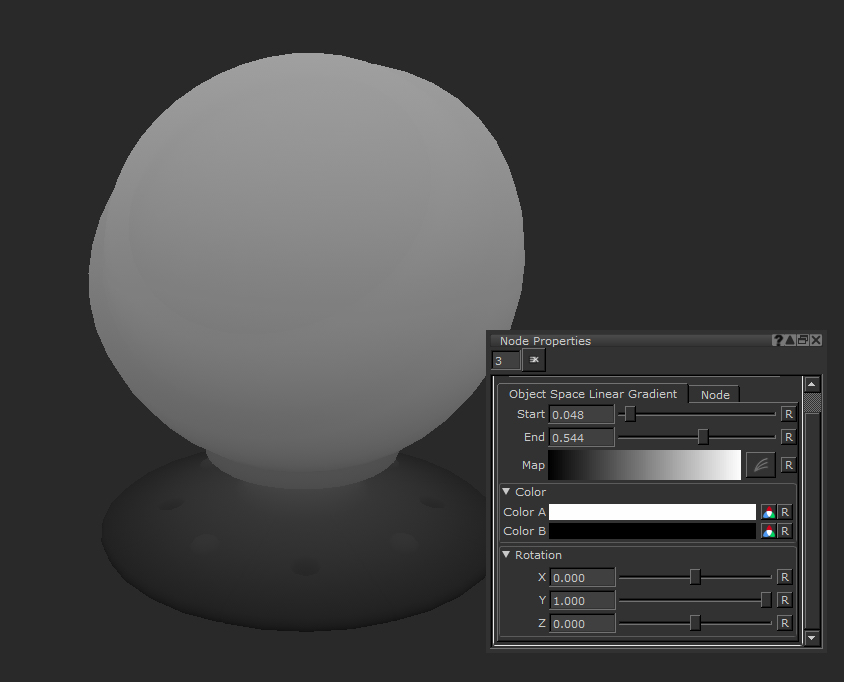
A rotation applied to a Object Space Linear Gradient node on the Shader Ball geometry. |
The Object Space Linear Gradient node is a great way to applied graduated colors across your objects geometry.
The node gives you a lot of options to change the result and its great for creating quick masks based on the world space of your object. By editing the properties you can make looser or tighter gradients and with the provided ramp options you can add extra levels of fidelity to the output.
The Object Space Linear Gradient node is a great way to mask off just the bottom of a mesh, for example for adding mud around the base, or for adding a color change over the mesh without having to try paint a smooth gradient yourself.
Object Space Linear Gradient Node Properties
|
Start text field, slider |
Changes the world space location of the start of the gradient. A value of 0 is the edge of your mesh’s dimensions. Increasing it will cause the start point to move further along your mesh. The slider will cap at 0 but you can type in negative numbers to push it further away, stretching out the gradation.
Default is 0. |
|
End text field, slider |
Changes the world space location of the end of the gradient. 1 is the edge of your mesh’s dimensions. Decreasing it will cause the start point to move further along your mesh. The slider will max at 1 but you can type in larger numbers to push it further away, stretching out the gradation.
Default is 1. |
|
Map Curve editor |
By clicking the curve editor icon you can change the curve of the gradient instead of it being a linear 0 to 1 ramp.
Default is a black to white linear gradient. |
Color
|
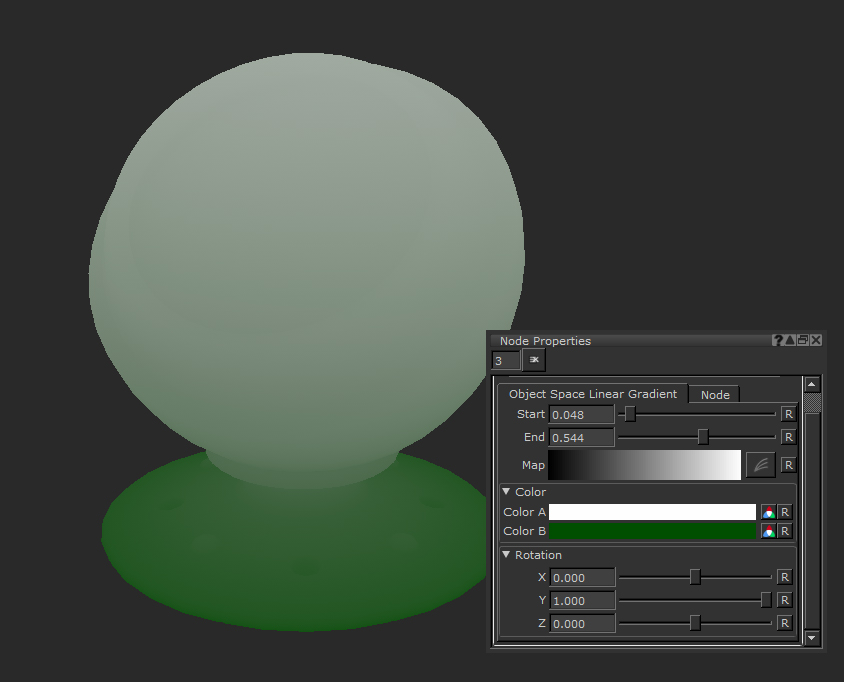
Color A |
Changes the start color of the gradient.
|
||||
|
Color B |
Changes the end color of the gradient.
|

Rotation
|
X, Y, Z text field, slider |
Changes rotation of the ramp along the X, Y or Z axis. Manipulate these sliders to have the gradient go across a different direction in world space.
Default is 1, 0, 0. |
Object Space Linear Gradient Node Workflow Example
Masking Dirt with Object Space Linear Gradients
Using the Object Space Linear Gradient we can easily create masks on the object that sit just at the bottom or top of the geo. This is a really quick and easy way to add mud or dirt to the bottom of objects. By combining it with other masks or procedurals you can get procedural dirt masks using just a few nodes.
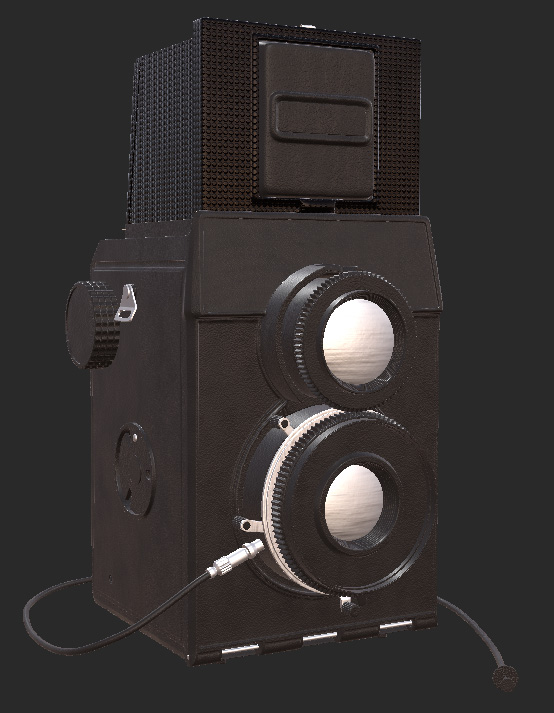
Here we have a camera object that we are going to create a dirt mask for.
The object has been textured with materials, so we are going to use a dirt material from the Shelf palette as a new addition.
Tip: For more on Material nodes see here.
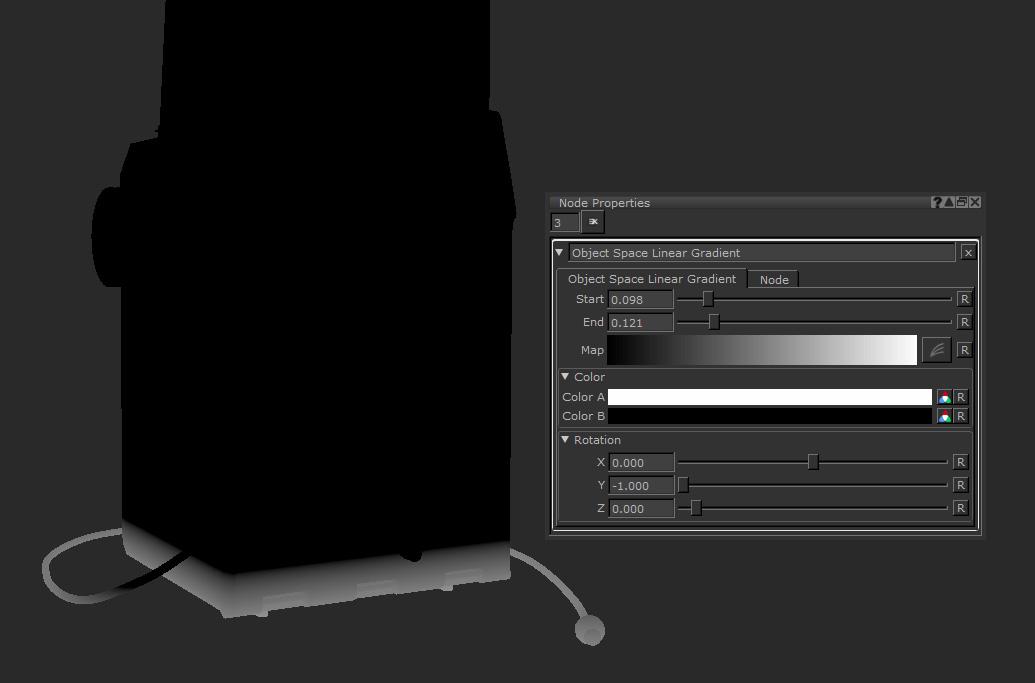
By dropping down an Object Space Linear Gradient node we can start off the mask construction. First thing is to get the Rotation correct. We want it to be along the height of the geometry which is the Y axis, so X needs to be 0 and Y needs to be -1. Then you can use the start and end sliders to change the tightness of it.
Tip: The reason we use -1 instead of 1 in the Rotation Y field is because for a mask you want white to be where the dirt will be so by using -1 it will flip to gradient the correct way around.
Finally using a Merge node to multiply an Oil node on top of this mask allows us to add some organicness to this mask so it looks more realistic.
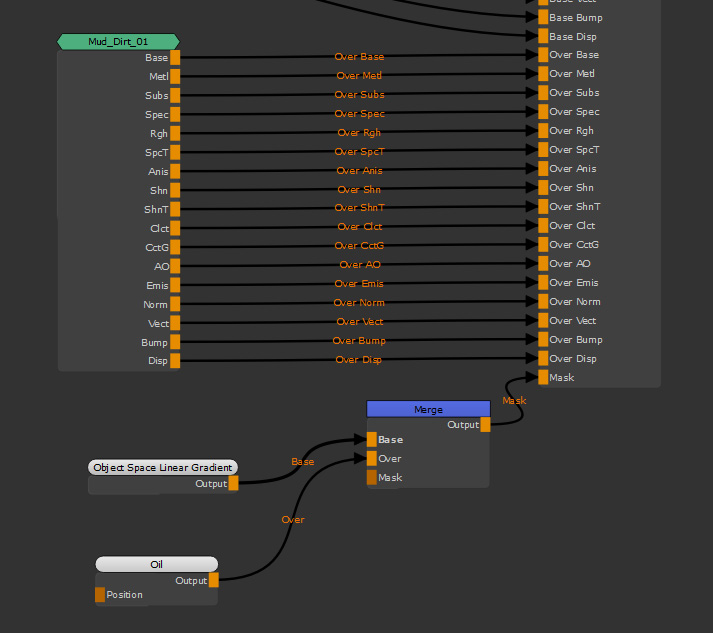

With only a couple of nodes, the Object Space Linear Gradient has helped create a very easy, quick and versatile dirt mask setup in our Node Graph.
Related Nodes
Sorry you didn't find this helpful
Why wasn't this helpful? (check all that apply)
Thanks for your feedback.
If you can't find what you're looking for or you have a workflow question, please try Foundry Support.
If you have any thoughts on how we can improve our learning content, please email the Documentation team using the button below.
Thanks for taking time to give us feedback.