Search is based on keyword.
Ex: "Procedures"
Do not search with natural language
Ex: "How do I write a new procedure?"
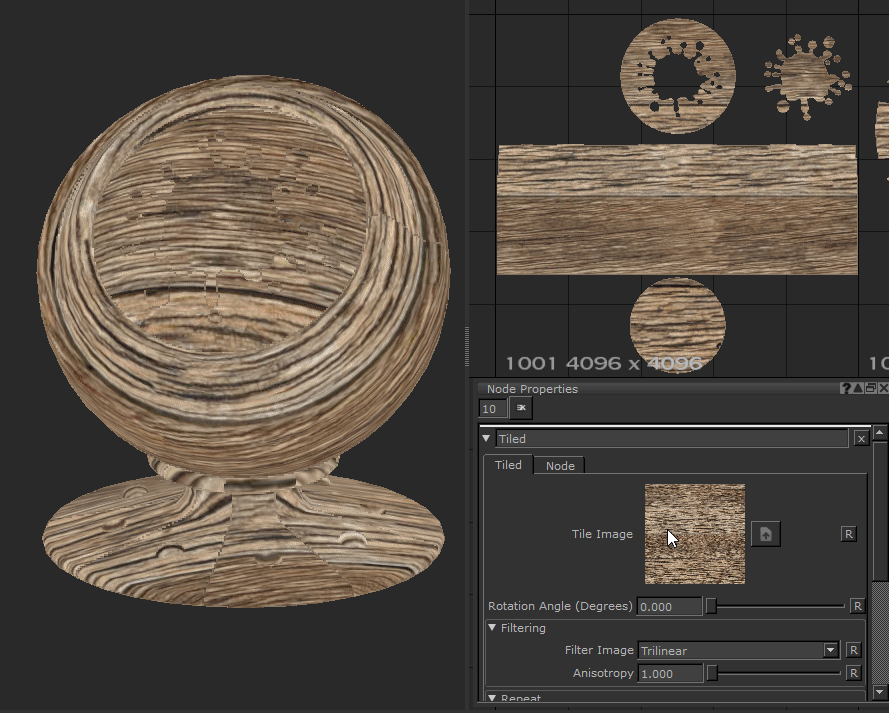
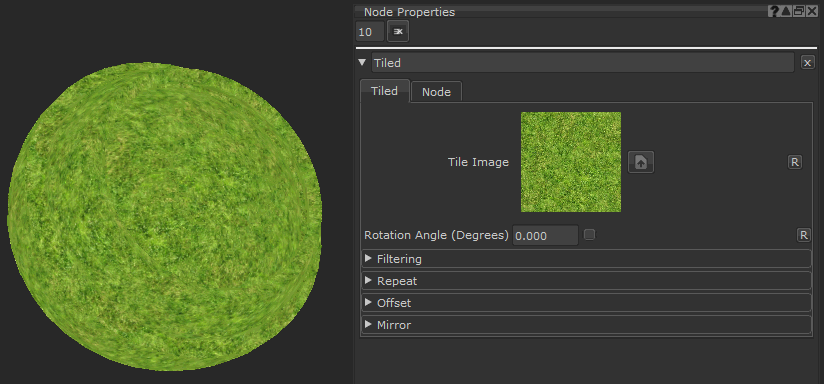
Tiled Node
Access: Nodes > Procedural > Pattern > Tiled Node
The Tiled node allows you to place down an image from your Image Manger and tile it across your UVs, repeating as many times as you define in the Node Properties.This can be used for many different tasks, from setting up masks, creating procedural texturing node trees, and breaking up plain looking textures with extra detail.
Tip: While the node doesn’t require a texture that tiles, it is best to use one to avoid seams at the edges.
Tiled Node Inputs
UV - By default the Tiled node uses the UVs of the object.
Tip: However you can, for example, plug in a UV Node with a Levels node to manipulate the way the Tiled node is placed across the surface of your object. You can also plug in other nodes, like noises, to get more experimental results.
Tiled Node Properties
|
Tile Image Button |
Chooses the image to tile across your geometry’s UVs. You can either use the button next to the image preview to find an image with the file browser or drag and drop an image from the Image Manager.
|
||||
|
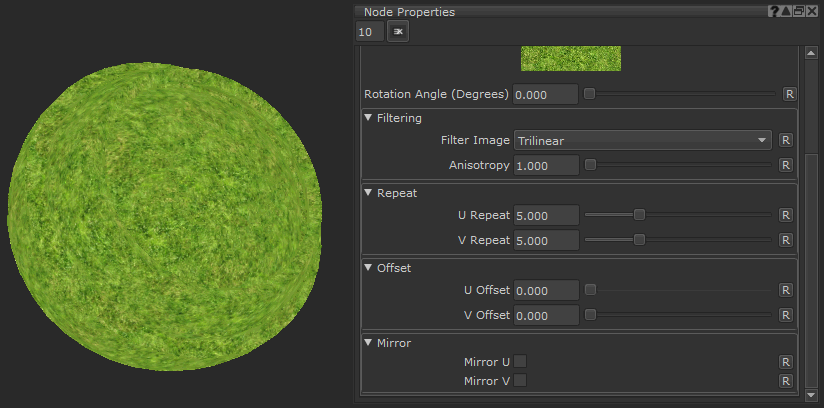
Rotation Angle (Degrees) Text field, slider |
Changes the rotation of the Tiled image input.
Default is 0. |

Filtering
|
Filter Image dropdown |
Chooses the type of texture filtering to use on your image when upscaling or downscaling it. Default is Trilinear. |
|
Anisotropy Text field, slider |
Changes the amount of Anisotropy on the filtering of the image. Default is 1. |
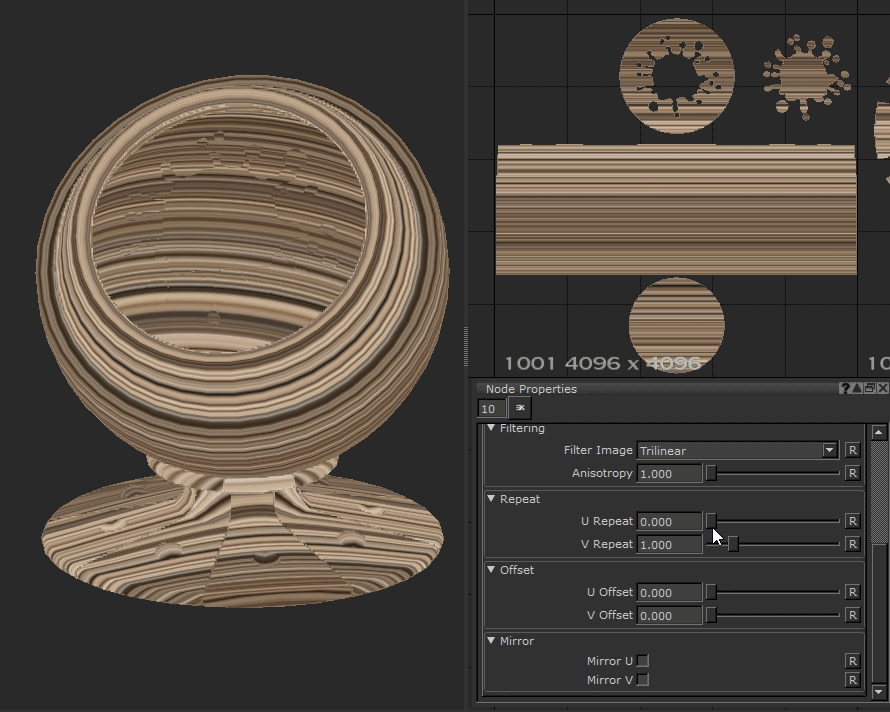
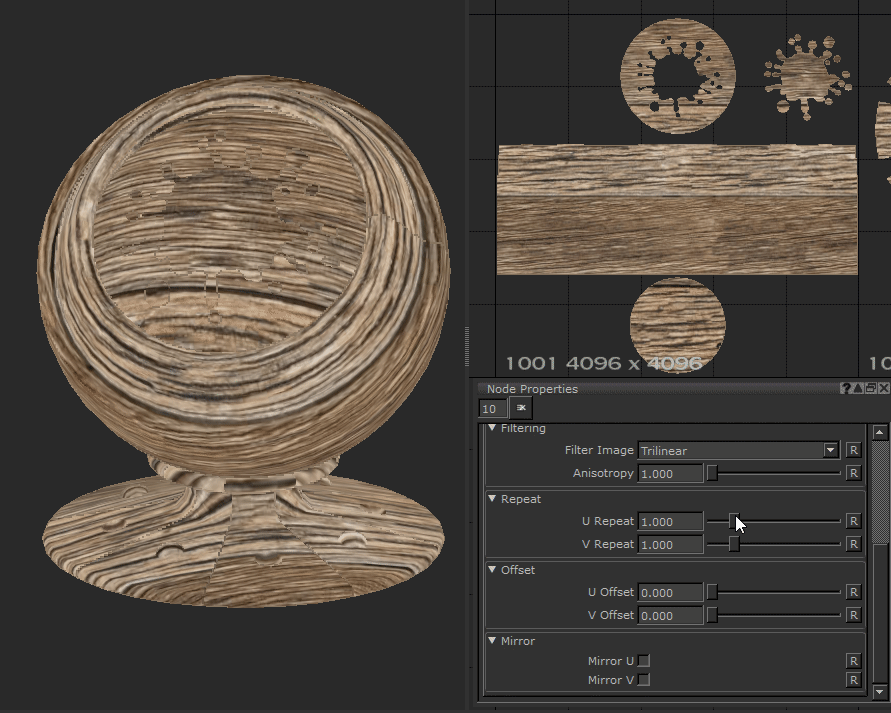
Repeat
|
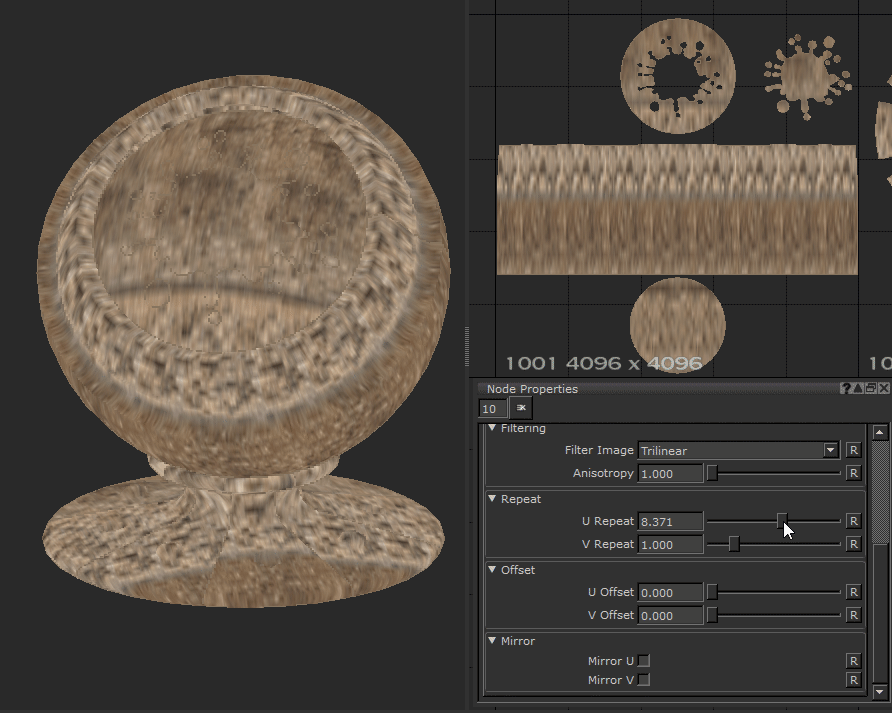
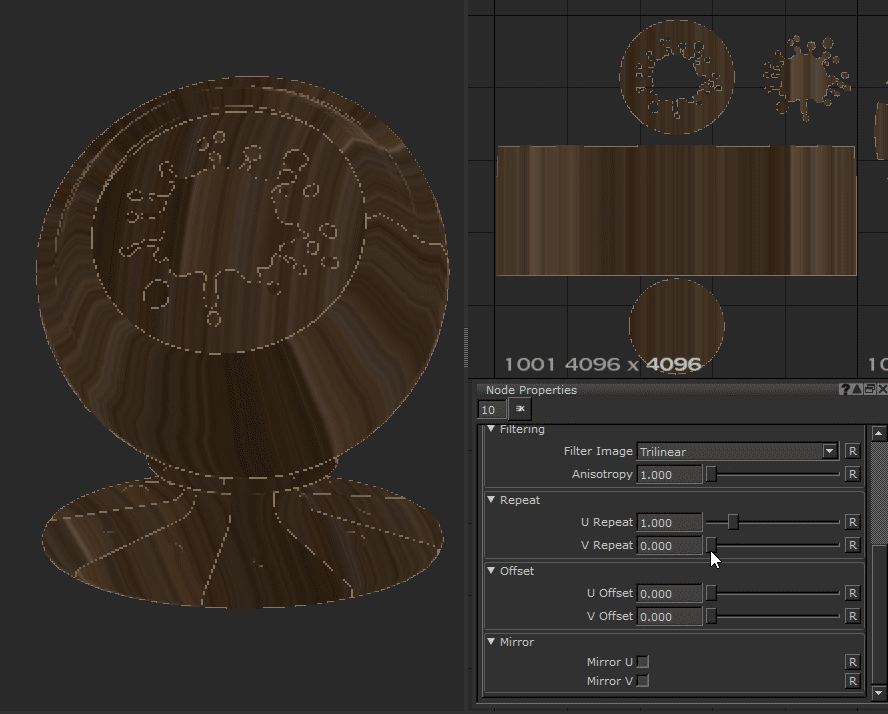
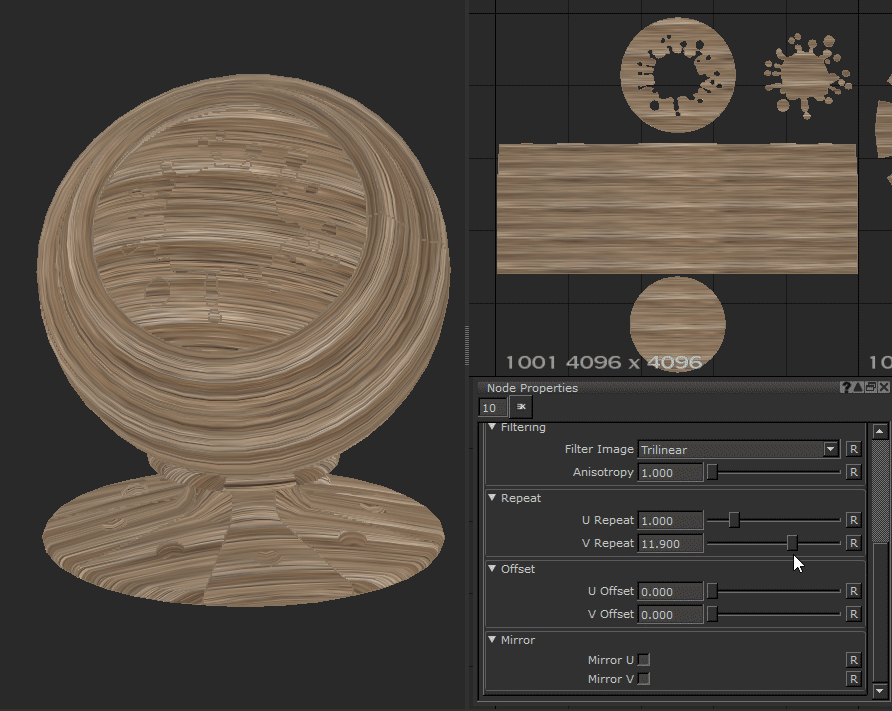
U Repeat Text field, slider |
Changes the tiling amount horizontally along the U axis of your UVs. Increasing this value makes the image scale and repeat more.
Default is 1. |
||||||
|
V Repeat Text field, slider |
Changes the tiling amount vertically along the V axis of your UVs. Increasing this value makes the image scale and repeat more.
Default is 1. |

Offset
|
U Offset Text field, slider |
Moves the tiled image horizontally along the U axis of your UVs.
Default is 0. |
|
V Offset Text field, slider |
Moves the tiled image vertically along the V axis of your UVs.
Default is 0. |

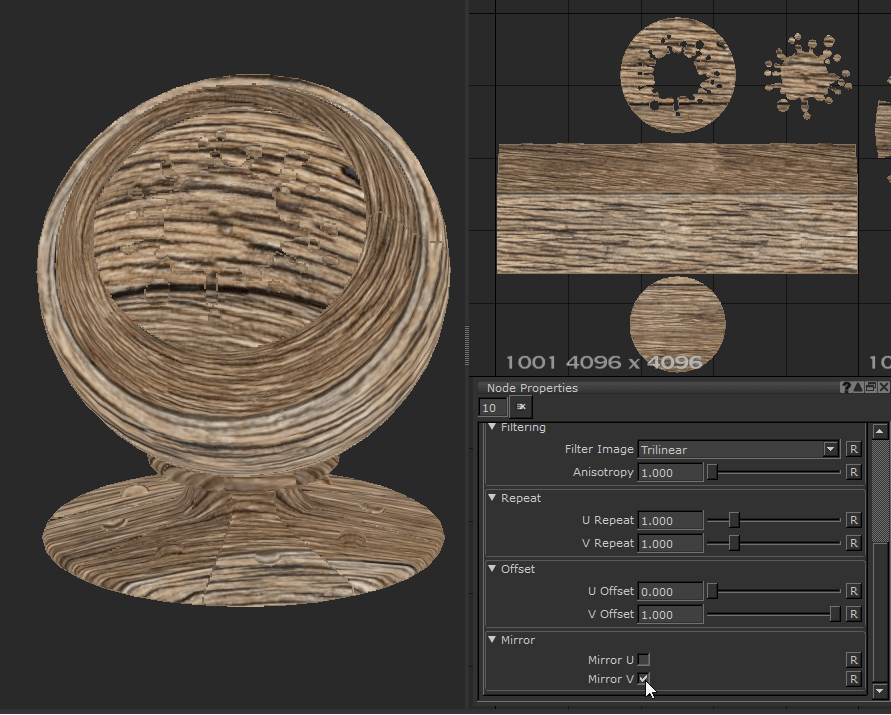
Mirror
|
Mirror U checkbox |
Flips the image along the U axis.
|
||||
|
Mirror V checkbox |
Flips the image along the V axis.
|


Tiled Node Workflow Example
Material Creation with the Tiled Node in Mari 4.5
Material creation goes hand in hand with the Tiled node. Lets create a quick wooden material that defines every channel you need.
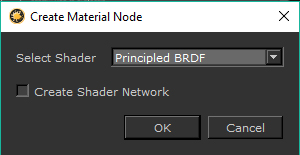
First you need to place down a Material node. The Create Material Node dialog asks for the shading model you would like to use. For this example Principled BRDF is selected but if you want to use another then the principles stay the same. If you toggle on Create Shader Network then a shader is also created that connects the Material’s outputs to the shader.
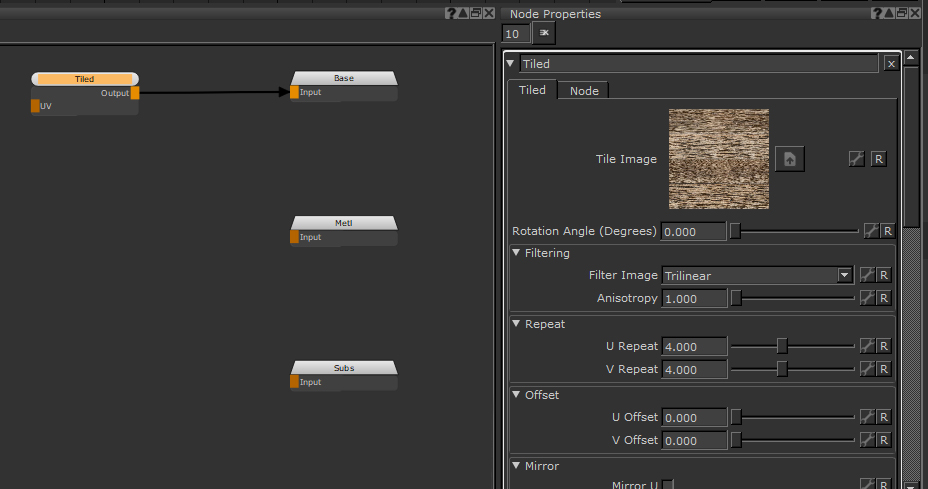
To edit it, Ctrl + double-click the node. This open ups a second tab in the Node Graph. To jump back to your main node tree just click the other tab.
Inside this new Node Graph, you can see a number of Output nodes, all named after different texture channels. When inside you can assign textures and inputs to any of the Material node’s outputs.
Next we need a tiled texture. You can either make one by going through the normal node creation method or by dragging an image from the Image Manager into the node graph. This creates a Tiled node for you. From there you can change your scale so it looks right for you and make any other edits to the Tiled node until you get something you are happy with. Then it’s time to plug that into the Base Color output.
Using a HSV node and Invert node to desaturate and flip that same Tiled node we have a rough map that we can use for the Specular Roughness. You can use a Levels node to adjust the values until you have something that looks right. The easiest way to tell is by going back to your Node Graph and hooking the material up to a shader and viewing that so you can Lookdev values on the fly.
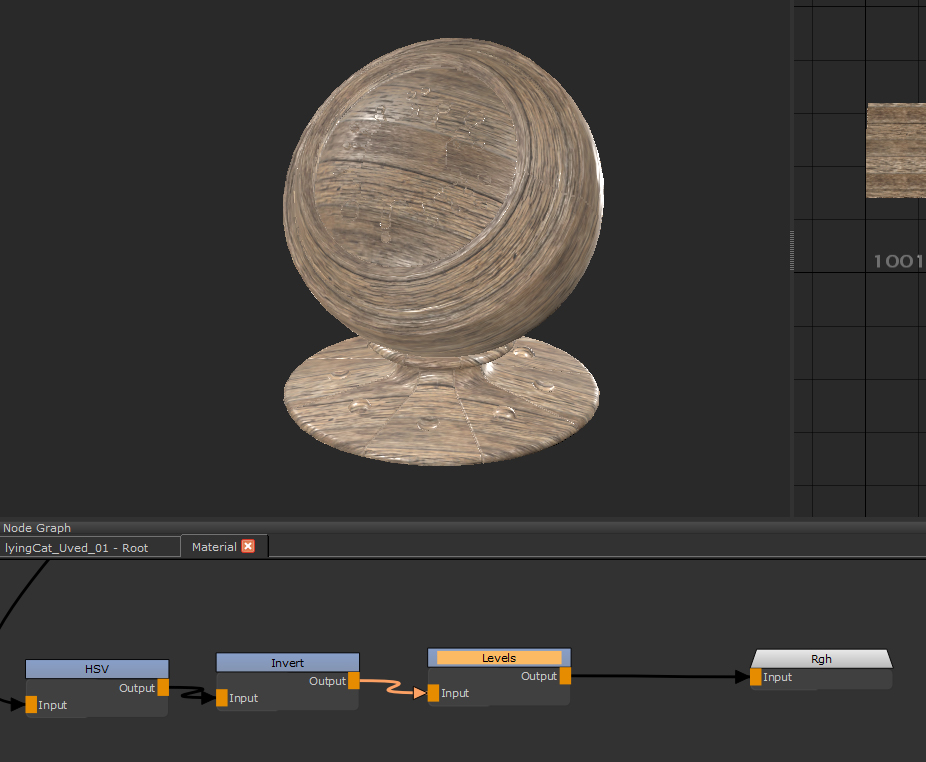
The Base Color and Roughness viewed through a shader.
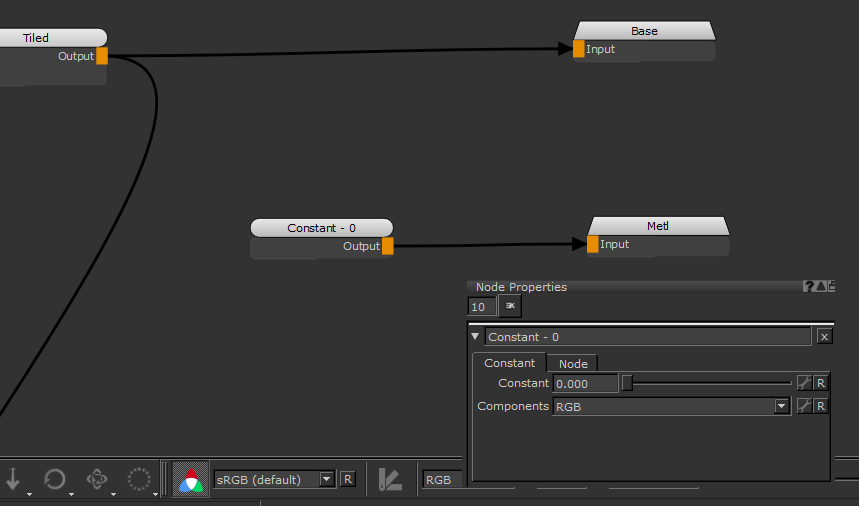
Adding a Constant node set to 0 for the RGB component can be used for the Metallic output of the Material, as wood is not metal.
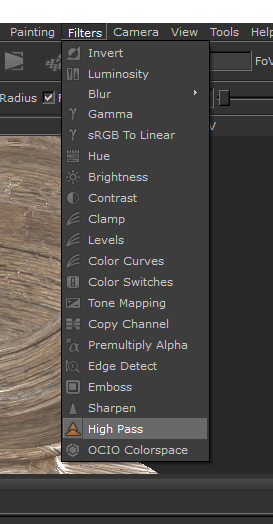
Finally to make a Bump Map you can use a High Pass filter on the wood texture in your Image Manager to get a quick height map from it. Make sure the Amount stays at 0.5 to get an image with mid-gray as the mid point like a Bump Map needs.

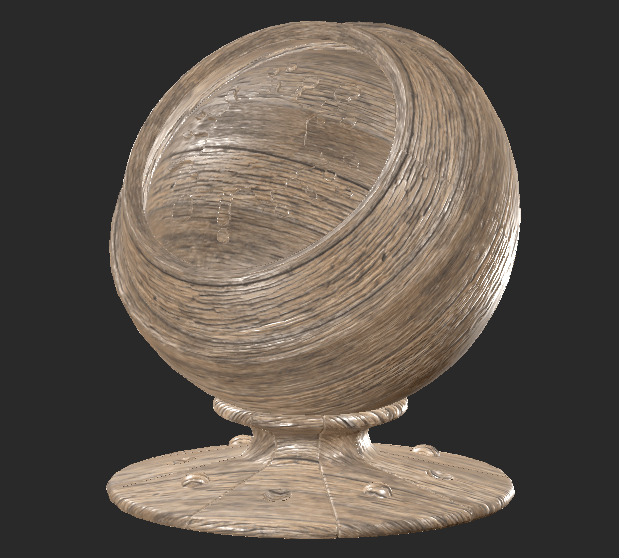
You can then use that with another Tiled node that plugs into the Bump output of the Material. Copying and pasting the first Tiled node is a good idea so the Repeat tiling amount lines up with the Base Color. Here’s the final result, a material you can export and reuse in other scenes, quickly built up with a single tiled texture with the Tiled node.
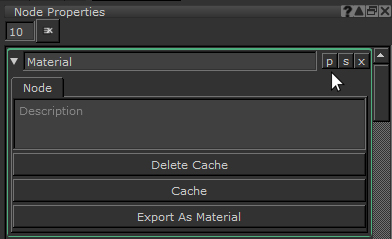
Finally lets promote the Tiled node properties so they can be edited on the fly without having to jump in and out of the node every time. If you jump back to your Node Graph and click the p button on the Node Properties you open up a new Group Node Knobs dialog.
From here you need to choose which properties to promote. Click the Pick option and open up the two Tiled nodes with the plus icon next to their names. From there select the U Repeat and V Repeat of both Tiled nodes in the Pick Knobs to Add dialog and click OK. They are promoted to the Material node. Now they can be edited on the fly without going in and out of the Material node.
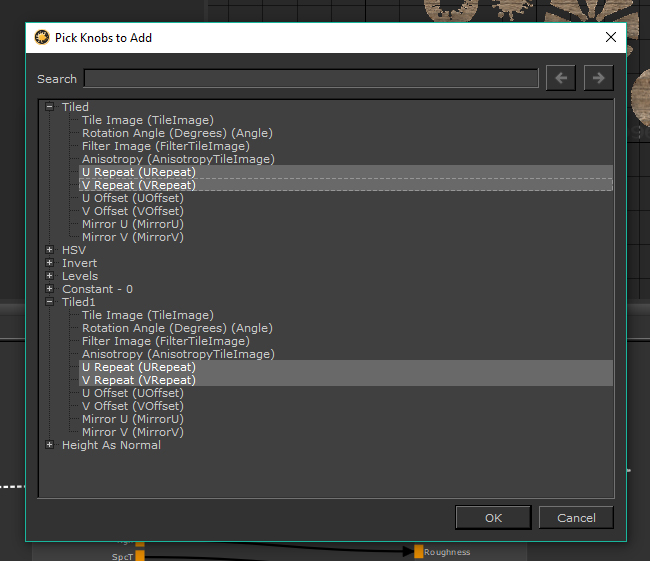

If you select those promoted properties back in the Group Node Knobs dialog and click the Link button you can merge them all into a single slider of your choosing. Make it something that is obvious, like TileAmount, and you will now see that new linked attribute in the Node Properties.
|
|
|
|
|
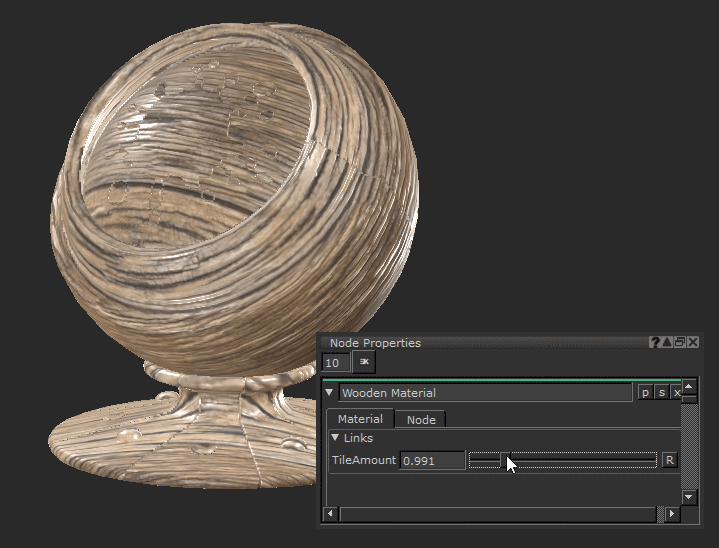
TileAmount set to 0.9. |
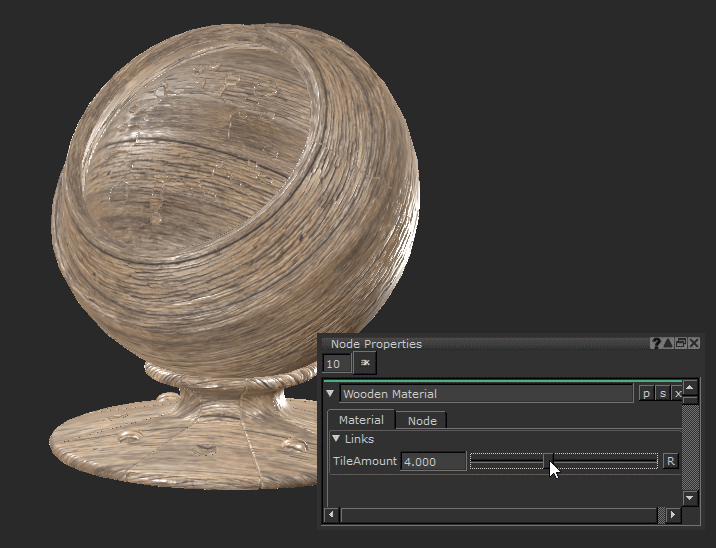
TileAmount set to 4. |
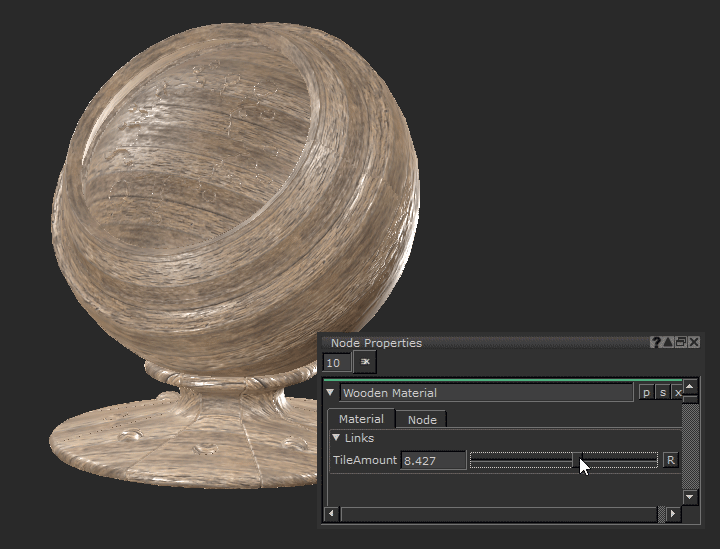
TileAmount set to 8. |
That is a way to quickly build up some of the output channels of a Material node from a single tiled texture. You can use this as a base and tweak things or add additional details with other procedural nodes like noises to add detail and complexity.
Related Nodes
Sorry you didn't find this helpful
Why wasn't this helpful? (check all that apply)
Thanks for your feedback.
If you can't find what you're looking for or you have a workflow question, please try Foundry Support.
If you have any thoughts on how we can improve our learning content, please email the Documentation team using the button below.
Thanks for taking time to give us feedback.