Search is based on keyword.
Ex: "Procedures"
Do not search with natural language
Ex: "How do I write a new procedure?"
UV Mask Node
Access: Nodes > Geometry > UV Mask
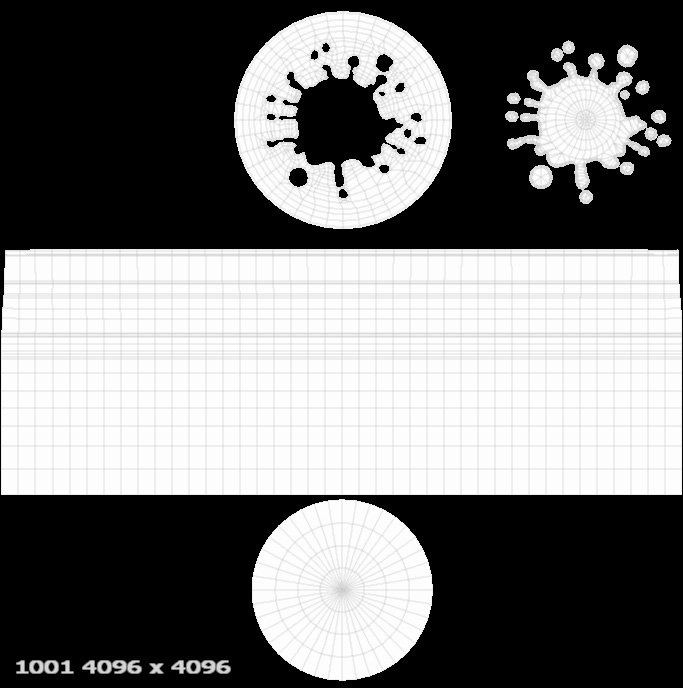
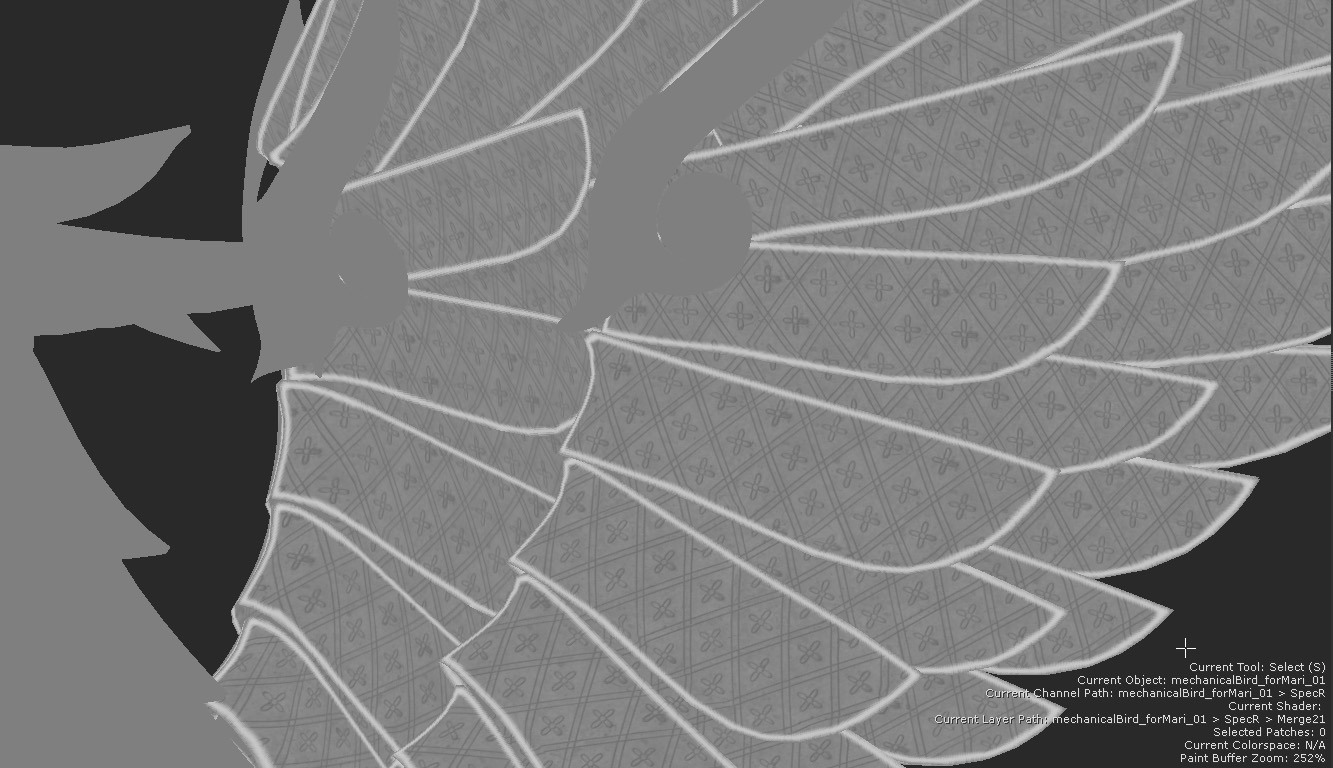
A black and white mask created based on the UVs of this shader ball asset.
The UV Mask is a node which creates a black and white mask as an output based on your UVs. The inside of your UVs fills with white and anything outside fills with black.
At first glance this node may not seem that useful however, since the node does not include bleed at the edges it’s very useful when combined with other pieces of software like Nuke to create edge masks and other useful images for texturing.
Unlike most nodes, the UV Mask has no input or properties. Its output is based on the UVs of your object and nothing else.
UV Mask Node Workflow Example
UV Mask for Edge Detection Texturing with Nuke
Let’s take a look at a great use for the UV Mask, edge detection of UV shells. This is a fairly advanced technique but a useful one.
In the example, you can see the UV view of the same object, textured in two ways. The first was with the paint tool in a paint node. As you can see when the Paint Buffer is baked down, the white is bled over the edges.
|
Paint node - hand Painted mask of the whole object. |
UV Mask - output. |

The second image is the UV Mask. In the 3d view it looks exactly the same, but in the UVs when exported there is no bleed.
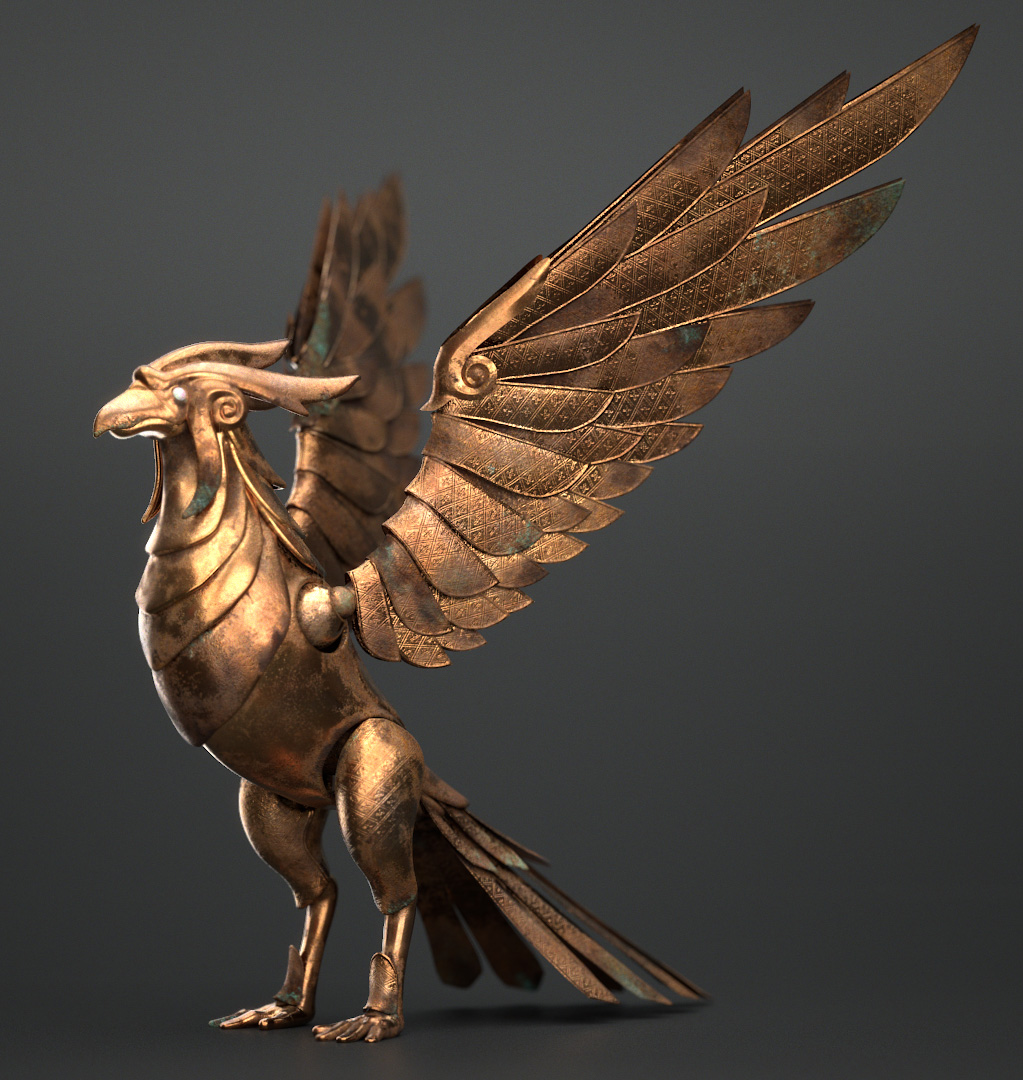
Here is an object that has had all of its maps textured. The wings are looking a bit plain though. Since the object is going to be an aged golden statue, it would be nice to get a bit of detail around the edges of the wing feathers to make it look a bit more grand.
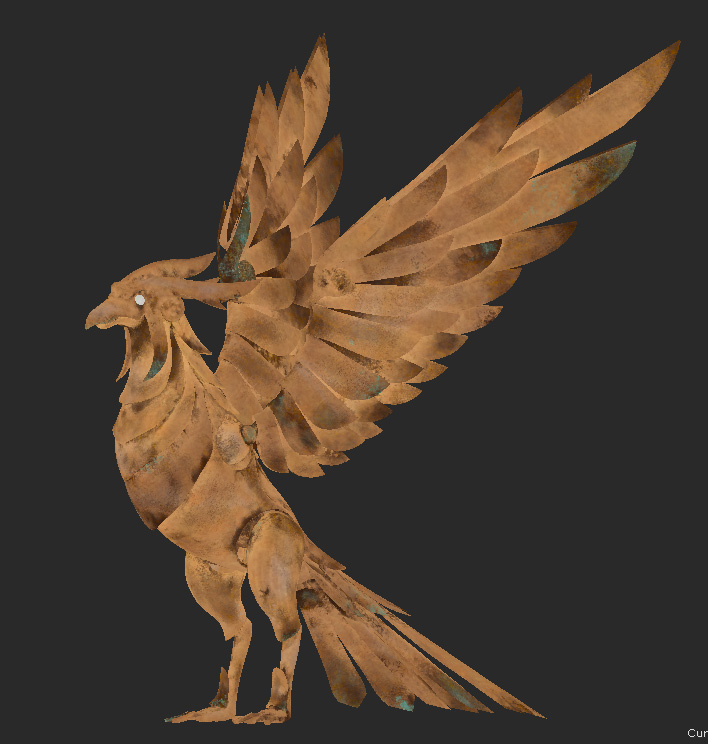
The base color of this mechanical bird asset.
Hand painting the edge of each piece of the wing would be a painful task and even with steady stroke enable it would be really difficult to get a clean edge. If we could create a mask of the geometry and then erode into that mask, we could then flip it and have just the edge of all the feathers.
But if we have a mask with bleed then it’s going to be useless, we need a mask that fills all the UVs but with no bleeding so we can shrink the mask a bit and get an edge. That’s where the UV mask node comes in.
Tip: The UV Mask node is really powerful when exported and used with other pieces of image editing software.
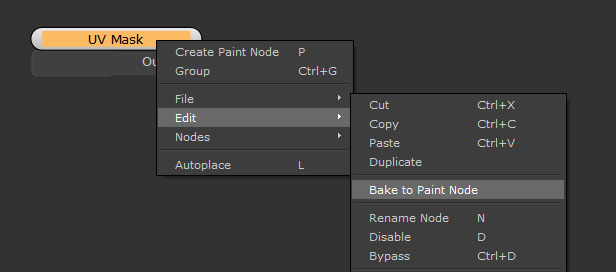
First we need to export the UV Mask Node’s data. That requires us to bake it a Paint node first as you cannot export non baked nodes. To do that you just need to right-click the node and select Edit > Bake to Paint Node.
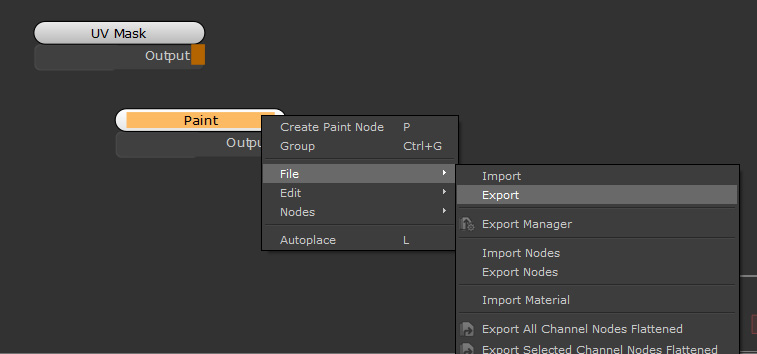
Once that is baked, it is ready to be exported by right-clicking and selecting File > Export.
We can now take those images into Nuke or another image software suite where you can manipulate the edges of selections.
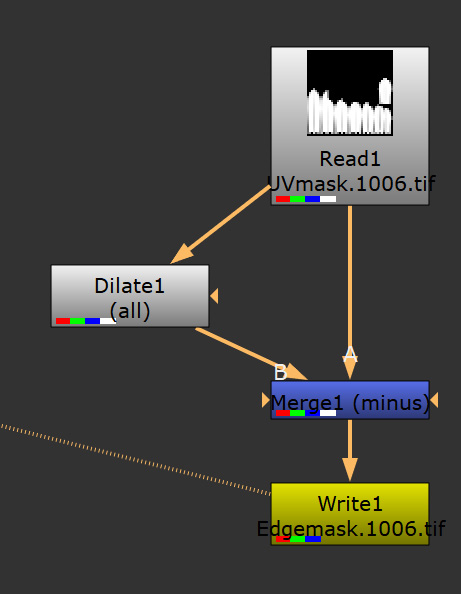
The Nuke Setup.
Here is a very simple Nuke script to get an edge mask. If you haven’t used Nuke before then it’s nodal work flow is similar to Mari’s, but this is all achievable in other image editing software.
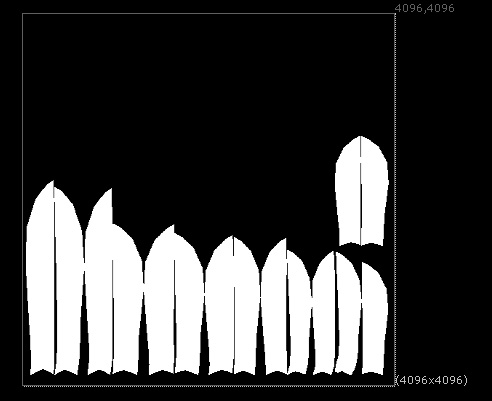
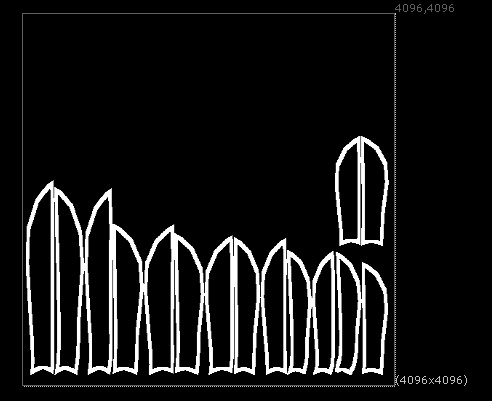
First the UV mask is read in, then it is eroded inwards using the Dilate node in Nuke, then we minus the original from this new dilated version which cuts out the interior of the UV islands as you can see below. Then we Write it out from Nuke.
|
Before |
After |
Now we have this mask we can import as a new Paint node in Mari.
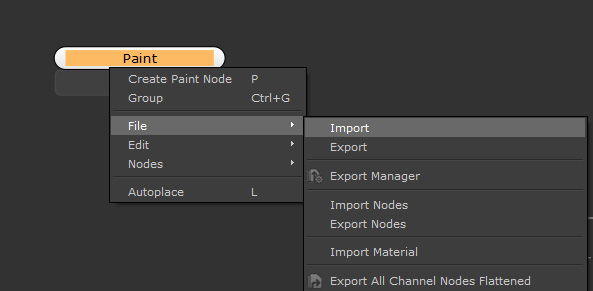
How to import images back into a Paint node.
Using a Merge node with a blend Mode of Add, we can merge it on top of a Color node of 0.5 gray to make our displacement push out at the edges.
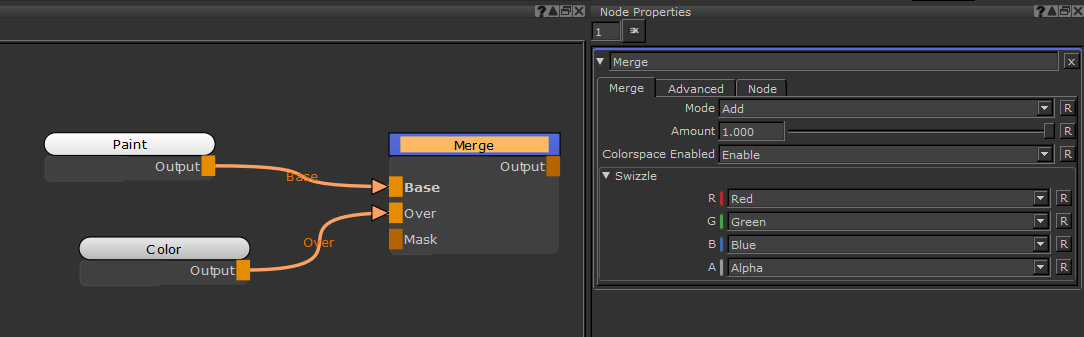
For an extra flourish a tiled texture has also been merged in to add some more detailing to make the design seem more grand.
Here is the final render with the displacement added to the shader to help add detail.
While there would have been ways to achieve a similar result without the UV mask, the speed and lack of bleed on the node is what sets it apart and can speed up workflows.
Related Nodes
Sorry you didn't find this helpful
Why wasn't this helpful? (check all that apply)
Thanks for your feedback.
If you can't find what you're looking for or you have a workflow question, please try Foundry Support.
If you have any thoughts on how we can improve our learning content, please email the Documentation team using the button below.
Thanks for taking time to give us feedback.