Multi-Channel Paint Node
Access: Nodes > Misc > Multi-Channel Paint
The Multi-Channel Paint node enables you to paint into up to eight different streams simultaneously from a single node. This means you can define images or colors for your individual texture streams, and paint into those channels simultaneously.
This means when you’re using the Multi-Channel Paint node, you don't have to manually align your diffuse with your displacement and bump. This can help you save time when painting using texture packs.
Multi-Channel Paint Node Properties
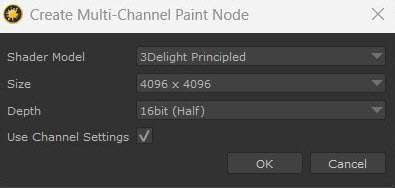
When you create a Multi-Channel Paint node, a UI dialog will pop up. This defines the settings for the Multi-Channel Paint node you’re creating.
|
Shader Model Dropdown list |
This option defines the Shader Model that the node will work in. The available streams to paint into will reflect those of the shader model you choose. The available shader options are: • 3Delight Principled • Arnold Standard Surface • Autodesk Standard Surface (1.0.2.x) • BRDF • Principled BRDF • USD Preview Surface • Unreal • VRayMtl • VRayMtl (V-Ray 6) |
|
Size Dropdown list |
Chooses the resolution of the images when exported. |
|
Depth Dropdown list |
Chooses the bit depth of the images that get exported. |
|
Use Channel Settings Tickbox |
For streams with a Channel node downstream, use its size and depth instead of the specified settings above. |
Multi-Channel Paint Node Workflow Example
Importing External Textures into a Multi-Channel Paint Node
You can use the Multi-Channel Paint node to paint external images simultaneously into a model. For example, if you have a TextureXYZ texture set that has both color and displacement images in it, you can import these into Mari to use in the Multi-Channel Paint node.
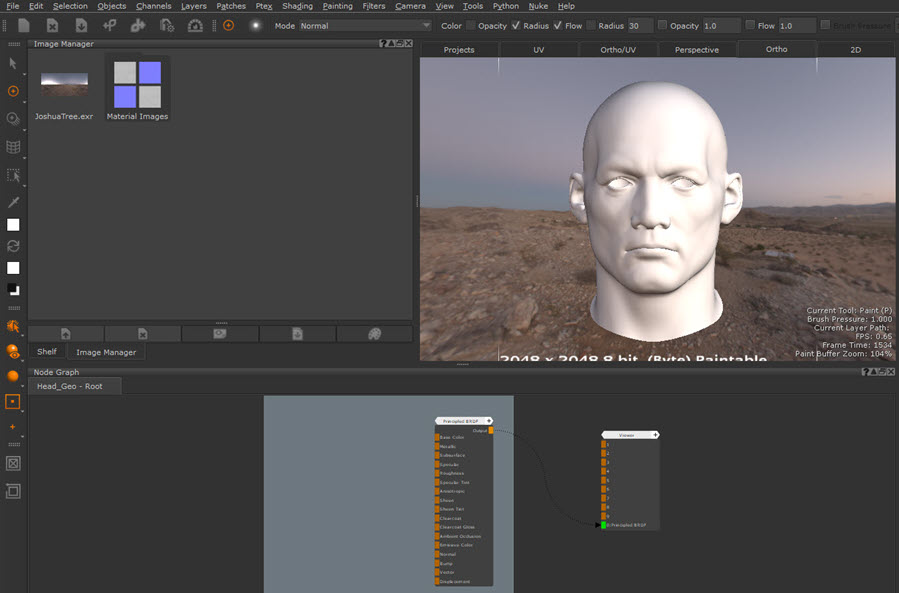
First, import the texture pack into Mari. To do this, drag the texture pack into your Image Manager.
The texture pack will automatically form an Image Group from the folder you dragged into Mari. When you click on the image groups, the Ingest Template dropdown list will appear. Learn more about the Ingest Template at Ingest Template Dropdown List.
You can auto assign the images into the Ingest template, or use the dropdown to specify which Image you want for each stream. This will mean when you import the images into the Multi-Channel Paint node, the images will automatically be added to the specific streams you have assigned to them.
Note: You don’t have to pre-define the streams in your Image Group. You can directly assign them to the Multi-Channel Paint node, described below.
To learn more about Image Groups, read Image Groups.
Setting Up Your Multi-Channel Paint Node
To prepare your Multi-Channel Paint node ready for painting:
| 1. | Create a Multi-Channel Paint node in your Node Graph. |
| 2. | In the pop up, select the shader model you want to work in. You can also define your Resolution and bit Depth. |
Note: To ensure the node works with your current shader, make sure the shader model matches the others used in your project.
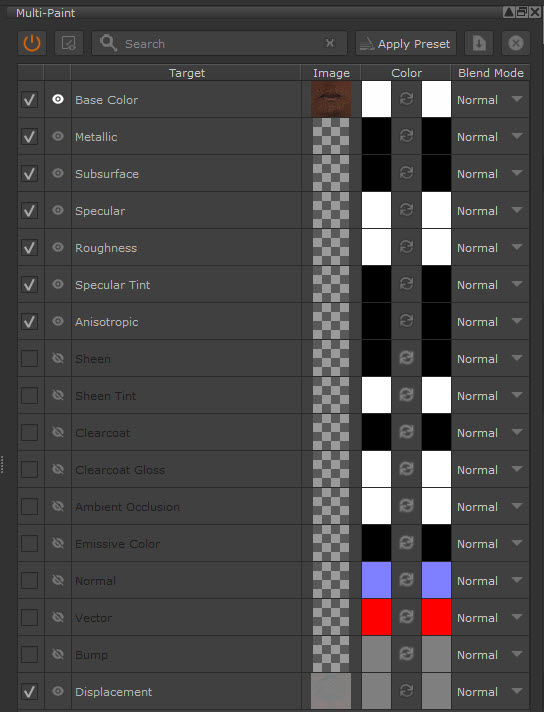
| 3. | With the node selected, go to the Multi-Paint Palette. |
| 4. | Edit the streams you want to paint into. If you have pre-assigned images to specific channels in the same shader, you can drag the Image Group into the Multi-Paint palette. |
Alternatively, drag specific images from the Image Manager into the stream you want to paint into, or click the Image column for the channel and choose the image.
Tip: You can customize the Multi-Channel Paint node colors in Edit > Preferences > Node Graph > Node Category Colors.
Multi-Paint using the Paint-Through Tool
| 1. | Connect the node to your node graph and select it as the active paint target. |
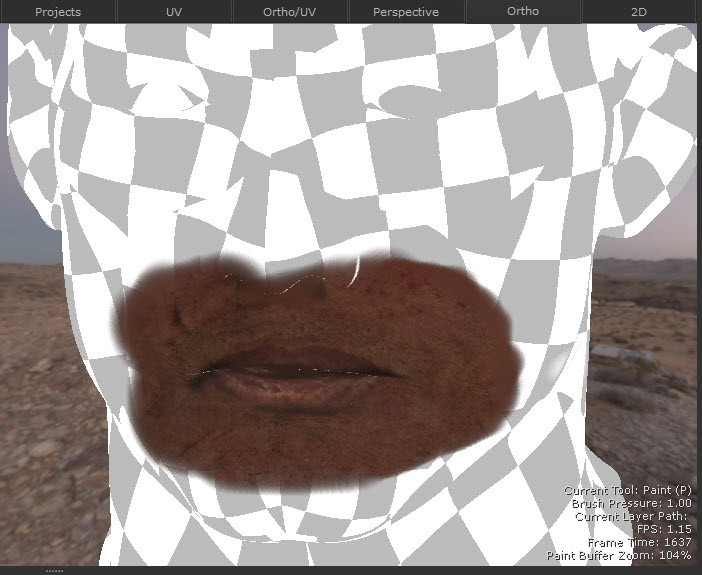
| 2. | Select the Paint Through tool. The primary stream image will appear in the Viewer. Match up the image with where you want to paint on the model (for more information on Paint-through, go to “Painting Through” an Image). |
Note: When using the Paint-through tool, you can only view one channel at a time - the Primary channel. To change the Primary Channel, click the eye icon (  ) next to the specific channel in the Multi-Paint palette.
| 3. | Paint onto your model. |
Note: When you select a Multi-Channel Paint node as your active paint target, it automatically activates multi-channel painting. If you switch to a Paint node, it will switch back to single-channel painting.
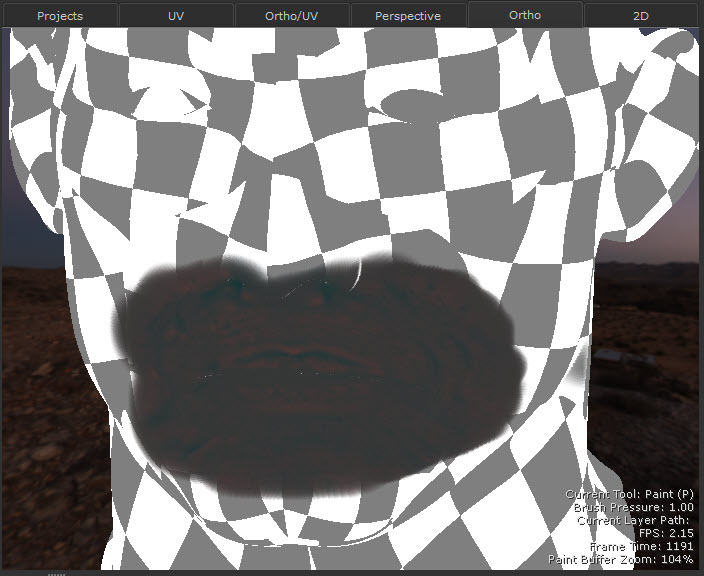
Whilst we are painting on the Primary stream, you are also painting on the other streams you’ve set up in the Multi-Paint palette. For example, here is the Base Color and Displacement Red information from the same painting session:
Base color:
Displacement (Red):
Using the Roller Tool to Multi-Paint the Patches Example Project
Mari 7.5 introduces Patches, a new example project for you to experiment with Multi-Paint (and any other tool in Mari you want to try). To access this project, go to Help >Example Projects > Create Patches ShaderCat Project.
This workflow example uses Patches to demonstrate Multi-Painting using the Roller Tool.
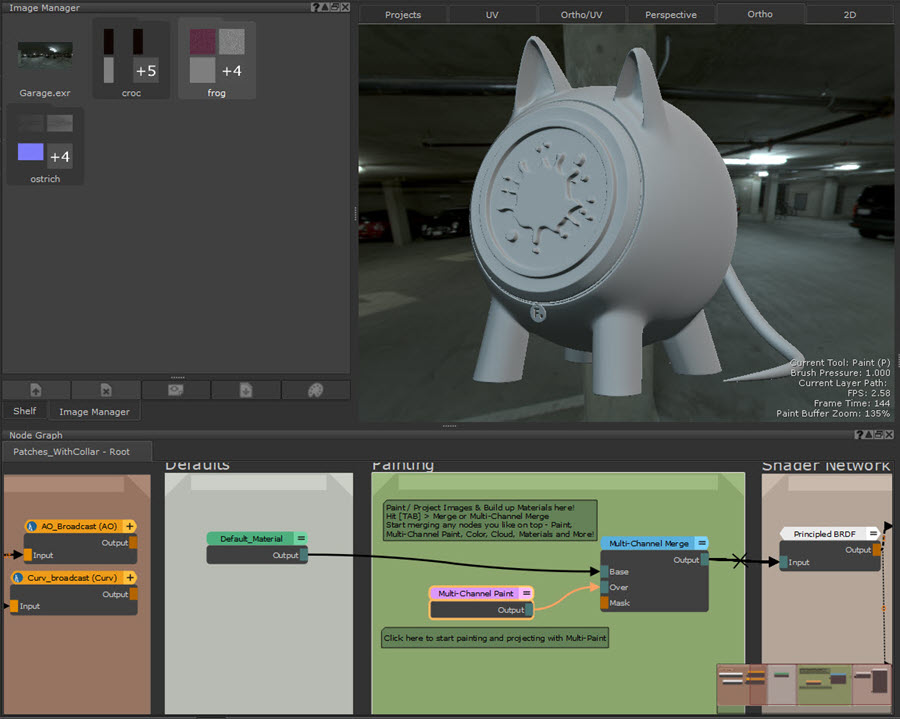
| 1. | In the Node Graph, create a Multi-Channel Paint node. |
| 2. | Open the Multi-Paint Palette. |
| 3. | Select the images you want to paint into for each stream. Double-click on the Image icon (  ) of your chosen stream in the Multi-Paint Palette, and choose an image from the window that appears. For example, the albedo image will be assigned to the Base Color stream. ) of your chosen stream in the Multi-Paint Palette, and choose an image from the window that appears. For example, the albedo image will be assigned to the Base Color stream. |
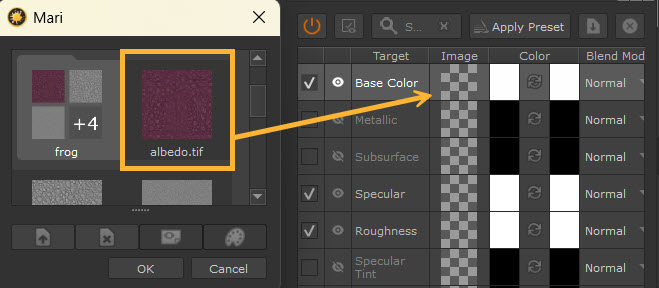
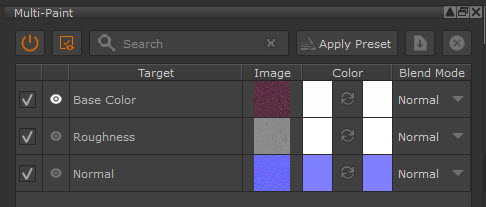
The Roughness and Normal channels will also be painted into, so those images are also assigned to streams.
| 4. | Connect the node to your node graph and select it as the active paint target. |
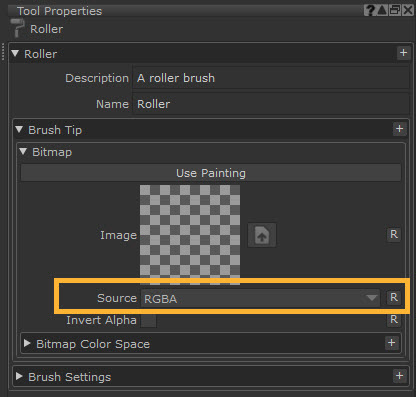
| 5. | Select the Roller Brush tool. |
| 6. | With the Roller Brush selected, go to Tool Properties > Brush tip > Source and change the value from Alpha to RGBA. |
| 7. | Start painting onto your model. The Primary Stream will be the only one visible, but all streams will be painted simultaneously. |
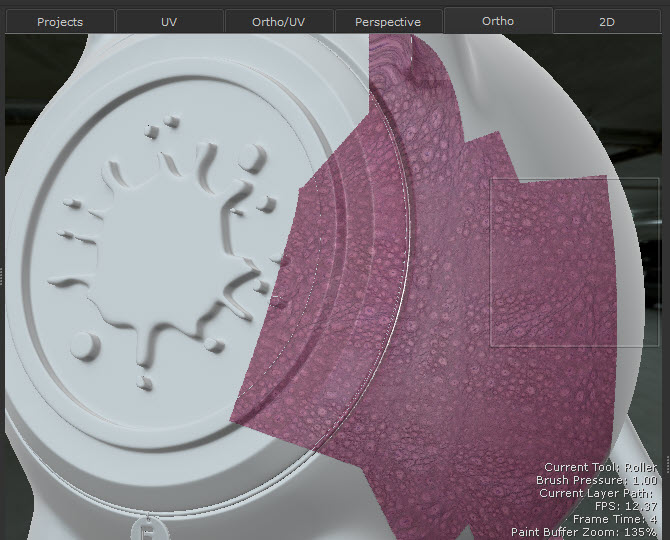
The different streams are painted simultaneously: