Geo-Channel Node
Access: Nodes > Geometry > Geo-Channel
The Geo-Channel system allows you to use the same material on a variety of models to achieve the look of edge wear and tear and other photo-realistic effects on your meshes. You might not know what geometries are going to be used when authoring a material. Geo-Channels solve this by driving geometry-agnostic data, such as curvature and ambient occlusion maps into your material setup. The Geo-Channel node points the material at specifically set up Geo-Channels on your object.
|
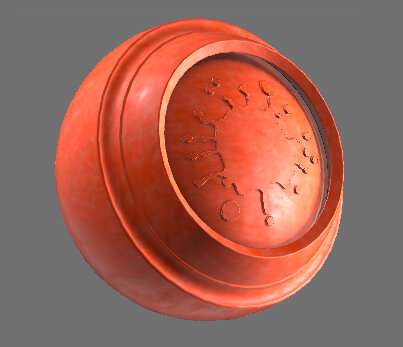
Material without |
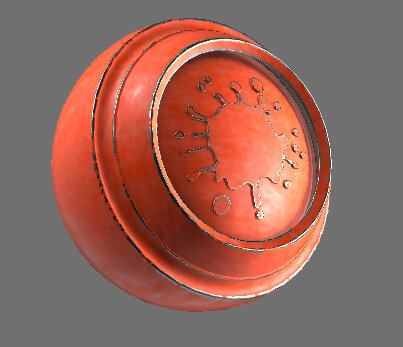
Material with |
You can use the
Tip: You can also export baked data from
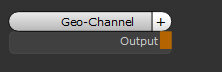
Geo-Channel
Node Properties
|
Channels Dropdown |
Select the |
|
Background Color swatch |
Fills any |
Assigning a Geo-Channel to a Geo-Channel Node
Note: Make sure you have Geo-Channels setup on your object. See Adding Geo-Channels to Objects for more information.
| 1. | In the Node Graph, press Tab. |
A search field appears.
| 2. | Type the following into the search field: |
Geo-Channel
| 3. | Click the resulting Geo-Channel node. |
| 4. | Double-click the Geo-Channel node in the Node Graph to bring up the Node Properties. |
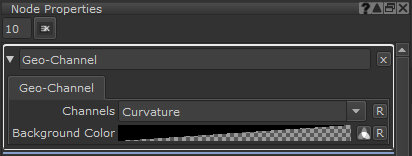
The Geo-Channel Node Properties.
| 5. | Click the Channels dropdown and select the |
The
Without a Geo-Channel selected.
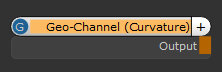
With a Geo-Channel (Curvature) selected.
Importing Materials with Geo-Channels into New Projects
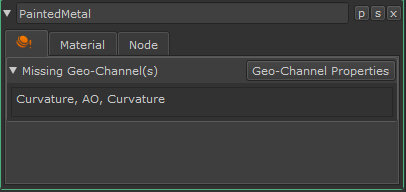
When you import a material containing a Geo-Channel into a new project, if the Geo-Channel is missing from the object(s) in your project, double-clicking the material in the node graph displays a warning in the node properties. The missing Geo-Channels are displayed in the Missing Geo-Channel(s) panel.
Tip: Click the Geo-Channel layer in the Layers Palette to open the Geo-Channel properties when working with layers instead of the Node Graph.
Tip: See Working with Materials in the Node Graph for more information on exporting and importing materials.
To add the missing Geo-Channel:
| 1. | Click Geo-Channel Properties. |
This opens the Geo-Channel Properties tab.
| 2. | See Adding Geo-Channels to Objects for information on how to add a Geo-Channel to the object. |
Note: Make sure the geo-channel name matches the geo-channel selected in the Geo-Channel node.
Geo-Channel Node Workflow Example
Creating Edge Wear and Tear Using Geo-Channels
Geo-channels can be used in a material pipeline to create realistic wear and tear such as rust, chipped paint, or worn leather on your objects. Since geo-channels are geometry-agnostic, you can use the same material across a variety of objects while ensuring the material looks realistic for the specific object. The Geo-Channel node is most useful when used as a mask on the object.
In the video:
• What are Geo-Channels?
• How are Geo-Channels useful to you?
• You learn how to add Geo-Channel properties in the Object Palette.
• You learn how to add a Geo-Channel node to your material setup.
• You learn how to export your material setup to be used in other Mari projects.
• You learn how to importing your materials to other Mari projects and how to deal with missing Geo-Channels.
Syncing Bake Points to Geo-Channel Nodes
You can export baked data from Bake Point nodes directly into Geo-Channels. The Geo-Channel node can then act as an intermediate caching point for complex Node Graph setups. Using this method, you can share common masks in your project across various other channels, groups, gizmos, and materials, with multiple Geo-Channel nodes receiving the same Bake Point node data.
Note: The Bake Point data you want to store to a Geo-Channel can contain other Geo-Channel nodes, but it does not need to.
To export Bake Point node data to a Geo-Channel:
| 1. | Create a new Geo-Channel on your object. |
See Adding Geo-Channels to Objects.
| 2. | Add a Bake Point node to your Node Graph if you don't already have one. |
See Bake Point Node.
| 3. | Double-click the Bake Point node in the Node Graph to open the Node Properties. |
| 4. | In the Bake Point tab of the Node Properties, click Bake. |
The Bake Point node caches all the data in the Node Graph that is upstream to the Bake Point node and turns green to indicate it is up to date.
| 5. | Click the Export tab on the Bake Point node Node Properties. |
| 6. | In the Geo-Channel dropdown, select the Geo-Channel you want to export the Bake Point data to. |
| 7. | Enable Sync on Bake to automatically sync the selected Geo-Channel with the latest bake data. |
For more information on the Bake Point Node Properties, see Bake Point Node
| 8. | Click Export Baked to Geo-Channel. |
The Bake Point node name updates to display the name of the selected Geo-Channel in brackets.
You can add as many Geo-Channel nodes as you need to your Node Graph using the selected Geo-Channel from step 6. The exported Bake Point data from step 8 is shared using those Geo-Channel nodes.