Import a Ptex Channel or Layer
| 1. | To import a .ptx file to a channel, select: |
• Channels > Import > Import into Current Channel, or
• right-click on a channel and select Import > Current Channel.
Note: If you want to import into a new channel instead of the current layer stack, select Import > Import into New Channel from the Channels menu or right-click menu.
| 2. | To import a .ptx layer, select layers to import into and navigate to: |
• Layers > Import > Import into Current Layer, or
• right-click on a layer and select Import > Import into Current Layer.
Note: If you want to import into the layer stack as a new layer, select Import > Import into Current Layer from the Layers menu or right-click menu.
Note: Ensure that you don’t import textures into a layer you want to preserve current textures on, as importing into a layer updated the previous paint.
The Import dialog displays.
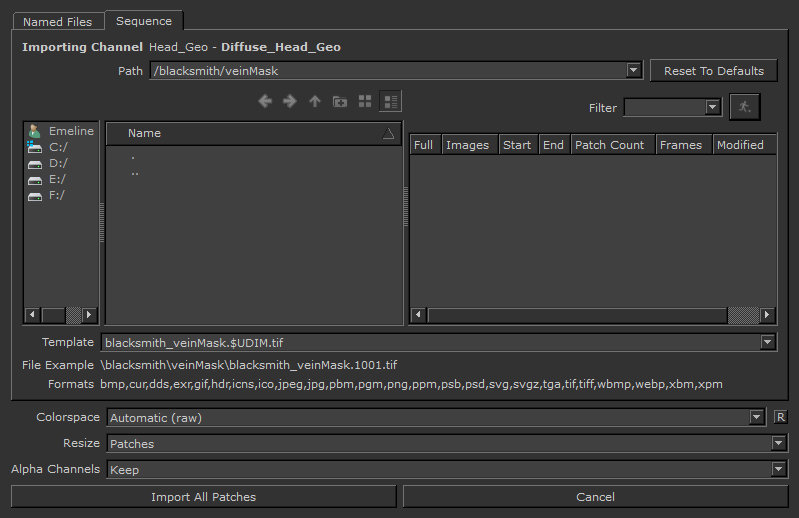
| 3. | Enter the Ptex import path in the Path field or manually browse to the location. |
Note: The Walk  button is toggled off by default. When enabled, Mari looks in all folders of the selected location (refer to the Path field in the Import dialog) and displays all folders and files in the right pane.
| 4. | You can manually select the Ptex files to import or you can set the Ptex File Template to automatically search for Ptex files that match the object, channel, or geometry variables. You can edit this line manually. As you edit, the Example Path updates with an example .ptx filename. You can use any combination of the following variables: |
• $ENTITY - imports a .ptx file, where the object name is part of the filename.
• $CHANNEL - imports a .ptx file, where the channel name is part of the filename.
• $GEO - imports .ptx files, where the individual geometry names are part of the filename.
• $LAYER - imports .ptx files, where the layer name is part of the filename.
• $COLORSPACE - imports a single .ptx file, where the colorspace used is part of the filename.
| 5. | In the Ptex Metadata field you can set whether Mari should: |
• Ignore the geometry metadata, or
• Import as New Version.
| 6. | For the Colorspace field, this is the colorspace to which the input values are converted. Automatic is determined by the file name, size, and type of data in file. |
| 7. | Click Import. |
Mari imports the images.
Note: If you are attempting to import geometry with degenerate faces into a Ptex project, Mari removes these faces on import. A warning dialog displays notifying you of this occurrence.
Note: For more information on importing or exporting channels or layers, see Channels and Layers.
To import a texture to a channel from multiple .ptx files, where multiple geometries are in an object, follow the steps below.
| 1. | Select: |
• Channels > Import > Import into Current Channel,
• Channels > Import > Import into New Channel, or
• Right-click on a layer in the Layers palette and select Import > Import into Current Layer.
The Import dialog displays.
| 2. | Enter the .ptx file import path in the Path field or manually browse to the location. |
The same $ENTITY, $CHANNEL, and $GEO variables are displayed, as described above, and displays an Example Path below the dropdown menu.
| 3. | Click All. |
The Ptex Texture Import: Face Texture Resize Options dialog displays.
If the face dimensions of the incoming import match, it displays the information, but no further action is required.
If the face dimensions of the incoming import do not match, a resize method dropdown menu is listed. The options available are:
• Resize incoming faces to existing dimensions - the imported texture sizes are changed to match those of the existing textures.
• Resize existing faces to incoming dimensions - the existing textures are changed to match those of the incoming import.
• Largest dimensions available per face - whichever texture is the largest, whether existing or incoming import, this is the texture size used. This is the default option when resizing is necessary.

| 4. | Click Ok. |
Mari imports the textures and loads them into the selected channel.
Note: The resize options are applied per face of the geometry. The Ptex Texture Import: Face Texture Resize Options dialog is also displayed when importing new geometry versions from .ptx files.