Search is based on keyword.
Ex: "Procedures"
Do not search with natural language
Ex: "How do I write a new procedure?"
Modifying Gradient Channels
Modo allows you to dynamically generate and modify gradients, rig their values and vary them over time. They enable you to carry out simple tasks, such as generating a new gradient from a waveform, as well as complex ones, like introducing noise or offsetting the value of a gradient.
Gradient Modifiers and Gradient Layers
Depending on whether you want to generate a new gradient from source gradients, or apply an effect on an existing gradient, you can use Gradient Modifiers or Gradient Layers.
You can use Gradient Modifiers to read an incoming gradient, perform an operation on them and output a new gradient. They allow you to blend gradients, generate a gradient from a mesh layer, perform mathematical operations on gradients, and so on. For more information, see Gradient Modifiers.
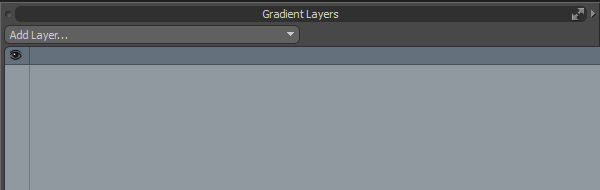
Similarly to Gradient Modifiers, Gradient Layers allow you to modify a gradient. However, instead of using a series of channel links to compute a new gradient, you can modify a gradient channel in place, by evaluating a stack of layers from the bottom up to modify the gradient curve. It works similarly to the Mesh Operations list and the Shader Tree. The base gradient is evaluated, and the value is passed up the stack to be modified by subsequent layers, until the final computed value is output from the channel. Gradient Layers can be added to a gradient channel using the Gradient Layers viewport.
Accessing the Gradient Layers Viewport
To open the Gradient Layers viewport you can add a new Data List tab to the right panel, or open a new window.
To open a tab on the upper or lower right panel, click the + sign to the right of the tab names, and in the dropdown, click Data Lists > Gradient Layers.
Note: If your right panel is narrow, a triangle is displayed instead of a + sign. In that case, click the triangle, and in the dropdown, click New Tab > Data Lists > Gradient Layers.
To open the Gradient Layers viewport in a new window:
| 1. | In the menu bar, click Layout > Windows > New Window > Data Lists. |
This opens a new window.
| 2. | Click the triangle in the top right corner and select Data Lists > Gradient Layers. |

This opens the Gradient Layers viewport.
Using Gradient Layers
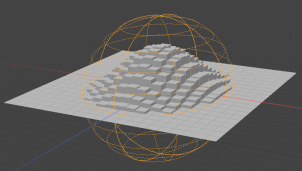
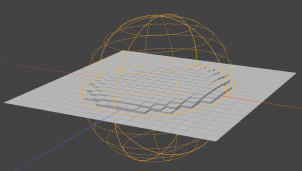
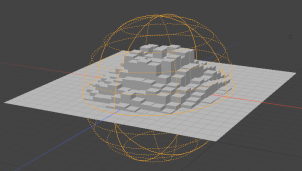
| 1. | Select a Gradient channel you want to modify. In the following example, we have a Polygon Bevel applied to a plane, modulated by a Radial Falloff. We're using the Radial Falloff's Gradient channel. |
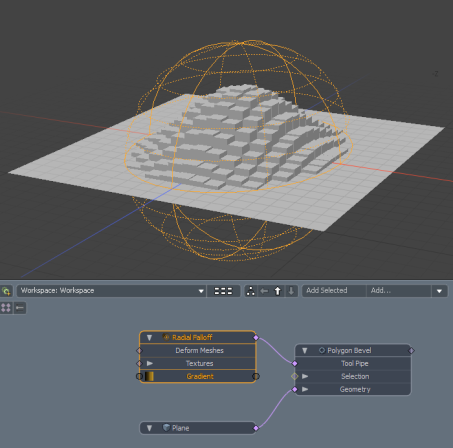
You can double-click the Gradient channel on the node to open it in the Gradient Editor:
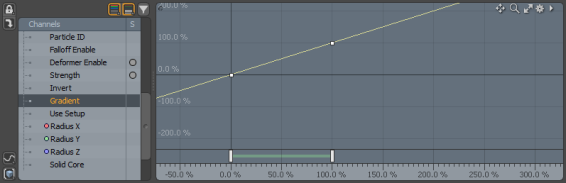
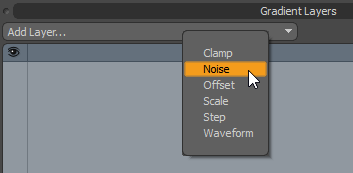
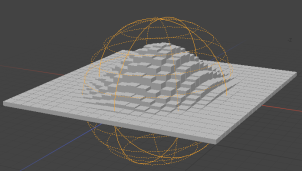
| 2. | In the Gradient Layers viewport, click Add Layer and select the Gradient Layer you want to use, for example, Noise. |
Note: For more information on the different gradient layers, see Gradient Layer Types.
Your source gradient is modified by the new layer.
| 3. | To edit the Gradient Layer's properties, select it in the stack and open the Properties panel on the lower right. Adjust the properties as needed. |
The result of the Noise layer applied with the Amplitude set to 7.0 looks like this:

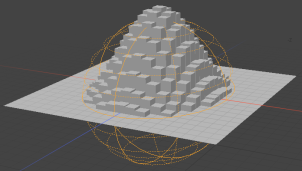
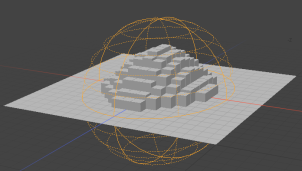
Adding multiple layers on top of each other and reordering them by dragging them around in the viewport allows you to produce a wide range of effects.
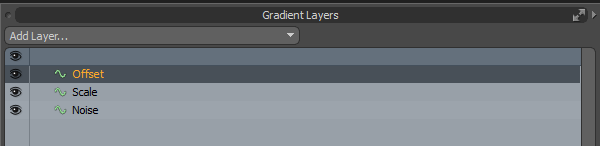
To hide a layer, toggle the Visibility ![]() button on the left. To delete a layer, select it and press Delete on the keyboard.
button on the left. To delete a layer, select it and press Delete on the keyboard.
Gradient Layer Types
The following Gradient Layers are available.
Clamp
Gradient Clamp clamps the gradient output value, ensuring that the value never exceeds the specified minimum and maximum range. You can edit the minimum and maximum values in the Gradient Layer's properties.
|
|
Gradient Clamp Layer Properties
| Minimum Value | The lower end of the clamped range. |
| Maximum Value | The upper end of the clamped range. |
Noise
The Noise layer applies Perlin Noise to an existing gradient. You can control both noise amplitude and frequency in the layer's properties.
|
|
|
Gradient Noise Layer Properties
|
Frequency |
Determines how regularly the noise occurs per second. |
|
Amplitude |
Controls how strong the noise offsets the original base gradient. |
|
Seed |
Seeds the randomness of the noise generator. Animating this value animates the noise. |
Offset
The Offset layer offsets all the values in a gradient equally, either by offsetting the value in Y, and/or the time the value is sampled in X.
|
|
|
Gradient Offset Layer Properties
|
Offset X |
Offsets the gradient value in X. This offsets the sample time, so reading the gradient at a specific time sample remaps the time sample to read the input gradient at a different time. |
|
Offset Y |
Remaps the gradient value, adding the Offset Y value to the input gradient sampled value. |
Scale
The Scale layer can be used to scale a gradient either in the Y axis, modifying the gradient's value, or the X axis, modifying the time of each value. You can also control the pivot point for each axis the scaling is performed in.
|
|
|
Gradient Scale Layer Properties
|
Amount X/Y |
The amount the input gradient is scaled in the X/Y axis. Changing X modifies the sample time of each value in the gradient. Changing Y increases or decreases the gradient values. |
|
Center X/Y |
The pivot point to perform the scale in the X/Y axis. The gradient is scaled from this position. |
Step
The Step layer rounds values in a floating point gradient to their nearest whole number. For example, 0.25 becomes 0.0, and 0.6 becomes 1.0. This can introduce a step pattern to gradients that cover a large range of floating point values.
|
|
|
Waveform
The Waveform layer generates a gradient from four standard waveform presets: Sine, Square, Triangle, and Sawtooth. You can use this to create regular repeated gradients.
|
|
|
Gradient Waveform Layer Properties
|
Type |
The type of waveform to generate:
|
||||||||
|
Amplitude |
The highest and lowest peak of the waveform. A value of 1.0 produces a low of -1.0, and a high of 1.0. |
||||||||
|
Frequency |
Determines how regularly the oscillating motion occurs per second. A value of 1.0 produces one up and down cycle per 1.0 time step. |
||||||||
|
Offset |
Offsets the gradient output value in the Y axis. |
Sorry you didn't find this helpful
Why wasn't this helpful? (check all that apply)
Thanks for your feedback.
If you can't find what you're looking for or you have a workflow question, please try Foundry Support.
If you have any thoughts on how we can improve our learning content, please email the Documentation team using the button below.
Thanks for taking time to give us feedback.