Camera Images
The Camera View properties include a number of features for using images with a camera. These are:
• Background image: This fills the camera frame and is rendered behind any geometry that is visible from the camera.
• Foreground Image: This fills the frame and is rendered in front of all geometry. You can also use this as a render mask.
• Overscan: Resize the foreground and background image without changing the aspect ratio.
• Camera Image Plane: You can place any number of image planes between the foreground and background positions at an adjustable distance from the camera viewpoint. An image can then be added to each plane as required.
• Apply EXIF data to Camera Settings: If an image file contains the necessary EXIF data (image metadata), you can set the camera Focal Length to equal the image focal length.
• Physical Sun from EXIF data: If EXIF data is available, you can auto-generate a Physical Sun directional light in the scene to match the sun in the image.
• Resolution Override: The render resolution can be defined in the camera.
For more details on the Camera View Property options, see Camera Items.
Foreground and Background Images
In addition to image planes, Modo lets you add a foreground and background image to a camera. A foreground image appears in front of geometry and is only visible when you render.
Note: The foreground image is hidden when editing so as not to obscure other items.
Background images are drawn behind other items and can be seen from the camera view when editing. To add a background image, see Adding a Background Image. Loading a background image enables Camera Matching and the use of EXIF data (if present).
Adding a Foreground Image
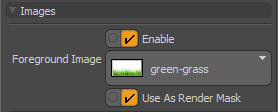
You can add a foreground image to any camera using the Foreground Image selector in the Foreground Image section of the Camera View properties.
| 1. | Select the camera. In this example we are using a camera that is facing some geometry to illustrate the effect of the foreground image. |
| 2. | Click the Camera View tab of the camera item's Properties. |
| 3. | In the Foreground Image section, click on the Foreground Image selector. |
| 4. | Click the Add Clip dropdown and select (load image). |
This opens the image file browser.
| 5. | Browse to and select the background image. Click OK. |
The image is loaded into Foreground Image.
In this example, we are using a transparent .png image with grass along the bottom. By default, the Foreground Image is enabled. If the Enable option is toggled off, the image is not displayed in your rendering or removed from your scene.
| 6. | To see the image in place, press F9 to open the Render Display. |

You can see the foreground image with the world geometry rendered behind it.
Note: To render from the camera, it must be set as the Render Camera.
Using a Foreground Render Mask
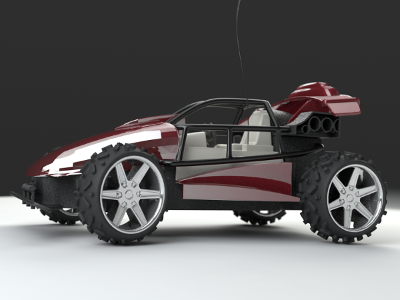
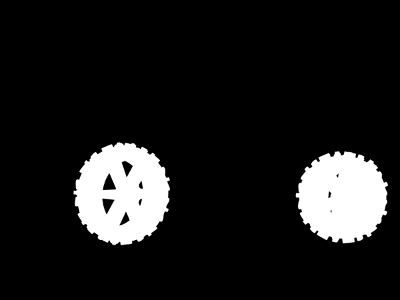
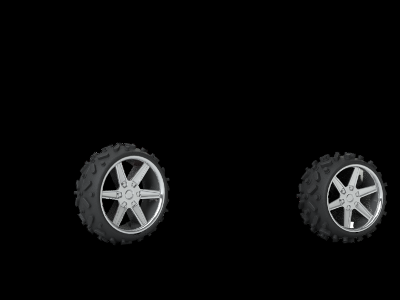
Check Use As Render Mask to use the Foreground Image to mask the render output. This is useful if you want to quickly re-render part of the image, whilst hiding parts that don't need to be updated. Modo uses the luminosity of each pixel in the image to determine the pixel's opacity. A white pixel is rendered as transparent, black is fully opaque, and all shades in-between are semi-transparent.
The images below demonstrate the use of a mask.
|
|
|
| Original model, fully rendered. | Camera foreground image used as mask. | Masked render output. |
You can paint a mask manually or use an external application to create one.
Note: In the example above, the mask was created by hiding unwanted geometry and rendering the wheels to an Alpha layer.
Overscan
If you want to scale an image to fill the camera's frame without changing the image aspect ratio, you can use Overscan. This works with both foreground and background images. Edit the Overscan value as a percentage of the original image size.
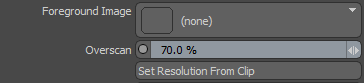
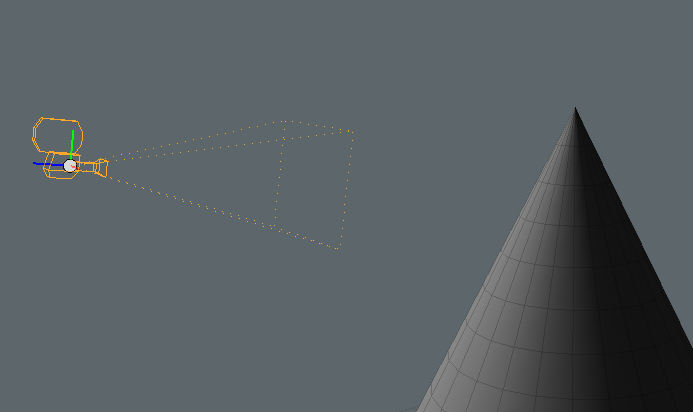
Image Planes
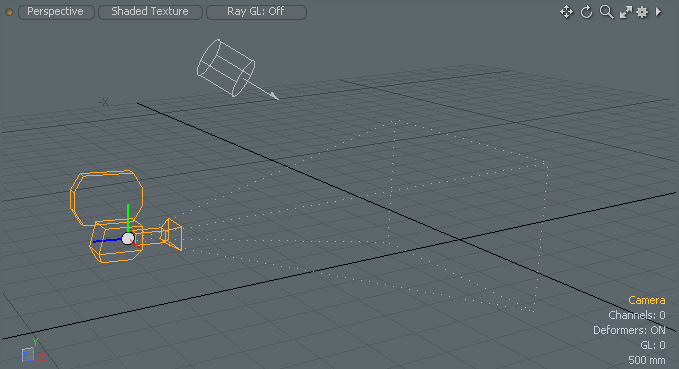
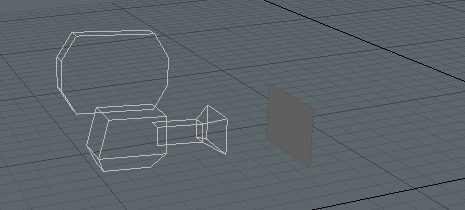
Modo can generate a rectangular polygon with size, position, and rotation to match the image plane, projected from the camera at a given depth. This is useful if you want to layer images in front of the camera and insert geometry between the layers. The image below shows an example of three image planes that have been added to a camera. Notice how the polygons are scaled to fit the camera frustum.
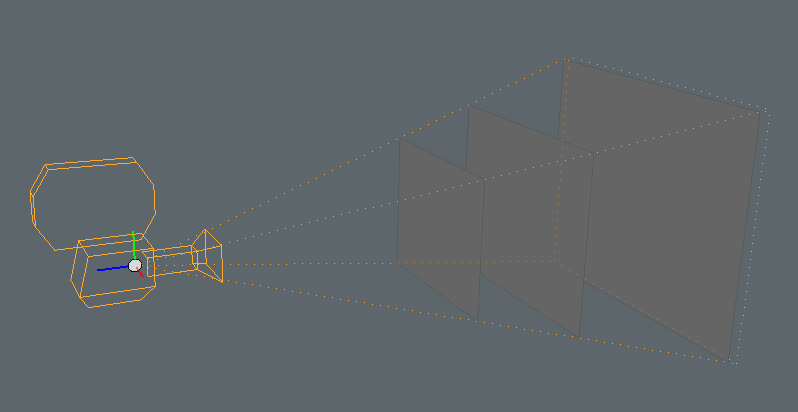
Note: To layer images, you must make use of transparency, similar to the foreground image shown above. An image without transparency fills the frame and hides items behind it.
Image Planes are added using the Add Camera Image Plane button on the camera's Camera View properties.
Adding an Image Plane
The Add Camera Image Plane button adds a quad (four-sided) polygon at an adjustable depth from the camera viewpoint.
| 1. | In Setup mode, select the camera to use in the Item List. |
Tip: You can also select a camera by clicking on it, when in the Setup layout in Items mode.
| 2. | Ensure the 3D viewport is in Perspective mode with a clear view of the camera. |
| 3. | Click the Camera View tab in the camera item's Properties. |
| 4. | In the Background Image section, click Add Camera Image Plane. |

You can see the new image plane in front of the camera.
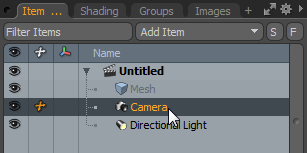
A corresponding image plane item called ImagePlane, is added to the Item List.
| 5. | Adjust the Depth value to move the image plane to the required distance from the camera. |

The quad will automatically scale to fit the camera frustum.
| 6. | Add more image planes as required by repeating steps 2-5. |
| 7. | You can add a material with an image to each image plane as needed. |
Note: To layer images and geometry, you must use images with transparent regions that reveal background detail.
EXIF Data
An image file produced by most modern digital cameras now includes metadata to store the camera settings at the time the image was taken. The additional data is known as interchange information. A common standard for encoding images with interchange information is the Exchangeable Image File (EXIF) format. EXIF data includes settings such as ISO speed, shutter speed, aperture, white balance, camera model and make, date and time, lens type, and focal length.
Note: At the time of writing, EXIF is limited to the .jpg and .tif image formats.
In Modo, if you are using a background image that contains EXIF data, you can use properties from the image to set the focal length or generate a Physical Sun directional light in the scene.
Note: For non-EXIF images, the options are grayed-out.
Using EXIF Data to Set Camera Properties
You can set the focal length of the Modo camera to match the focal length of the image. Open the Camera View tab in the Item Properties, and click Apply EXIF Data to Camera Settings in the Background Image section.

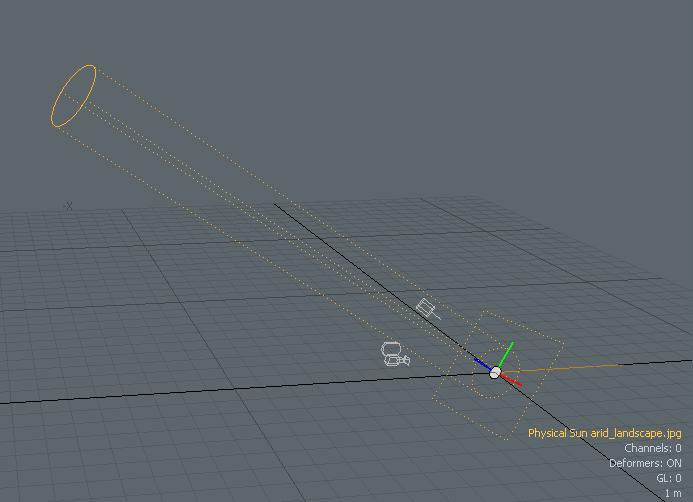
Using EXIF Data to Create a Physical Sun
Matching the lighting in a background image can be challenging. Modo can help you by auto-generating a Physical Sun directional light to mimic the sunlight in the image. This is calculated using the time, date, and location information that is stored in the EXIF file.
| 1. | Open the Camera View tab in the Item Properties. |
| 2. | In the Background Image section, click Physical Sun from EXIF data. |
A Physical Sun directional light is added to the scene.
Resolution Override
The Camera View properties include a Resolution Override section to customize the render resolution when the camera is used as the render camera. Check Override Render Resolution and adjust the Width and Height values as required.
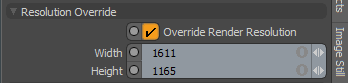
The Set Resolution from Clip button turns on Resolution Override and uses the dimensions of a selected image. If you have loaded a Background Image, its resolution is used. This is useful when performing Camera Matching. Without a Background Image, the resolution of the selected image in the Images/Clips List is used.