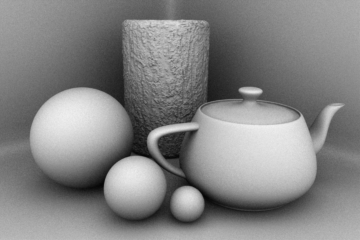
Rendering is the act of converting the scene information into a bitmap image by evaluating all the geometry and lighting information in a given file. Generally, the resulting rendered image is a fully raytraced and shaded image with full shadows, reflection and the like, much like a photograph depicting an entire scene when taking a picture with a camera. In Modo, these images are the result of what are called render outputs, the visible representations of the full scene evaluations. Each render output is a separate layer in the Shader Tree and produces its own image layer as part of the render calculations. Every time one of the Render Commands is invoked, all of the render output layers are simultaneously calculated and represented in the Render Display viewport. The different layers can be viewed by choosing one of the specific Output options within the display window.
Occasionally, you only need a subset of the full evaluations, such as the diffuse color layers without any shadows. Modo offers many different Render Output types useful in a variety of situations ranging from purely diagnostic, to specific compositing utility in an external application. A default scene automatically includes a Final Color and Alpha output which is fine for most situations. Additional layers can be added from within the Shader Tree viewport itself, by clicking Add Layer > Render Outputs. This adds an additional layer to the top of the tree. You can then right-click the Effect column of the render output for a pop-up context menu that allows you to select from the alternate output types. The different Lighting render outputs are described below.

The Ambient Occlusion output generates an occlusion image where occluded areas, such as crevices and other inaccessible areas of a scene shade darker, while open areas render lighter colors, approximating an overall global illumination type of shading. Grainy renders can be smoothed out by increasing the Occlusion Rays value. You can control the density of the occluded areas with the Occlusion Range option. For more information on Ambient Occlusion, see the Render Outputs topic.
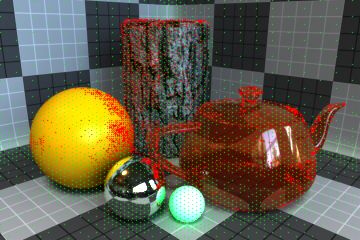
The settings in the Render Item > Properties > Global Illumination tab allow you to specify values that the irradiance cache uses to shade a rendered scene. The IC Positions output displays the pixel positions used in generating the shading based on the irradiance cache values. Green points are positions sampled during the initial pass, red points signify additional sample generated by the Interpolation Values setting. Useful in analyzing various IC settings.
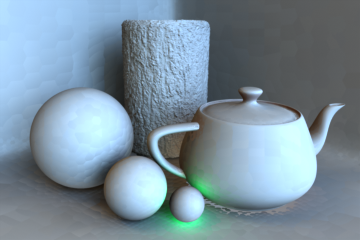
The settings in the Render Item > Properties > Global Illumination tab allow you to specify values that the irradiance cache uses to shade a rendered scene. The IC Values output displays the diffuse values calculated during the initial irradiance cache Render Pass. The image appears splotchy as each irradiance sample is not blended with nearby samples; giving one a much better understanding of the area affected by individual IC positions. Useful in analyzing various IC settings.
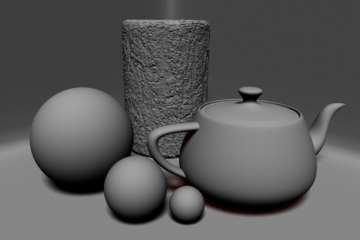
The Illumination (Direct) output generates a channel exclusive to the illumination in a scene from all direct light items such as distant lights, area lights, point lights and spot lights, independent of all other illumination types and surfacing attributes. For information on lights, see Light Types
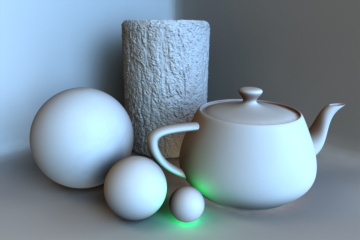
The Illumination (Indirect) output generates an image exclusive to the illumination in a scene from all indirect sources, such as image-based lighting and luminous polygons, independent of all other illumination types and surfacing attributes.
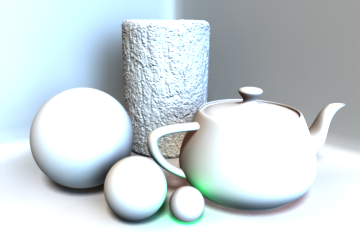
The Illumination (Total) output generates an image of the full illumination evaluation in a scene, including shadows cast by direct sources, but independent of all other surfacing attributes.
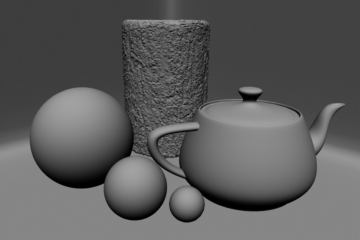
The Illumination (Unshadowed) output generates a channel of the full illumination in a scene excluding shadows cast by direct light sources, independent of all other surfacing attributes.
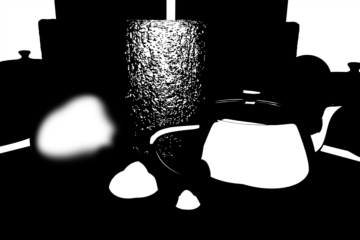
The Reflection Occlusion output renders an image that is strictly black and white, determining if a reflection ray off of an object has hit any other geometry in the scene. White if it has and black if it has not. The areas that appear as white here would be shaded with the background environment in a Final Color render.
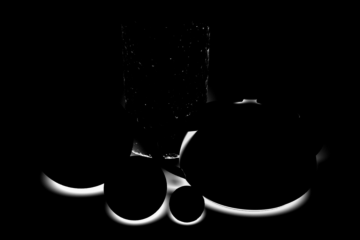
The Shadow Density rendering output renders a channel generated from the density of all direct light shadows in Modo, excluding color shading or texture. The darkest areas of shadow render as white, ramping toward black for the areas that are fully illuminated. When rendering in layers, it is very useful to have shadows rendered separately, giving you control of color and transparency. You can easily invert this channel in an image-editing application and layer it over the unshadowed render set to Multiply, giving control over how dark the shadows are based on the layer's transparency.
Render outputs are incredibly useful when you wish to compose the generated layers individually in an external application, such as Photoshop, After Effects, Nuke or Fusion. This can aid in tweaking color, among other settings as a post process without requiring additional render time. The question most often asked is which render outputs combine to equal the final color output. The answer is Diffuse Shading (Total) + Transparent Shading + Reflection Shading + Specular Shading + Subsurface Shading + Luminous Shading = Final Color, where each successive layer is added to the layer below in the composition (also called linear dodge). Rendering each layer at a gamma of 1.0 and then combining them and adding the gamma back to the fully composed layers produce the best results.
You may also render out simultaneous alpha channels for each item in a scene by creating item masks for each and placing a render output set to Effect > Alpha (or simply adding them to existing Shader Tree masks). Then each time a render command is invoked, all active render outputs get generated simultaneously.
