Spot Light
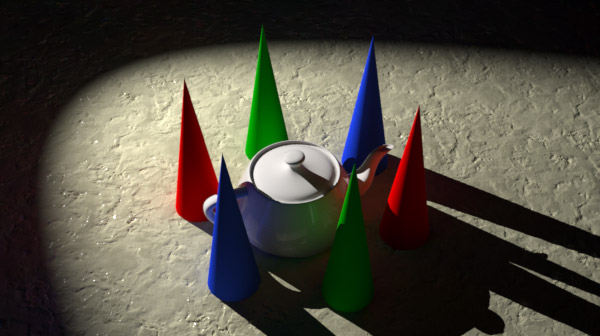
The Spot Light looks and acts like a real world spot light and obeys the physical law of inverse square falloff of intensity. Light radiates from a single point outward in a cone shape, widening the further the subject is from the light itself. As with all items, the spot light controls are located on the Properties tab when the light is selected. Spot lights have Position and Rotation options, as well as controls for the intensity of the light, shadow type, and other settings covered fully below. Using the Transform tool with the Spot Light selected provides interactive handles for editing position, rotation, cone, and soft edge angles.

To control the lights color, shadow color, and other material-related properties, refer to the Light Material topic.

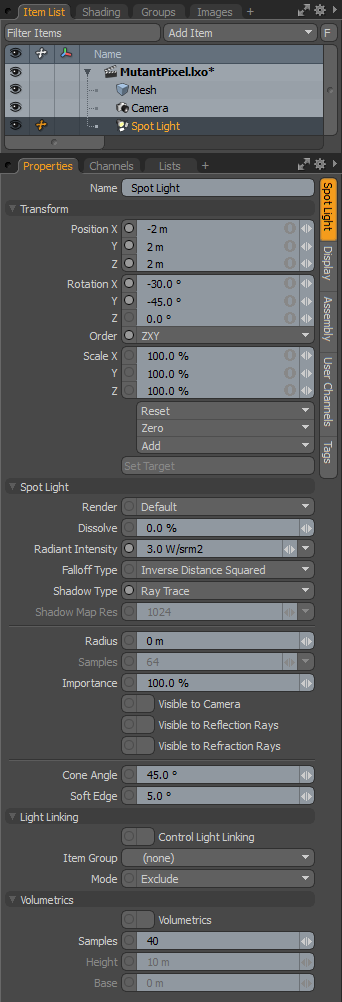
• Name - this data field displays the current item name. You can easily change it by clicking within the field and typing the new name.
The following Transform options are available for the Spot Light:
• Position - allows you to numerically position the light item in XYZ space.
• Rotation - allows you to numerically set the rotation of the light item.
• Order - allows you to set the order that the rotations are applied to the light item. Changing the order that rotations are applied can sometimes help to reduce or eliminate "gimbal lock".
• Scale - allows you to numerically set the size of the light item. This scale transform is a multiplier of the Height and Width options.
• Reset - resets the selected transform values to (0,0,0) returning the items back to their default state.
• Zero - resets the chosen transform property values to '0', leaving the Center position and Mesh position intact. This is done by adding an additional transform item to the Mesh Item's channels with an inverted version of the current values. This is useful to allow, for example, a joint to have a base value of 0,0,0 but still be located away from the World Origin.
• Add - adds additional Transform items to the associated item or, if they do not yet exist, it simply adds them. Transform items are the channel groups that store the actual transform values, controlling any item's position, rotation, and/or scale. You can add as many transform items as you want for any transform property desired. Adding additional Transform items produces an additive effect where each transform group is evaluated before the next, and so on. Additional item transforms are evaluated in their order in the Channels list, from the bottom upwards.
Note: It should be noted that by default, new items do not have any transform items associated with them (even though they are visible here within the Properties panel). This is useful as an optimization, as only the necessary transforms are created on an as-needed basis, reducing scene overhead.
There are several actions that add these base transform items. One is by simply transforming the target item with one of the various transform tools or by editing the values input fields. This action causes the particular transform item to be added automatically to the Channels viewport list. Due to this fact, you may need to specifically create item transforms when Referencing, because in order to override the channels in the master scene, they must first exist.
• Set Target - by selecting the Light item, and a single additional item in the item list, and then pressing Set Target, this function allows you to target specific items in a scene, automating the rotation of an item, so that it continuously points toward the targeted item. Once activated, additional options appear:
• Remove Target - removes the target link between the two items.
• Enable - toggling this option off temporarily disables the targeting function while retaining the link between the items.
• Set Focus Distance - sets the focal distance for DOF when targeting camera items to other items.
• Roll - offset the item's rotation angle away from the target.
• Time Offset - time the offset, by a number of frames, to set how the light follows the target item. It can either be delayed behind it with a negative value, or run ahead of it with a positive value.
The following Spot Light options are available for the Spot Light:
• Render - allows you to select from three choices: when set to Default, you can enable/disable lights using the visibility function ![]() of the item list. When the light is visible, it contributes to the final rendered scene and, when invisible, it does not. On some instances you may prefer to fix this state, setting the light as On (enabled) or Off (disabled) regardless of visibility. Also useful for workflows that auto toggle visibility, saving you from manually enabling lights for test renders.
of the item list. When the light is visible, it contributes to the final rendered scene and, when invisible, it does not. On some instances you may prefer to fix this state, setting the light as On (enabled) or Off (disabled) regardless of visibility. Also useful for workflows that auto toggle visibility, saving you from manually enabling lights for test renders.
• Dissolve - when the Dissolve function is set to any value above 0%, the light's overall effect on the scene attenuate as the value increases. When set to 100%, the light's effect on the scene is completely disabled. This function provides a convenient way to dim a light's effect within a scene.
• Radiant Intensity - controls the intensity of the light and uses the standard physically-based unit of Watts per volumetric meter. As you would expect, increasing this value increases the amount of light coming from the Spot Light and decreasing the value reduces the light intensity. With spot lights, the area of light generated in the scene is very small and therefore large values are likely necessary to illuminate the scene how you would expect.
Tip: Keep in mind that a light's intensities and falloffs adhere to real world scale values, scenes that do not adhere to a real world scale factor likely require intensities to be adjusted accordingly to achieve appropriate illumination.
• Falloff Type - light in the real world isn't a uniform brightness; its intensity diminishes with distance. Photographers may be familiar with the concept that a light is a quarter as bright at twice the distance away, known as the Inverse Square Law. Modo lights default to this setting, providing a realistic way to light a scene. However, there are times when you may not wish to have this behavior, so three falloff type options are provided:
• None - no falloff; light is consistently bright across its distance.
• Inverse Distance - light is half as bright at twice the distance.
• Inverse Distance Squared - the default behavior; light is a quarter as bright at twice the distance.
• Shadow Type - offers options between Ray Traced, None and Deep Shadow Maps. In situations where you want a light to cast a shadow, Ray Traced gives the most accurate results. The traditional hard edge of ray traced shadows can easily be softened using Spread Angle value in any light item. Deep Shadow Maps are useful for volumetric lights and fur rendering, where a great deal of calculations are required to produce shadows; producing similar results to ray traced shadows while reducing the number of calculations.
• Shadow Map Res - sets the resolution for the calculated deep shadow map in pixels. This option is only available when Deep Shadow Maps is selected.
• Radius - when above '0', gives the direct light some size. The default value of 0m results in crisp hard-edged shadows. An increased Radius produces a soft-edged result; the larger the Radius, the softer the specular highlight and shadow is. Keep in mind that increasing this value too high results in noisy shadows unless you also increases the number of Direct Illumination Light Samples in the Render item, or the light's Samples value when adaptive sampling is disabled.
• Samples - when the Direct Illumination option is set above zero, the Samples value is grayed out as there is no need for you to adjust it. The number of samples are dynamically allocated using the adaptive light sampling method. This provides you a global control to adjust overall shading and shadow quality. When the Direct Illumination option is set to '0', this disables adaptive sampling and you can manually adjust this Samples value to control light and shadow quality per light.
As the size increases, additional samples are required to smooth out the resulting soft specular shading and soft edge shadows. If they appear grainy, increasing this sample setting is the most likely solution. The default value is a good starting point for balancing speed and quality. As the size increases or the resolution of the image increases you can drive this number higher to account for any grain that appears. Keep in mind that increasing the number of samples also increases render times.
• Importance - Modo uses an adaptive light sampling method to evaluate lighting in a scene. This option allows you to control illumination sampling using a single global value, producing better results in less time. In rare cases, where adaptive sampling isn't producing the desired outcome, an individual light's Importance value can be adjusted, acting as a multiplier to the lights evaluated importance. Changes in Importance are relative to other lights in the scene, influencing it one way or the other as more or less important, in effect increasing or decreasing its sample allocation from the total number of possible Light Samples, all while remaining fully unbiased.
• Visible to Camera - you can enable this option to make the light itself visible to cameras. The size of the visible light is determined by the Radius attribute.
• Visible to Reflection/Refraction Rays - you can enable either or both of these options to make the light itself visible to reflective and/or transparent surfaces. The size of the visible light is determined by the Radius attribute.
• LPE Label - you can provide a label name here, which appears as the label for any Light Path Expression output you generate for this light. See Rendering with mPath.
• Cone Angle - spot lights emit their light in a cone shape that originates from the light's position toward the default Z direction. The Cone Angle defines the shape of the cone that is generated; larger values produce wider conical shapes and therefore larger areas of illumination, while smaller values produce tighter cones with smaller areas of illumination. A setting of 360° produces light similar to a point light radiating in all directions equally. This value can also be set interactively with the Transform tool in the 3D viewport.
• Soft Edge - defines an illumination falloff inside the edge of the spot lights cone producing a more natural look. The soft edge is contained within the Cone Angle, and attenuates illumination at the edges. A 40° Cone Angle with a 10° falloff would really be a 20° cone angle of full illumination that would falloff 10° across the outer edges of the cone. This value can also be set interactively with the Transform tool in the 3D viewport.
The following Light Linking options are available for the Spot Light:
• Control Light Linking - illumination on a surface is generally controlled by the Shader item in the Shader Tree. Within the shader, it's possible to control a light's effect on a surface with Light Linking. As its name describes, it links the illumination affects of a group of lights to specific items or material groups. When the Control Light Linking option is enabled on a light item, it acts as an individual light-specific override to the shader, allowing you to Include or Exclude a specific light's illumination on a group of items.
• Item Group - determines the specific group of item layers in the scene that is affected by the Light Linking. The group needs to be defined in the Groups viewport panel. This can be done easily by selecting the target items while in Items mode and then, in the Groups palette, click the New Group button. Define a name for the group in the pop-up dialog and choose the From Selected Items option and click OK to accept. Once the group is defined, select the named group here.
• Mode - determines whether the light is Included, meaning it only affects the items in the specified item group, and Excluded by all other surfaces, meaning it is ignored by any items in the specified item group.
The following Volumetrics options are available for the Spot Light:
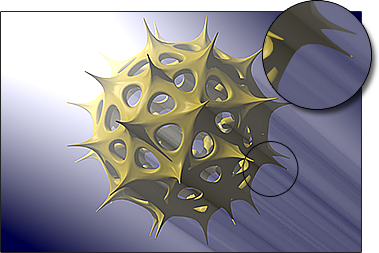
When light shines on a particular matter suspended in the air, such as water vapor, smoke, or even pollution, the light rays become visible. In computer graphics, this effect is known as "volumetric lights". Their affect can be subtle or pronounced and, either way, it can add a good amount of believability and atmosphere to renders. Additional settings related to volumetrics can be found in the Light Material item.
• Volumetrics - toggles the effect on or off. When enabled, the Samples, Height, and Base options become available.
• Samples - any objects that intersect the light beam volume cast shadows through it. You may have witnessed this when sunlight shining through the clouds creates streaks of light, sometimes referred to as "god rays". The Sample setting defines the degree of accuracy that Modo uses to calculate these shadows through the volume; higher numbers of samples give smoother and more accurate results, while lower values render more quickly but become increasingly grainy. The example images below demonstrate the difference between 32 samples, on the left, and 256 samples on the right.
|
|
|
• Height - this is the depth of the volume, as measured extending out from the front of the light. A setting of 20m extends the rays 20m from the light, including falloff.
• Base - sets the circular region around the light where volume effects originate from.


