Direct vs. Procedural Modeling
There are many ways to tackle each modeling project using Modo. In this section I’d like to briefly discuss the difference between the two main types of modeling: Direct Modeling and Procedural Modeling.
This video takes a quick look at procedural modeling.
I’ll start with direct modeling since that is the most common type of modeling and what we’ve been working with so far.
Direct Modeling
Direct Modeling is creating and manipulating geometry directly using transform, deform and mesh edit tools in the 3D Viewport. Any changes made to the geometry are destructive, meaning once you commit to the action, you can’t go back and edit the values of the previous operations.
For example, if you wanted to change the number of segments you added to the cube you created in Working with Tools, you couldn’t simply reopen the properties for the cube.
Direct modeling has been the core approach to modeling in Modo since its first release and what has drawn so many artists to use it. 90% of the work I do involves direct modeling, and I still find it to be the quickest way to accomplish my modeling projects. So although its ‘destructive,’ it’s still my method of choice for what I create.
Procedural Modeling
There has been an industry-wide growth in using procedural workflows over the past few years, and the Modo toolset has expanded to offer procedural modeling as an alternative approach to creating assets.
Procedural Modeling enables you to create assets with a non-destructive workflow, allowing you to perform topological edits to a mesh, which can be modified, rigged, and even animated. You can easily revert or modify operations, keeping the rest of the operations intact.
Let’s create a procedural cube and adjust some of its attributes to get an apples to apples comparison between direct and procedural modeling.
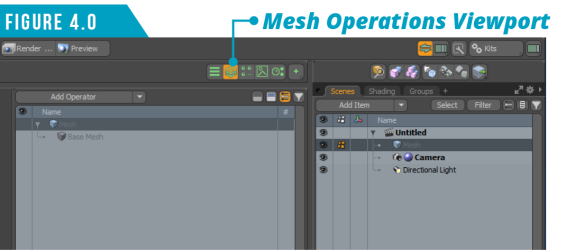
To enhance our workflow, let’s display the Mesh Operations List in our workspace. Open the Right Viewport using the Viewport Switcher Pie Menu (Alt+Spacebar), and select the Mesh Operations Viewport as seen in (Figure 4.0).
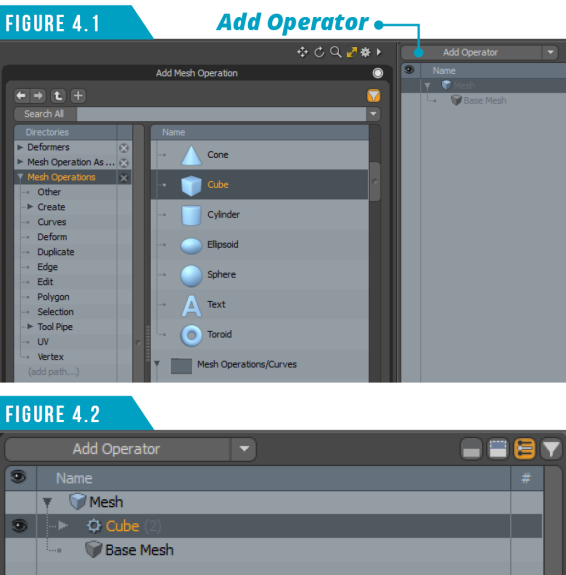
Click the Add Operator Button, and then locate the Cube mesh operation (meshop) (Figure 4.1). Double click on the Cube meshop to add it to the Mesh Operation List (Meshop Stack) (Figure 4.2).
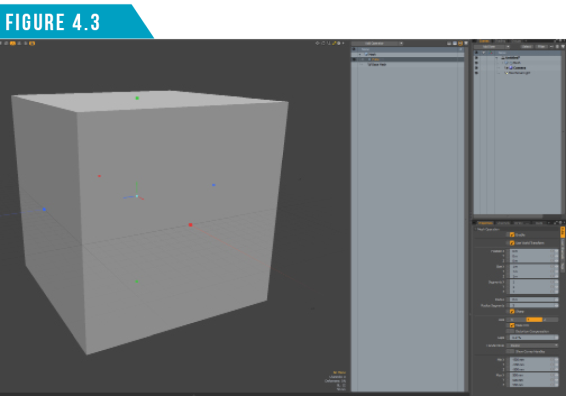
You should now have a 1-meter procedural cube primitive in your scene (Figure 4.3).
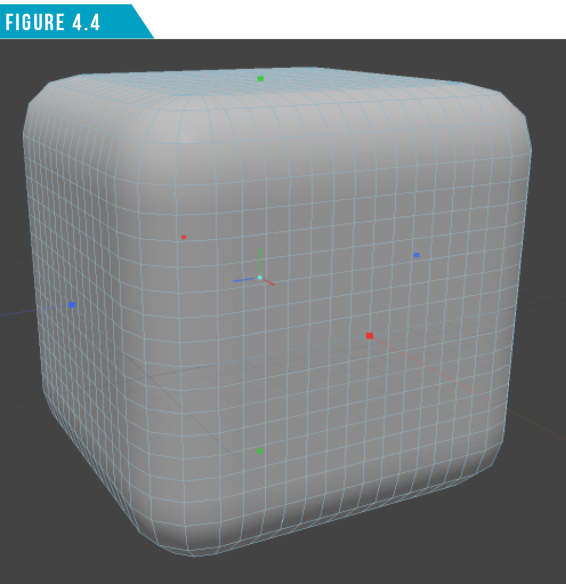
Adjust the X, Y and Z Segment count to 12 and the Radius attribute to 200 mm in the Properties Viewport. Your procedural cube should now look like (Figure 4.4).
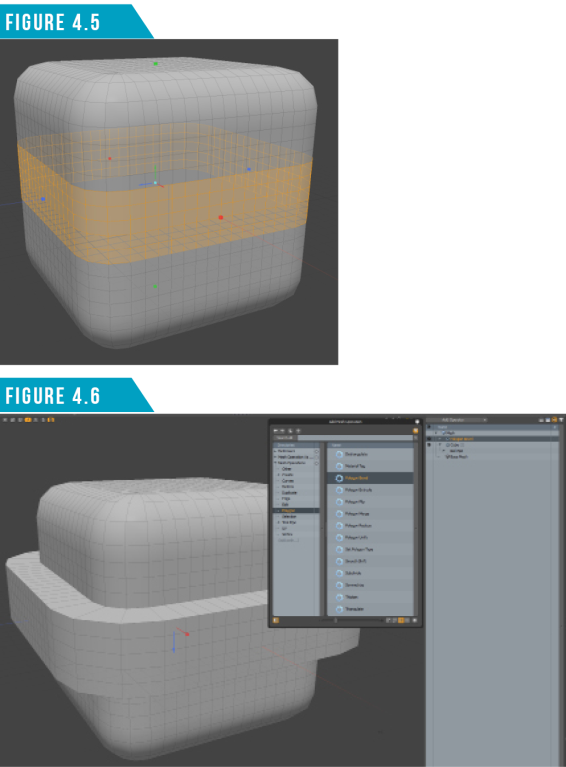
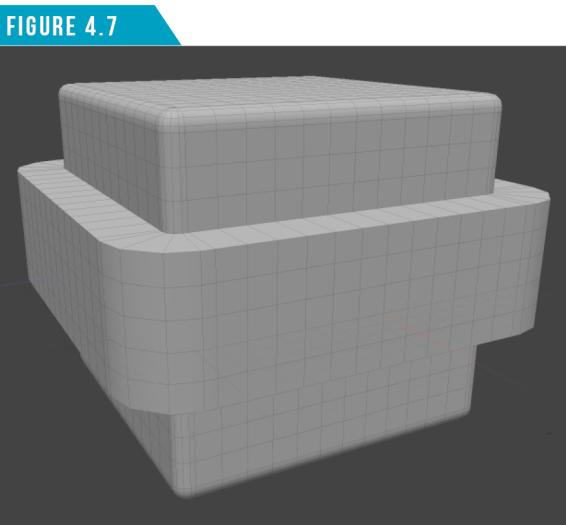
Select some polygon loops in the center of the cube as seen in (Figure 4.5), add a Polygon Bevel meshop to the stack and then adjust the Shift attribute for the Polygon Bevel to 150 mm (Figure 4.6).
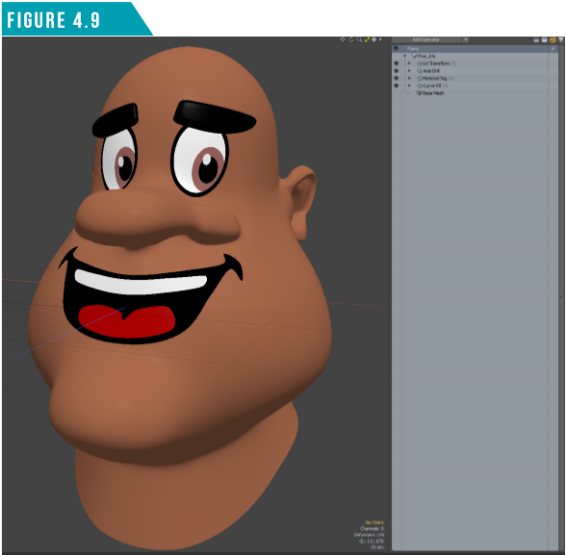
Select the Cube layer in the Mesh Operations List and adjust its Radius attribute to a value of 50 mm. Your procedural cube should look like (Figure 4.7).
Although this example is extremely basic, it should demonstrate just how powerful procedural modeling can be. Using direct/destructive modeling, you wouldn’t have been able to go back and adjust the radius of the cube by simply changing a single value.
It’s important to understand that the mesh operations’ order of evaluation is determined by the order of mesh operations. Modo evaluates mesh operations at the bottom first and proceeds upwards in the list.
Warning: Procedural meshes can’t use direct modeling tools.
That’s right. Procedural meshes contain no active data to operate on in the eyes of direct modeling tools. If you look over at the Model Toolbar when a procedural mesh is selected, all of the tools will be ghosted (Figure 4.8).

Fortunately, most of the existing modeling tools have procedural counterparts that boast full feature parity. I’ve found that I can tackle some modeling challenges much more quickly using procedural modeling.
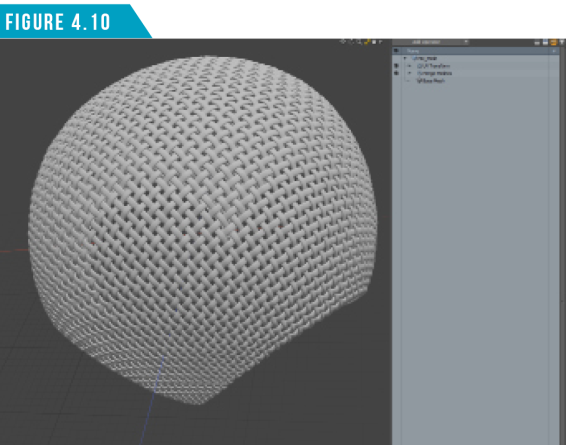
For example, creating 2D animated faces that conform to a 3D head is easy to set up using Curve Fill, Axis Drill and UV Transform mesh operations. (Figure 4.9) shows the result of this meshop stack on a toon character.
The UV Transform meshop has all sorts of uses, such as deforming a woven mesh into a spherical shape as seen in (Figure 4.10).
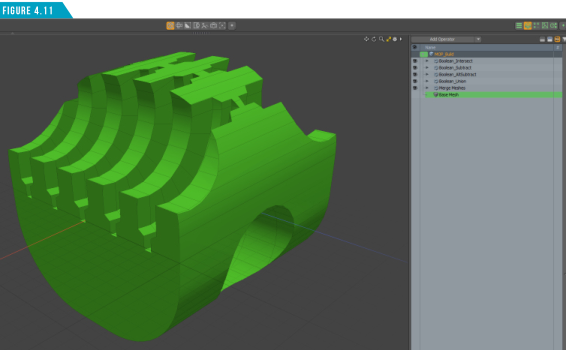
Live procedural booleans (Figure 4.11) are my favorite set of features when working with procedural modeling. They allow for true freedom while working with Booleans in Modo. Being able to make changes to the base mesh as well as the driver meshes at anytime has brought me back to working with booleans after years of avoiding them due to feeling restricted with direct modeling. I highly recommend giving them a try.
If you’re used to traditional modeling, working with the procedural modeling system can take a little bit of practice to become comfortable using it, but it’s worth the time invested. Adding procedural modeling to your toolkit will open up the flood gates to all sorts of possibilities.
This topic only scratches the surface on working with the procedural modeling system, but you should have enough information to get started. Remember that the order of operations is from the bottom up, and you can add operations using the Add Operator Button. This will open the Mesh Operations Preset Browser, where you can easily locate the operator you’d like to use.
|
||
|
Explore what procedural modeling has to offer by spending some time creating multi-layered procedural meshes. Change the order of the operations by clicking and dragging them to new positions in the list. Select meshop layers lower on the list, change their values and see how it affects the final results. |