Subdivision Surfaces (SubD)
I’d be doing Modo, the entire development team and each of you reading this guide a disservice if I didn’t introduce Subdivision Surfaces (SubD). In my opinion, SubDs are what put a spotlight on Modo when it was first released and to this day, Modo is still “the” tool of choice for working on subdivision surface meshes.
Subdivision Surfaces is a refinement algorithm that creates a smooth curved surface from a coarse polygonal mesh. The original polygonal mesh is often referred to as the control cage, or simply the cage. When a polygonal mesh is converted to subdivision surfaces, it produces a smoother mesh made up of more polygonal faces.
This video takes a quick look at working with Subdivision Surfaces in Modo.
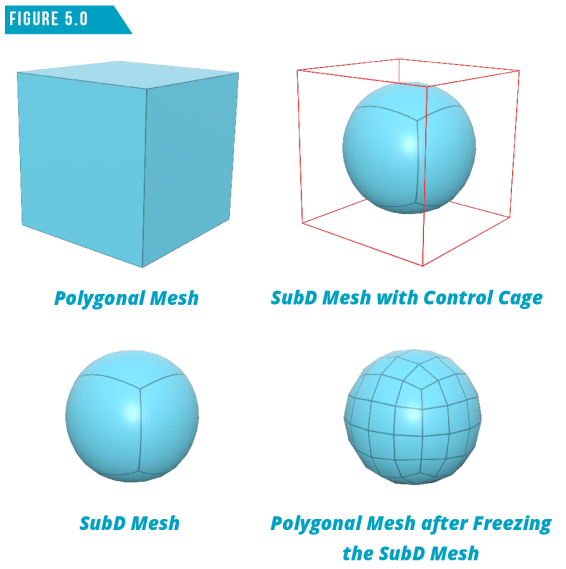
Unlike the cube we subdivided with the Subdivide command (D) in Working with Tools, converting to subdivision surfaces is nondestructive and can be toggled on and off using the keyboard shortcut (Shift+Tab). If you’d like to permanently convert a SubD mesh to a polygonal mesh, use the Freeze command (Geometry/Freeze).
(Figure 5.0) shows a cube in both polygonal and SubD mode. Modo offers two flavors of SubDs, Modo Subdivs (Tab) and Catmull-Clark SubDs (Shift+Tab). The most commonly used subdivision surface algorithm is Catmull-Clark devised by Edwin Catmull and Jim Clark.
While Modo Subdivs (Tab) are an acceptable SubD algorithm, Catmull-Calark SubDs (Shift+Tab) are the industry standard, so I recommend using them in every SubD asset you create.
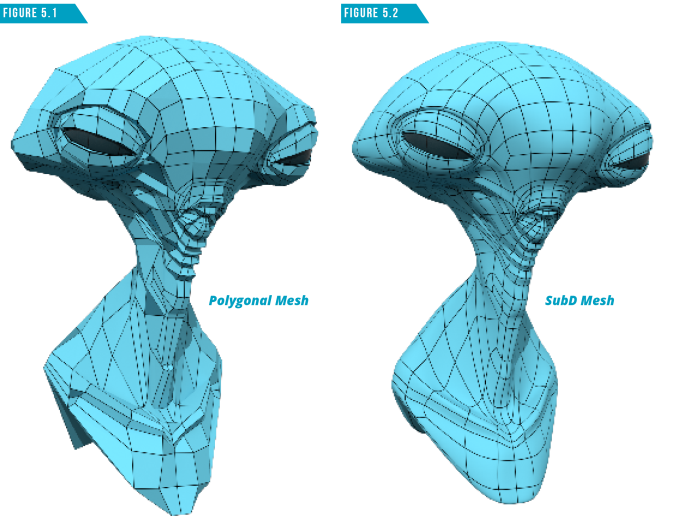
Although Catmull-Clark subdivision surfaces accept non-quad polygons (tris and ngons), it’s recommended that 3D meshes consist primarily of quad faces. The alien model in (Figure 5.1) is an all-quad mesh seen in the coarse polygonal state, and (Figure 5.2) shows the smooth SubD state.
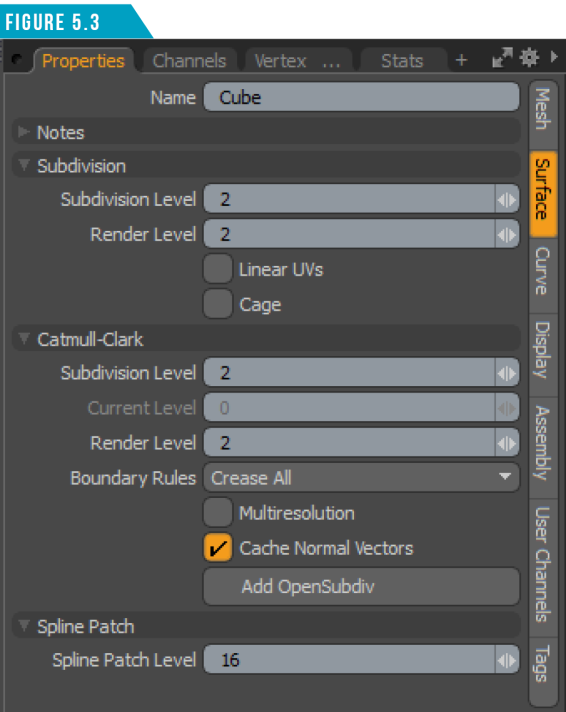
One of the key benefits to working with subdivision surfaces is the ability to adjust the level of subdivision. This gives you full control over the density of the mesh at render time. You can adjust the Subdivision Level using the attributes found in the Surface tab of the Properties Viewport (Figure 5.3).
Whether you’re modeling, rigging, animating, or generating the UVs for a complex smooth object, you’ll almost always have an easier time manipulating and adjusting the polygonal cage of the mesh.
Topology plays a role when creating any 3D asset, but a greater attention to clean topology should be given when modeling with subdivision surfaces. As powerful as SubD geometry can be, it’s important to remember that with great power, comes great responsibility.
Polygonal models are much more forgiving than SubD meshes. Boolean operations can be a godsend when constructing a polygonal mesh but can wreak havoc when modeling with subdivision surfaces.
Many artists never take the time to fully understand how to work with SubD topology and create overly dense, complex meshes that are difficult to work with in every stage of production. The old saying “you can’t judge a book by its cover” holds true with 3D assets. Without seeing the underlying topology of a mesh, it can be difficult if not impossible to know if it is viable for production.
The good news is that once you truly grasp working with subdivision surfaces and gain control over the SubD topology of your meshes, creating clean, production-ready assets with any level of complexity becomes an enjoyable experience.
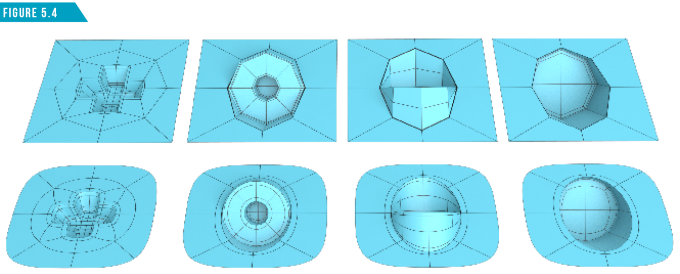
(Figure 5.4) shows a few basic examples of how SubDs could be used on hard-surface meshes such as vehicles and industrial equipment.
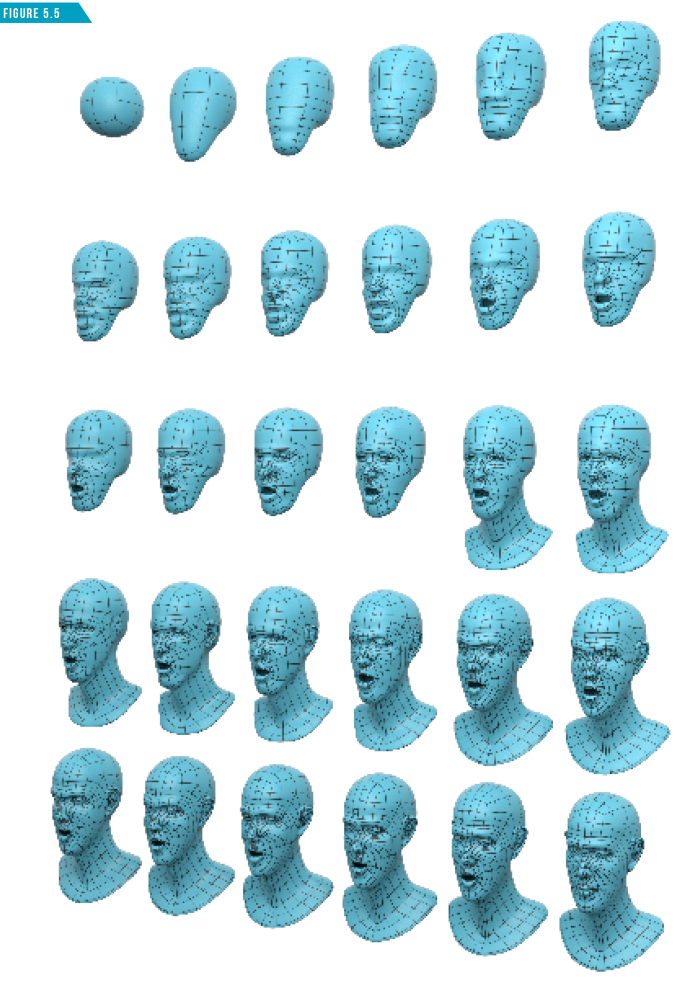
(Figure 5.5) Shows a stepped progression of how I model my SubD character meshes using a modeling technique often referred to as Box-Modeling. Box-Modeling is the modeling technique where you start with a cube primitive and construct meshes using mesh edit tools such as the Polygon Bevel Tool.
Spend some time creating some low-resolution polygonal cage meshes and see what happens when you convert them into SubD meshes (Shift+Tab).