Using ModelBuilder
The ModelBuilder node provides an easy way to create 3D models for 2D shots. You can build a model by creating shapes and then editing them, and align models over your 2D footage by dragging vertices to their corresponding 2D location.
Prerequisites
To be able to align models, ModelBuilder needs a tracked camera and an input image for visual reference. You can also use other 3D geometry and point clouds as a reference if you already have these for your scene.
Note: You can use ModelBuilder without a camera, image sequence, or reference geometry. In this case, all the Edit mode features work just fine; it just means you aren’t able to do anything in Align mode.
Creating and editing models using ModelBuilder requires a NukeX license, but the resulting geometry can also be used in Nuke.
|
|
|
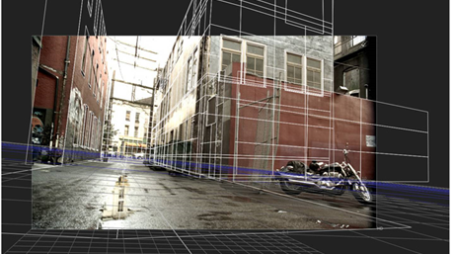
A 2D source image with shapes created using ModelBuilder. |
Special thanks to  for use of the above footage, used throughout this chapter.
Quick Start
Here's a quick overview of the workflow:
| 1. | Connect the ModelBuilder node to your footage and a changing Camera. For more information, see Connecting the ModelBuilder Node. |
| 2. | As a starting point for your model, create one or more of the built-in 3D shapes using the toolbar on the left hand side of the Viewer. |
See Creating Shapes.
| 3. | If necessary, adjust the display characteristics of your shapes so you can better see them in the Viewer. You can do this at any point during the process. |
See Editing Shapes’ Display Characteristics.
| 4. | Position the shape using your 2D footage or existing 3D geometry as a reference. |
See Positioning Shapes.
| 5. | Edit the shape until you’re happy with your model. |
See Editing Shapes.
| 6. | Once you're happy with your model, you're ready to texture it. |
See Applying Textures.
| 7. | If necessary, you can also create a separate geometry node for the selected shapes and use that as you would use any other geometry node in Nuke. |