Search Tips
Hydra in the 3D Viewer
Hydra is rendering architecture, capable of processing large scenes with many changes. Hydra is used by Pixar for asset preview in many of its tools alongside USD.
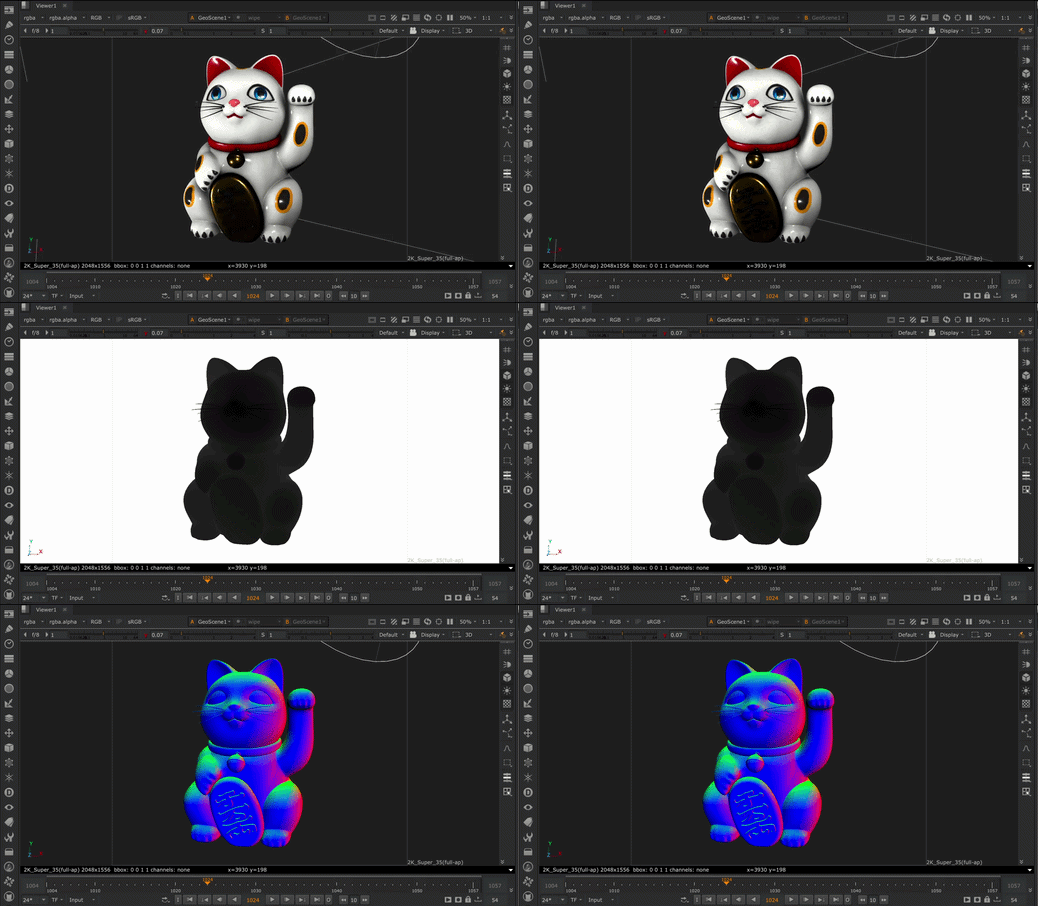
Nuke’s New 3D System uses a Hydra 2.0 based 3D viewport, which allows you to preview render delegates, like Moonray and Renderman in the 3D Viewer. This flexibility allows you to visualize more from your 3D Viewer, helping you make more informed choices when rendering.
Support for Hydra 2.0 delegates also gives greater control over the display of your 3D scene in the Viewer. In the Viewer node you can now set the Display AOV which will update the display of the 3D Viewer so you can preview channels like depth and position.
Render Delegates in the 3D Viewer
When working with the New 3D System nodes in the 3D Viewer, the Viewer's Renderer knob now has multiple options, depending on what delegates you have.
To select a render delegate to use for the 3D Viewer, switch to 3D mode at the top of the Viewer and double click your Viewer node to enter the Properties panel.
In 3D View tab, under the Renderer Settings section, find the Renderer knob and use the dropdown to select one.
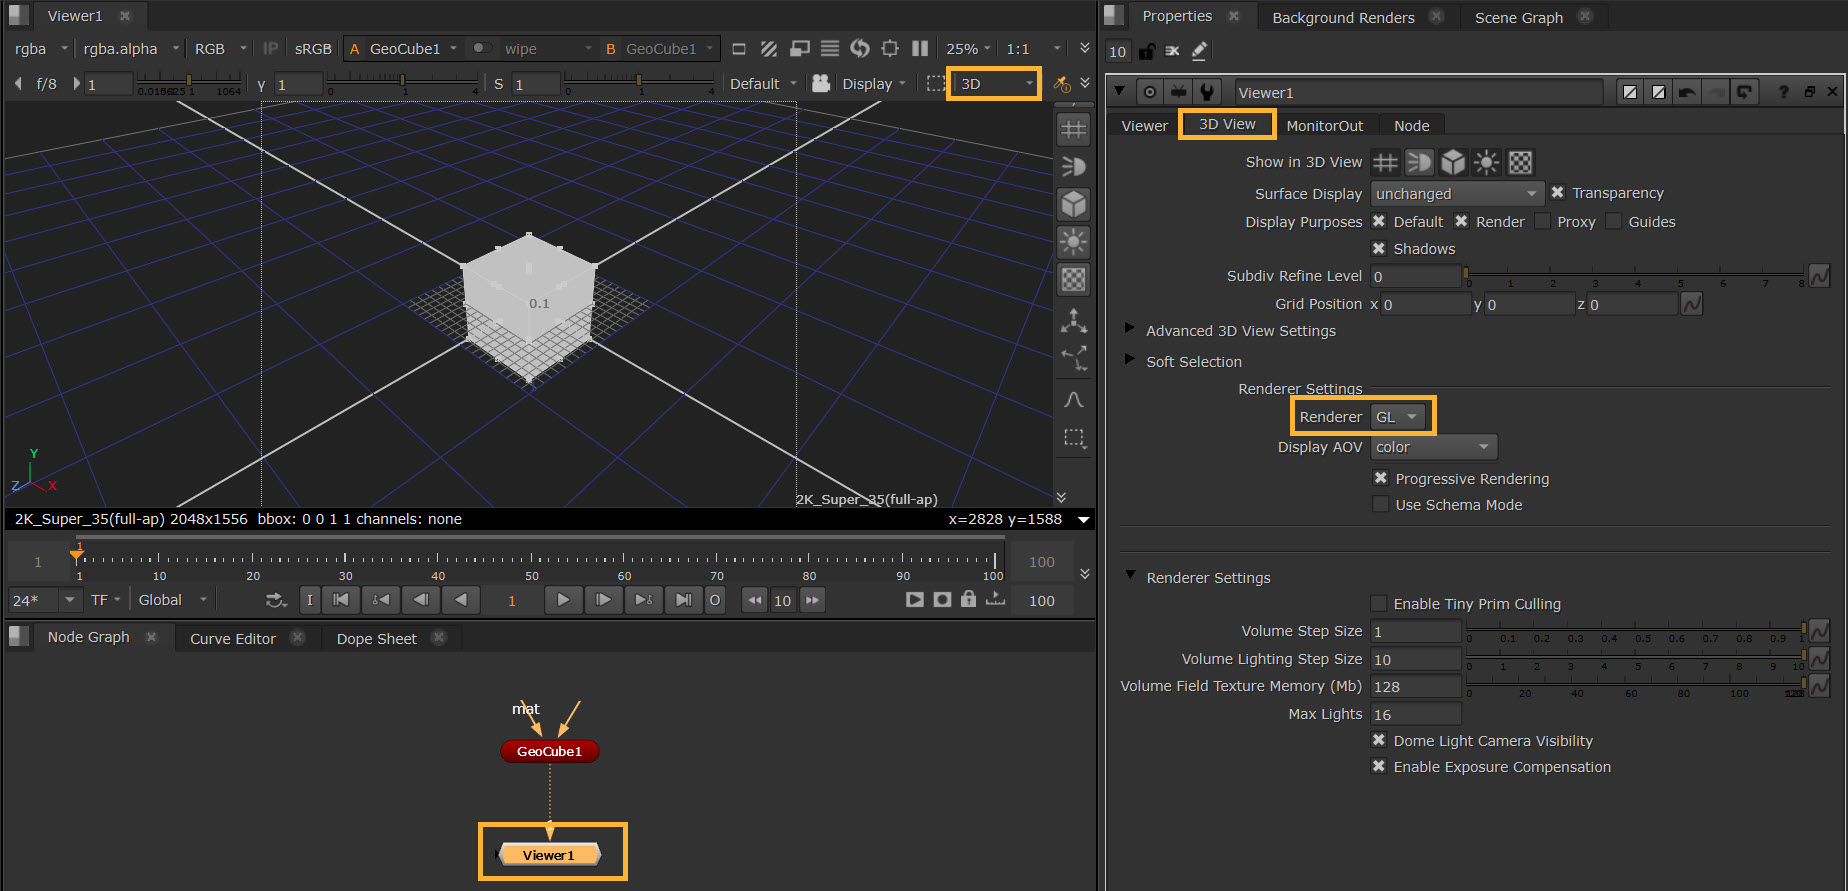
GL is the default renderer. For New 3D System nodes, this uses HdStorm as a render delegate.
Note: While Nuke's New 3D System nodes use a Hydra 2.0 renderer, nodes in the Classic 3D System use a "Nuke" renderer. GL is the default option - this acts as both the Hydra and "Nuke" renderers, depending on if you are viewing New or Classic 3D nodes.
Selecting a Renderer dynamically populates the Renderer Settings section with your chosen renderer's custom options.
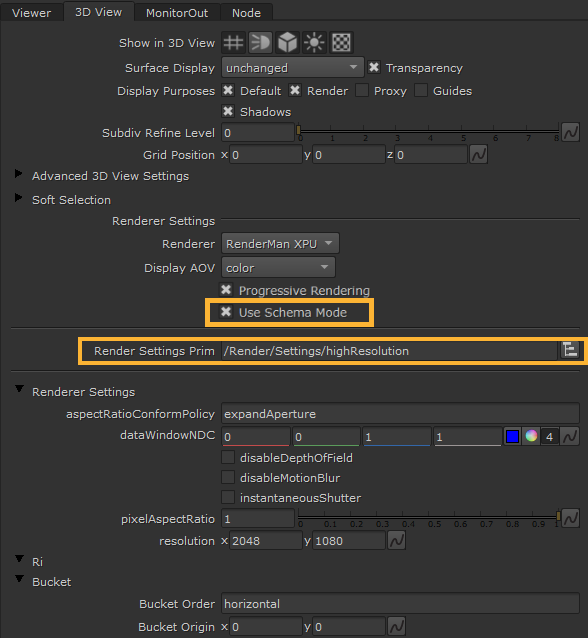
The Renderer Settings section uses either the delegate settings API path or the USD schema path, depending on whether the Use Schema Mode setting is turned off or on. By default, the GL renderer has this option turned off, and uses the delegate settings rather than the USD schema.
When the Use Schema Mode checkbox is enabled and no schema exists, you will need to provide the Render Settings Prim path to manipulate your render settings in the Viewer.
Note: Additional renderers can be setup by using the PXR_PLUGINPATH_NAME environment variable.
If you wish to edit the defaults of an existing render settings prim or create new ones, there is also a manual way to do this using the GeoRenderSetting node. See Creating and Editing Render Settings.
Note: You can also use Hydra 2.0 to render your scene to 2D - see Rendering with GeoRender.
Note: When Progressive Rendering is disabled, it means the viewer will not update until the render is complete, which for more complex delegates may take significant time.
To learn more about concepts such as scene delegates, the render index, and render delegates, refer to OpenUSD’s documentation on Hydra 2.0 and the USD Render Schema.
Hydra and Lighting
One important thing to note is that Hydra needs a light source to display materials, so if you want to see materials then you can to enable the Viewer headlamp, or add lights to your scene. If you don’t do either of these, Nuke has a backup default dome light that will allow you to see the materials until you add your own lighting.
Toggle the Viewer headlamp with this button:
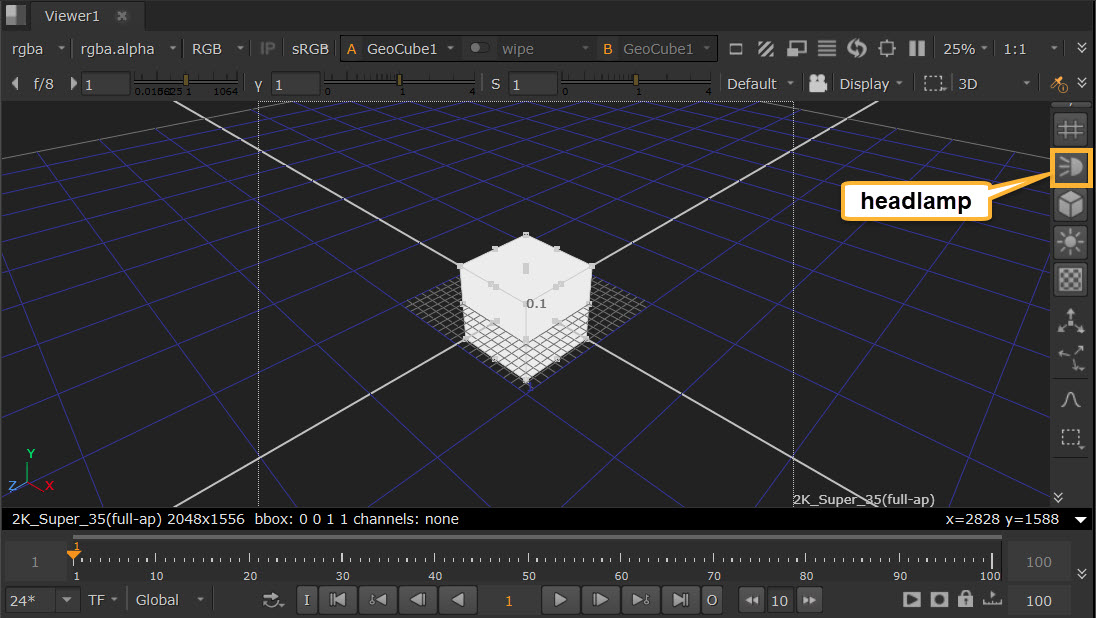
Tip: You can also enable or disable the headlamp by opening your Viewer node Properties, selecting the 3D View tab and using the headlamp icon there.
To learn more about how to use the 3D Viewer, see Viewing Your Scene and Viewer.