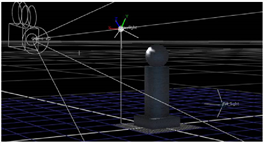
Nuke includes lighting tools to enhance the existing lighting in the plates and images you include in a 3D scene. Also included are fundamental surfacing tools to control the attributes of the objects in the 3D workspace.
These tools are not designed to replace the use of true 3D lighting and surfacing, but they can definitely help you punch up the scene and quickly tweak the settings without sending elements back to the 3D application.

Nuke’s lighting objects introduce lighting and surface attributes into your scene. When the scene has no lighting objects, then all surfaces are illuminated with the same properties and level of “brightness.”
In the following steps, you’ll first add nodes that define surface properties for the objects, and then you’ll add the light objects to illuminate them.
| 1. | Click on an empty place in the Node Graph to deselect all nodes. Then, choose 3D > Shader > BasicMaterial. |
| 2. | Drag the BasicMaterial1 node onto the connector between concrete.jpg and Sphere1. |
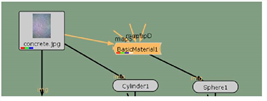
In the Basic Material control panel, you can see parameters to define the amount of light emission, diffusion, and specular properties of the surface. You can mask these properties by connecting images to the mapS (specular), mapE (emission), and mapD (diffuse) connectors, but this is not required for this example.

| 3. | Set the light emission control to 0.25. Set diffuse to 0.18, and specular to 0.75. |
| 4. | Adjust the min shininess and max shininess values to adjust the quality of the specular highlights. Once again, nothing seems to happen! That’s because you haven’t yet added a light into the scene. All surfaces are illuminated with the same level of brightness, so there are no specular highlights or other controllable light properties visible. It’s not very exciting, but don’t worry - you get to add a light into the scene soon. |
| 5. | Make two copies of the BasicMaterial1 node and attach a copy before Cylinder1 and before Cube1. |
| 1. | Choose 3D > Lights > Spot and connect the light node to the Scene2 node. |
| 2. | In the Spotlight1 control panel, rename the light to Keylight. |

| 3. | Switch to the top view and drag x-axis handle (red) to move the light to the left. |
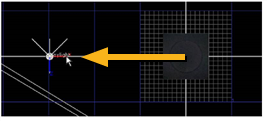
| 4. | Drag the z-axis handle (blue) to move the light closer to the bottom edge of the screen. Then, press the Ctrl or Command key and rotate the light to face the pillar object. |
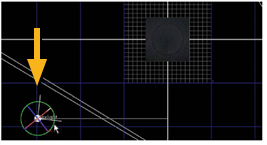
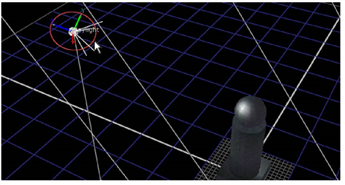
| 5. | Switch to the 3D (V) view and rotate the view so you can see both the Keylight and the pillar geometry. |
| 6. | Drag the y-axis handle (green) to move the light up above the pillar. |
| 7. | Press the Ctrl or Command key and rotate the light down to shine on the pillar. |
That’s the basic setup for lighting and surfaces, but there are other tools for more complex setups.