Open topic with navigation
3D Selection Tools
Using the 3D selection tools in the top right corner of the Viewer, you can select nodes, vertices and faces on a 3D object. Additionally, you can select individual 3D objects in the 3D view, which is handy when you have more than one object in a node.
Selecting Nodes
You can select nodes with the Node selection tool.  This is the default selection tool, and corresponds to the familiar way of selecting 3D object nodes in the Viewer.
Selecting Vertices on a 3D Object
You can select vertices on a 3D object using the Vertex selection tool. To save selections into your script, you need to use the GeoSelect node. You can find the 3D selection tools in the top right corner of the Viewer.
NOTE: The selection mode is set by the Viewer - changing geometry nodes translates your selections to the new object.
You can also use the Vertex selection tool to edit geometry using the EditGeo node. See Modifying Objects Using the EditGeo Node.
To select vertices in the Viewer
|
1.
|
Attach a 3D object to the Viewer and activate the Viewer’s 3D mode. |
|
2.
|
Click the Vertex selection tool  to activate it. It is disabled by default. to activate it. It is disabled by default. |
|
3.
|
Select vertices on the object by dragging a marquee over the vertices you want to select. |
|
4.
|
By default, a new selection replaces an existing one, but you can also add and remove from an existing selection: |
• To add to existing selection, hold down Shift while selecting.
• To remove from existing selection, hold down Shift+Alt while selecting.
|
5.
|
You can also include hidden items by selecting the occlusion test button  . Deselect it if you don’t want to include occluded vertices in your selection. Select if you want to select both visible and occluded vertices. . Deselect it if you don’t want to include occluded vertices in your selection. Select if you want to select both visible and occluded vertices. |
To Save or Restore Selected Vertices Using the GeoSelect Node
With the default Viewer 3D selection tools you can only make a temporary selection. To save or restore a selection, you can use the same 3D selection tools in the Viewer with the GeoSelect node:
|
1.
|
Create a GeoSelect node (3D > Modify > GeoSelect) and attach a 3D object to its input. The GeoSelect properties panel needs to be open in order for you to use the node for selecting vertices. |
|
2.
|
Click the Vertex selection tool  from the 3D selection panel. from the 3D selection panel. |
|
3.
|
Select vertices on the object by dragging a marquee over the vertices you want to select. |
|
4.
|
By default, a new selection replaces an existing one, but you can also add and remove from existing selection: |
• To add to existing selection, hold down Shift while selecting.
• To remove from existing selection, hold down Shift+Alt while selecting.
|
5.
|
In the GeoSelect properties panel, you can also uncheck the selectable box to freeze your selection so it can’t be changed. Checking the box again enables selection again and you can continue selecting vertices as normal. |
|
6.
|
With the display and render controls you can select the display option you want for your object. For more information on these controls, see Object Display Properties. |
|
7.
|
When you’re happy with your selection, click save selection to store the vertices in the GeoSelect node. |
|
8.
|
The vertices are saved by the GeoSelect node and can be restored by clicking restore selection. |
Selecting Faces on a 3D Object
You can select faces on a 3D object using the Face selection tool. Each 3D object is divided into polygonal faces by wireframe lines, and with the Face selection tool you can select one or many of these.
You can also use the Face selection tool to edit geometry using the EditGeo node. See Modifying Objects Using the EditGeo Node.
|
1.
|
Click the Face selection tool to activate it. It is disabled by default. |
|
2.
|
Select faces on the object by dragging a marquee over the faces you want to select. |
|
3.
|
By default, a new selection replaces an existing one, but you can also add and remove from existing selection: |
• To add to existing selection, hold down Shift while selecting.
• To remove from existing selection, hold down Shift+Alt while selecting.
|
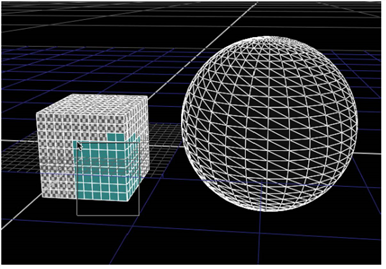
|
| Marquee-selecting faces on a cube. |
Selecting 3D Objects
When you have more than one 3D object in one node (such as in a case when you’re reading in a .fbx file with multiple objects), you can use the Object selection tool  to select them. To select objects, activate the Object selection tool and click on the object you want to select in the 3D view.
Matching Position, Orientation, and Size to 3D Selection
You can match the position, orientation, and size of a 3D object, such as a Card node, to your selected vertices in another object. Do the following:
|
1.
|
Click the snap dropdown menu  on the properties panel of the 3D object you want to move and select Match selection position. The object is now positioned to match the selected vertices. on the properties panel of the 3D object you want to move and select Match selection position. The object is now positioned to match the selected vertices. |
|
2.
|
If you select snap > Match selection position, orientation, your 3D object is positioned and aligned according to the 3D vertex selection. |
|
3.
|
If you select snap > Match selection position, orientation, size, your 3D object is positioned, aligned, and scaled according to the selected vertices. |