You can add as many User Tracks as required, depending on what you intend to accomplish. For example, auto-track assist may only require one or two User Tracks, whereas manual tracking would require at least eight User Tracks.
| 1. | Enable the fast-add button |
NOTE: Clicking Add Track places the new track in the center of the current Viewer.
TIP: You can quickly add User Tracks by holding Ctrl/Cmd+Alt and clicking in the Viewer.
Track zoom windows display in the top left of the Viewer.
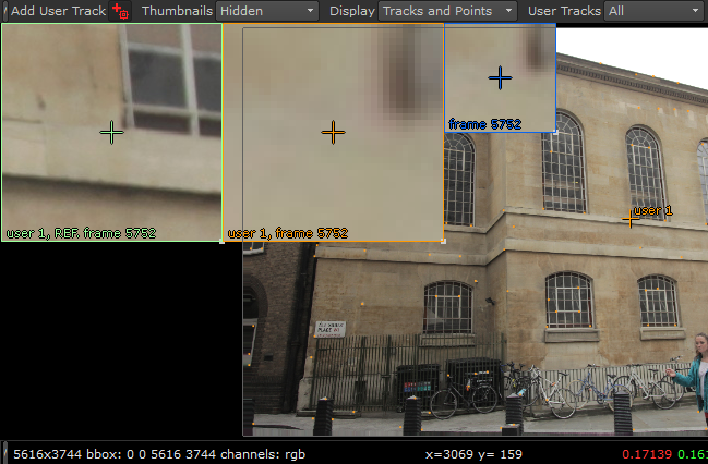
There are three zoom windows initially:
• Reference frame (green) - the first frame in the track, which remains constant, allowing you to locate the feature more accurately in subsequent frames.
• Current frame (orange) - the playhead position. Use this window to adjust the tracking anchor on the current frame by comparing it to the reference frame.
• Keyframe (blue) - the first keyframe in the sequence. Adding more keyframes adds a zoom window per keyframe.
TIP: You can click on a keyframe zoom window to instantly jump to that frame.
TIP: You can hide the zoom windows by setting the Zoom Window Viewer control to Off.
| 2. | Drag the crosshair in the center of the anchor over the feature to be tracked or manually adjust the track x and y fields in the UserTracks list. |
| 3. | Refine the track position by clicking and dragging in the current frame zoom window. |
TIP: You can change the magnification of zoom windows by holding Shift and dragging the magnifying glass cursor away from the center of the window.
To resize a zoom window, drag its lower right corner to a new location.
| 4. | Once you're happy with the track's position, proceed to User Tracking Methods. |