Once you’ve identified and highlighted the less accurate points:
| 1. | Click Delete Rejected Points to automatically remove all highlighted points. |
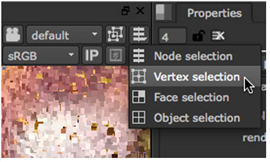
| 2. | You can then be a little more selective by switching the Viewer to Vertex selection mode. |
| 3. | Use the Output controls to assist you when visualizing your point cloud: |
• Point Size - set the pixel size of points in your cloud.
• Output points per frame - by default, all tracked points in your sequence are displayed in the Viewer. Enabling this control allows you to view only the points generated at the current frame.
NOTE: If you’re having trouble viewing points individually, try reducing the 3D handle size in the Preferences > Viewers tab.
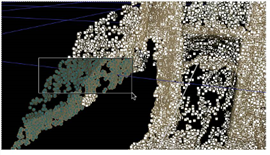
| 4. | Manually select points in the cloud using the 3D Viewer by: |
• Dragging a marquee over the required points in the Viewer, or
• Holding Shift, and dragging a marquee over several selection areas in the Viewer to select all points at once.
NOTE: You can remove points from a selection by holding Shift+Alt and re-selecting highlighted points.
| 5. | Press Delete/Backspace or right-click in the Viewer and select delete selected to remove the points. |
| 6. | Proceed to Grouping, Labeling, and Baking Points. |