Troubleshooting Matches and Solves
Some sequences are inevitably going to cause problems while matching and solving. There are a number of refinement workflows to assist CaraVR when solving rigs.
Tip: CaraVR adds a tab to the Properties panel of Nuke's Write node allowing you quickly select groups of views such as stereo and cams when rendering previews or stitches. You can still select views manually using the views dropdown, but View Presets can make the process faster.
Rejecting and Refining Matches
After matching and solving the cameras, you'll see some features that are outside the specified Error Threshold tolerance, marked in red.
Generally speaking, matched pairs should trend in the same direction for a given area of the sequence, so that's a good place to start refining the matches. Another good sign that a match is poor is the distance between the matched features, when compared to other pairs in the same region.
| 1. | Switch to Camera mode ( |
Note: This overlay is only displayed on frames where a keyframe is present.
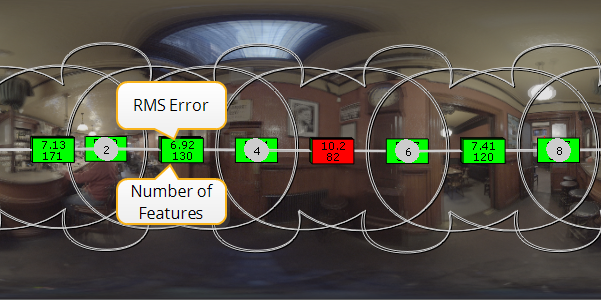
In the example, the matches within the overlap for cameras 4 and 6 register an RMS error of 10.2, which is quite high.
| 2. | The first thing to try is dialing in some lens distortion using the Analysis section of the node properties. |
| 3. | Click Lens Distortion and select Optimise Single to use one lens model for all the cameras in the rig. |
| 4. | Click Refine. You may find that the RMS errors fall to more acceptable levels. |
Note: You can refine the solve further by setting Lens Distortion to Optimse per Camera and then clicking Refine again for certain rigs.
| 5. | Switch back to Matches mode ( |

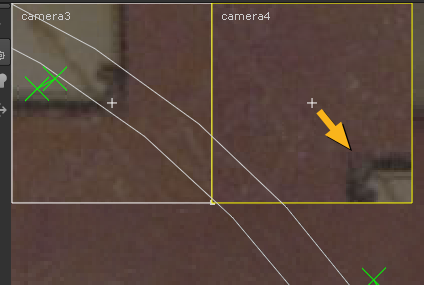
The example shows matches that CaraVR has rejected automatically. They're quite far apart, when compared to the other matches in the area, but you'd see the other matches turn red as well if you lowered the Error Threshold control.
| 6. | To remove the rejected matches, you can either: |
• click the Reject button in the C_CameraSolver properties, or
• select individual matches and press Backspace or Delete on your keyboard.
| 7. | After cleaning up the rejected matches, click Refine in the C_CameraSolver properties to recalculate the solve based on the current solve. |
You should see the RMS error decrease, along with the number of features.
Adding User Matches
User matches are placed manually, rather then being automatically detected by C_CameraSolver, and can be used to improve automatic matching. You can add as many user matches as required.
| 1. | Switch to Add Match mode ( |
| 2. | Hold Ctrl/Cmd+Alt and click a feature in the Viewer that is present in more than one camera to add a match marker ( |
| 3. | Click the user match to display a zoom window for each camera in which the feature resides. |
Tip: You may find that panning the Viewer to move the automatic features makes it easier to see the zoom windows.
| 4. | Refine the match position by clicking and dragging in the camera zoom window for each instance of the match. |
A match marker is added for each camera.
| 5. | Add as many user matches as required and then click Refine in the C_CameraSolver properties to recalculate the solve based on the current solve. User matches carry more weight than automatic matches when solving the rig, so the more accurate matches you add, the better the chances of getting a good solve. |
Tip: You can adjust the Settings > User Matches Weight control to instruct CaraVR to give user matches more or less 'weight' when refining a solve. If you haven't added many user matches, you might consider reducing the amount of weight so that the solve depends more on the automatically generated matches.
| 6. | Switch back to Camera mode ( |
Adjusting Convergence in Spherical Rigs
If you're using a spherical camera layout, you can adjust the Converge control to alter the depth at which the cameras overlap, allowing you to bring particular areas in the scene into focus. You can use convergence to determine the distance of objects from the camera by adjusting the slider until the ghosting disappears at the required depth.
Convergence in C_CameraSolver is used to test the quality of the solve, the final convergence is set using the controls in C_Stitcher. See Setting the Convergence Point in Spherical Rigs for more information.
Note: Convergence doesn't have any affect on nodal rigs because all the cameras share the same origin.
The first step is to set the approximate diameter of the sphere on which the cameras sit using the Rig Size control on the Cameras tab. This normalizes the 3D representation of the rig into close to real world units, depending on the quality of the solve. The Converge control then defines the depth at which the preview stitch is converged, bringing different areas of the shot into focus.
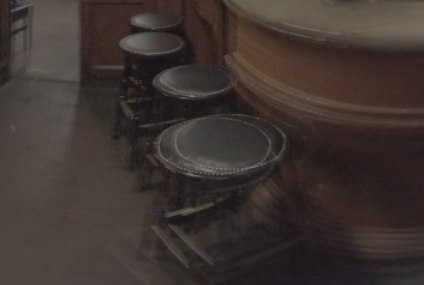
The example shows converge depths using the default Rig Size setting of 0.3 (or 30 cm). The Converge control defaults to 10, which is a little high when considering the stool in the foreground.
|
|
|
|
Default rig settings showing an offset between overlapping cameras. |
|
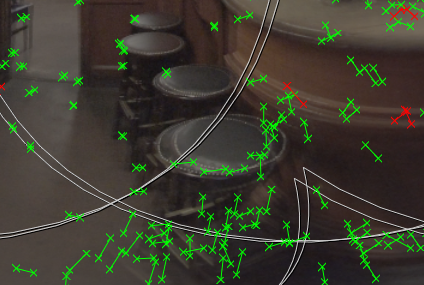
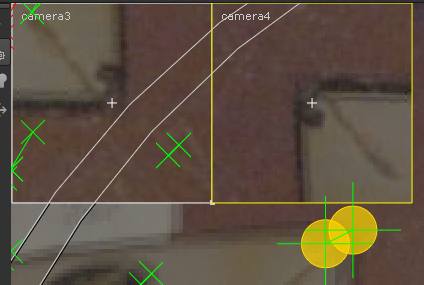
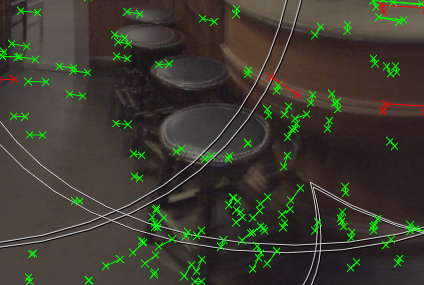
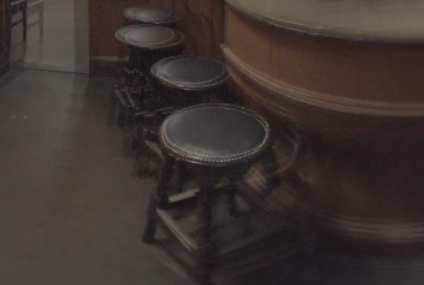
Decreasing the Converge value to around 1.6 metres brings the stool into sharper focus. You can also see that the matched feature pairs overlay each other.
|
|
|
|
Decreasing the converge depth aligns the offset nicely. |
|
You can remove any feature matches that are shown in red by clicking Reject in the node properties, and then Refine the solve.