Selection in the 3D Viewer
The new 3D system includes an enhanced selection system, designed to provide artists with increased flexibility and control when navigating large scenes using the latest 3D architecture.
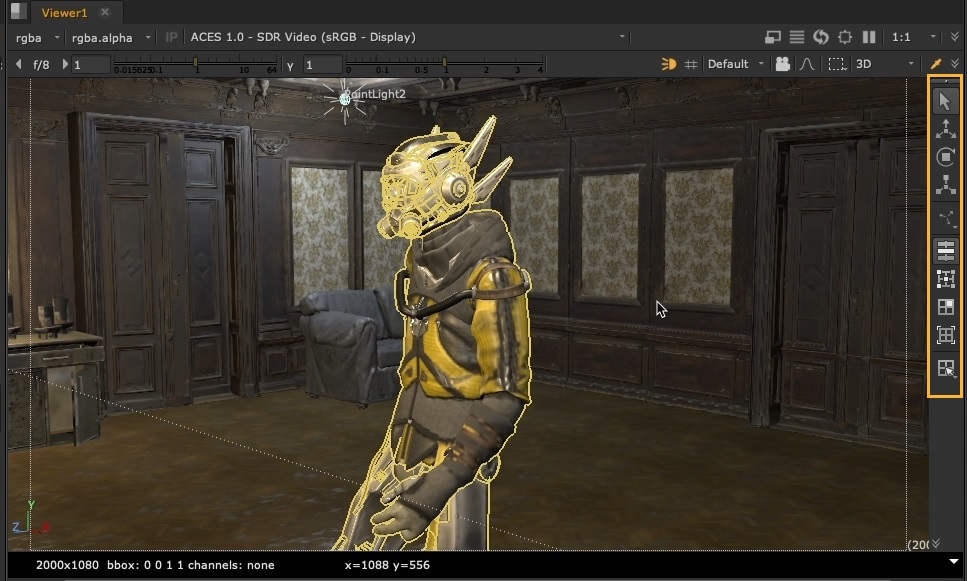
The selection control buttons are in the 3D toolbar to the right of the 3D viewer panel.
The 3D Toolbar on the right of the Viewer.
This toolbar offers essential controls for transforming and making selections in the 3D space.
Note: Any selection you make in the 3D viewer is also shown in the Scene Graph (see New 3D Scenes in the Scene Graph). Conversely, you can select prims in the scene graph and see the corresponding selection in the 3D viewer.
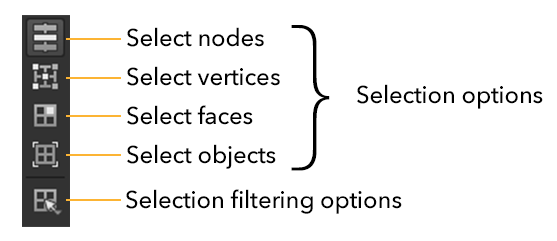
3D Toolbar Selection Buttons - Quick Reference
Note: The 3D toolbar also includes 3D transform buttons. To learn more about these, see Using the Transform Handles
Using the Selection Tools
Selection is a simple process:
-
Choose the objects and type of item that you’d like to select from the filtering options menu
 . For example, if you want to select all USD components, choose Component.
 -
Choose a selection mode for the type of element that you want to select (node, vertex, face, or object).
-
Click, or click and drag a marquee to select items in the viewer.
Simply put, when you click or drag in the 3D viewer, you select the items based on the chosen filtering options and see the elements according to the selection mode.

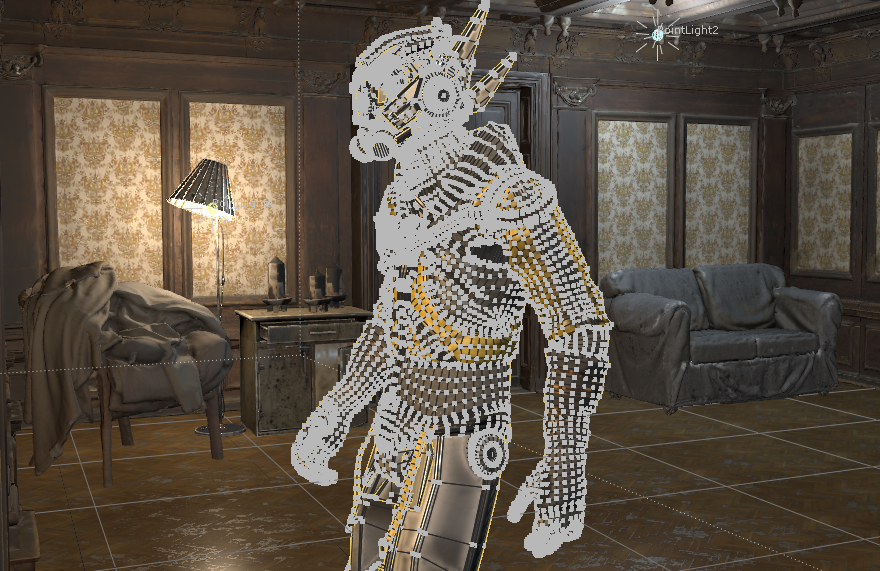
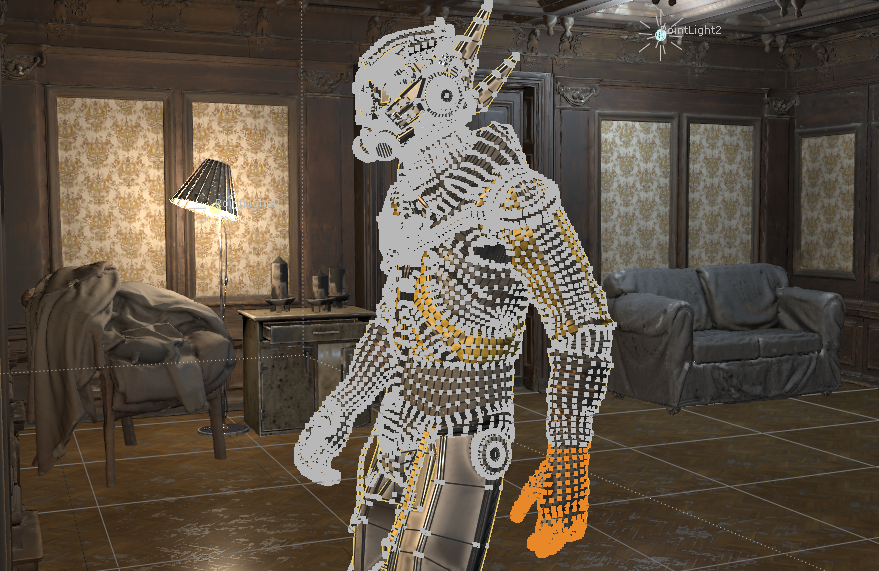
Here, the selection is filtered by mesh in face selection mode. The mesh is the torso part of the figure.
Once you’ve made a selection, you can change the selection mode at any time to switch element types.
To focus your selection on a part of the item, choose a selection mode and select the part. We call this two-tier selection.
Two-Tier Selection
Sometimes, you may want to locate an object in a scene quickly and then focus your operation on a particular part of that object. For example, finding a character in a busy scene and then modifying part of its body or costume. We’ve streamlined this by providing a “two-tier” selection workflow.
Two-tier selection is the process of first selecting an item and then using the selection modes to sub-select part of the item as follows:
-
Tier 1: Select the item based on the filtering option.
-
Tier 2: Sub-select part of the item based on the selection mode (node, vertex, face, or object).
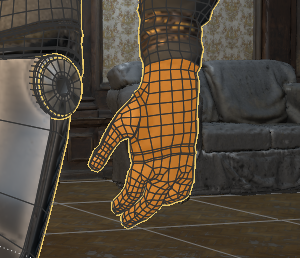
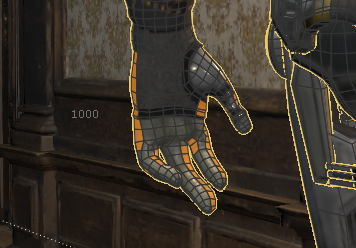
For example, you might filter by component to select an entire component type part of the scene. Once selected, you could then activate vertex selection mode to limit your selection to a set of vertices within that component. You can see an example of this below.
|
|
| First-tier selection - A component type filter is active to select the figure. This is done in vertex selection mode. |
Second-tier selection - the glove has been selected by drag selecting. |
Selection Modes
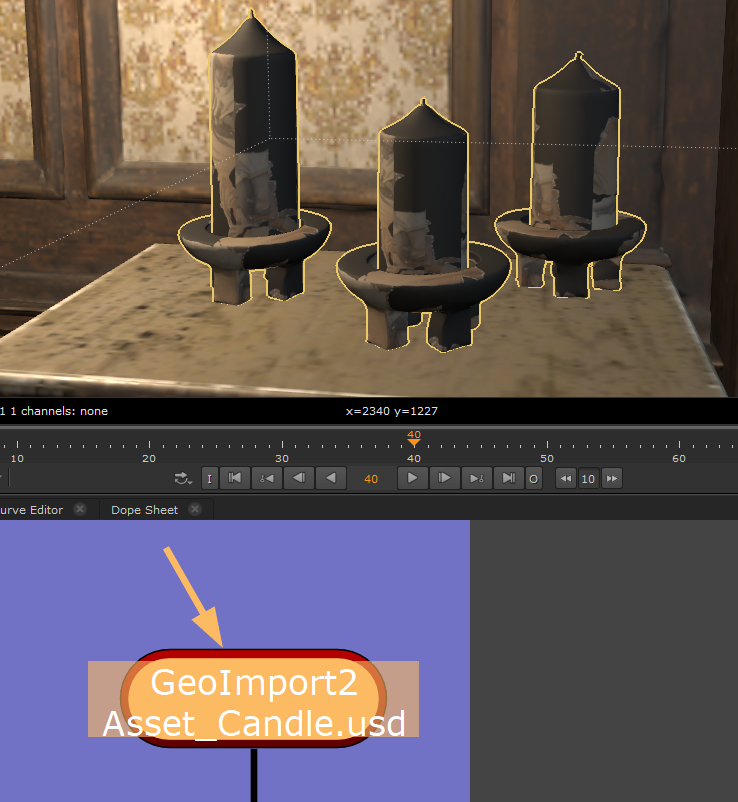
Nuke offers four selection modes: node, vertex, face, or object. The table below shows examples using a component selection. The candles were imported in a separate USD file.
|
|
The node that generates the geometry is highlighted on the node graph. You can double-click in the 3D viewer to open the node properties. |
|
|
|
|
|
|
|
|
|
 Node selection
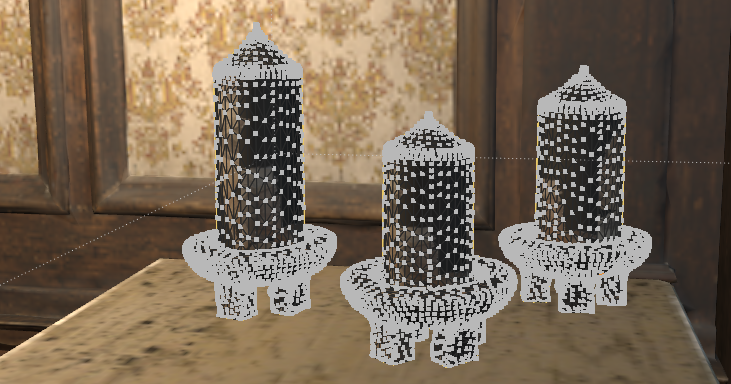
 Vertex selection
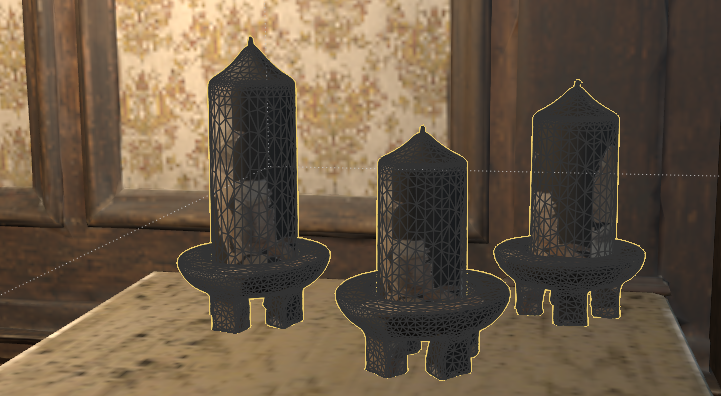
 Face selection
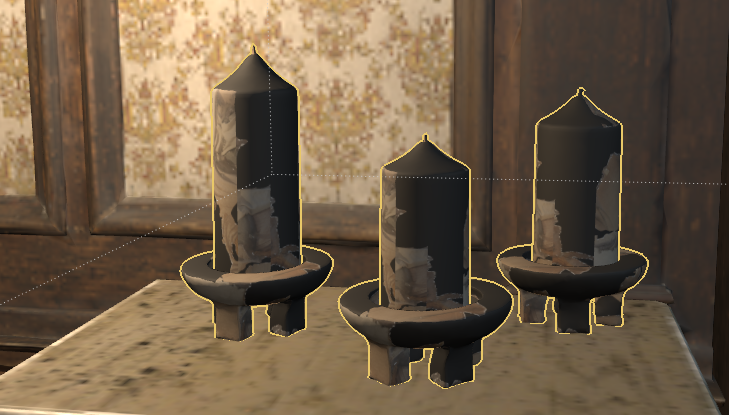
 Object selection
Adding to Selections
You can add to any selection using Shift +click or Shift + drag.
Filtering the Selection Mode
The selection filter determines the type of objects and items that are selected in the 3D viewer.
Click the filtering selection button  to open the filtering options.
Filter by Object Type and |Toggle Occlusion Testing
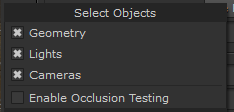
Check the boxes to select the objects that you want to include in a selection. You can choose from Geometry, Lights, and Cameras.
Check Enable Occlusion Testing to select only objects that are immediately visible from your camera position, and not hidden behind surfaces. See Selection Based on Camera Occlusion .
Filtering by Type/Kind
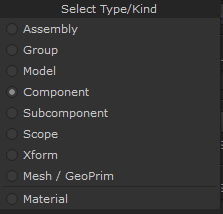
The Type/Kind corresponds to the Type and Kind columns in the Scene Graph (seeNew 3D Scenes in the Scene Graph).
"Type" refers to the data category of an element. For example, Mesh represents meshes, and Xform represents a transform.
"Kind" refers to the organizational role of an element in the hierarchy. It is categorized as values like component for individual objects or assembly for a collection of components.
Nuke’s selection filtering menu offers the following types:
-
Assembly - A high-level organizational unit that combines multiple groups or components, typically representing a complete object or scene, such as a character and its accessories.
-
Group - This container acts as a cluster for grouping related components or subcomponents, facilitating efficient organization and hierarchy. For example, it enables grouping all engine parts of a vehicle together.
-
Model - A self-contained entity or object within the scene, such as a character, vehicle, or other significant entity, consisting of multiple components and subcomponents.
-
Component - A fundamental building block in a USD scene graph is an individual object or model component, such as a door in a building or a wheel on a car.
-
Subcomponent - A smaller, individual part within a component in a USD scene graph, such as the knob of a door or the spokes of a wheel.
-
Scope - A non-renderable organizational element that hierarchically groups related items without applying any transformations or attributes to the contained elements.
-
Xform - Short for transform, this is a transformation schema applied to an element, specifying its position, rotation, and scale in 3D space, determining the object's placement and orientation in the scene.
-
Mesh - A geometric primitive comprised of vertices, edges, and faces, serving as the visual structure of objects such as the surface of a 3D car model or character.
-
Material - Surface properties of an object, such as color, texture, and reflectivity, interact with light, and rendering. These attributes contribute to realistic visual effects on the applied mesh.
Modify Selections by Hierarchy or Materials
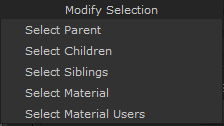
After making a selection, you can use this menu to change the selection to a relative of the selected item as defined by the USD scene graph.
-
Parent - Select the higher-level entity or node in the scene graph hierarchy directly above the selected item.
-
Children - Select the nodes or entities in a USD scene graph that are directly under the selected item.
-
Siblings - Select the nodes or entities that share the same parent node as the selection.
-
Material - Select only the material(s) that are in the current selection.
-
Material Users - Select all nodes or entities in the scene graph that share the same material(s) as the selection.
Selection Based on Camera Occlusion
In the selection filtering options,  you can toggle Enable Occlusion Testing to choose to select all items throughout the depth of the scene or only those visible to you at the current camera position:
Enable Occlusion Testing off: The selection includes all items behind the selection marquee throughout the entire depth of the scene. This means that even if you can’t see them (they’re occluded), they’ll be selected if they’re within the bounds of the marquee.
Enable Occlusion Testing on: The selection is limited to only items that are visible to you from the current camera position. Items behind the selection but within the marquee aren’t included.
|
|
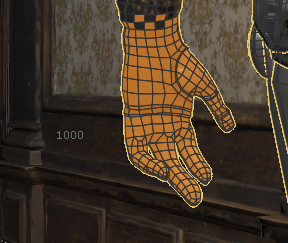
|
| A selection of the top faces of a glove. | The back of the glove is unselected as Enable Occlusion Testing is on. |
The back of glove following the same selection but with occlusion testing off. |
Occlude the Selection Outline
When selecting prims, you may need to select something behind another prim. In which case, Nuke provides two ways of drawing the selection outline:
-
Maintain the complete selection outline for a visual reference of the selected prim, or
-
prevent the selection outline from overlapping with the foreground prims, and occlude it behind them.
Selection occlusion allows you to customize selections for different scenarios, providing greater control over how you view the scene.
You can toggle the occlusion of the selection outline in the Viewer settings in the 3D tab using the object_selection_depth_tested button.
Note: To open the Viewer settings, simply locate the Viewer node in the scene graph and double-click it.
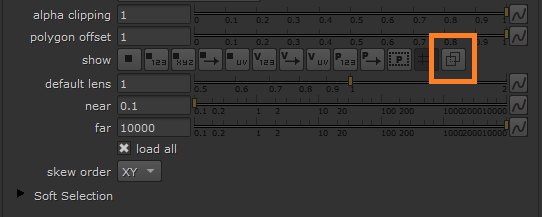
The Object Selection Depth Testing button. Toggle this to occlude or reveal the selection border around prims.
|
|
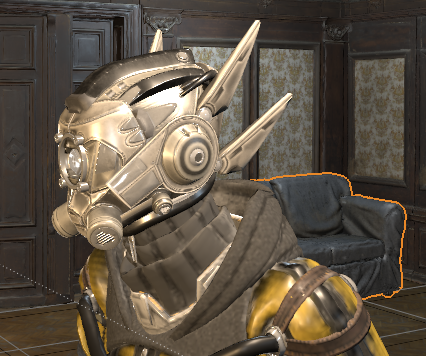
Object selection depth testing off.
Part of the sofa selection appears over the figure in front. |
|
|
Object selection depth testing on.
The sofa selection is occluded by the figure in front. |