Adding Transitions Between Shots and Audio Clips
Nuke Studio supports video and audio fade transitions as well as dissolves between shots on the same track. Transitions come in three flavors:
• Fade in - fades in from black on a single shot or fades in audio.
• Fade out - fades out to black on a single shot or fades out audio.
• Dissolve / Audio Crossfade - fades out from one shot or audio clip and into the next, by merging frames or audio.
Tip: Once a transition is in place, it can be nudged in the same way as an edit using the , (comma) and . (period) keyboard shortcuts, providing the required handles exist.
To add a fade transition:
-
Right-click the target shot or audio clip and select Editorial > Add Transition > Fade In, Fade Out, Audio Fade In or Audio Fade Out to add the fade icon.
-
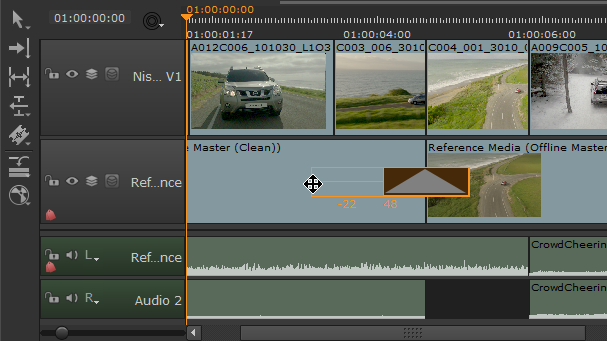
Adjust the fade by dragging the fade icon using the Multi Tool or Move/Trim tool.
![]()
To add a dissolve transition:
Note: You can only add dissolves between shots when they're on the same track and have sufficient handles available on both sides of the transition.
-
Select the Multi Tool or Roll Edit tool and hover the mouse pointer over an edit between two shots or audio clips.
-
Tip: Clicking and holding the edit point displays available handles as a red overlay.
-
Right-click and select Editorial > Add Transition > Dissolve or Audio Crossfade, or use the Ctrl/Cmd+T keyboard shortcuts, to add the dissolve icon to the edit.
-
Adjust either side of the dissolve by dragging the icon, in a similar way to using the Multi Tool or Move/Trim tool.
Non-Linear Transitions
Transitions in Nuke Studio are linear by default, meaning that the fade or dissolve happens at the same rate throughout the transition. For example, a linear fade out on the last five frames of a shot would appear as follows:


Non-linear transitions allow you to vary the speed at which the transition happens, giving you more creative control. For example, you might want a fade out to be slow and then speed up towards the end of the shot.


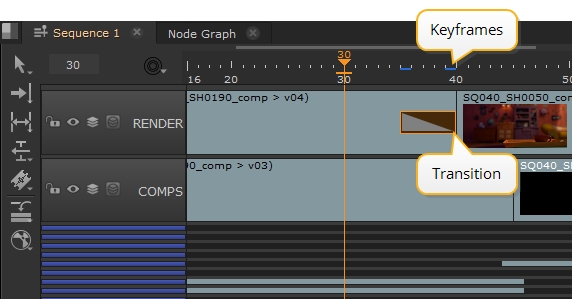
When you add a transition, keyframes are added to the timeline as blue chips, so you can see where the transition begins and ends.
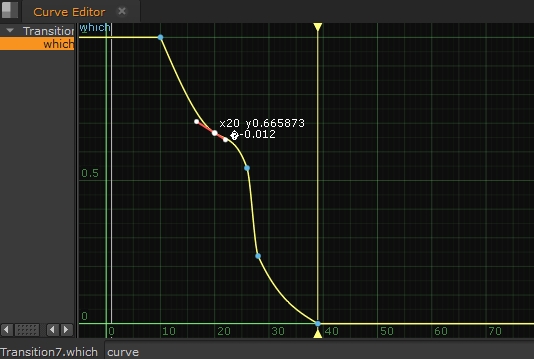
You can adjust the keyframes in the Curve Editor to achieve the required transition speed. You can adjust the keyframes manually by dragging them to different frames and adjusting the curve handles to change the speed of transition. You can also add keyframes to edit the curve with even more precision by pressing Ctrl/Cmd+Alt and clicking on the curve.
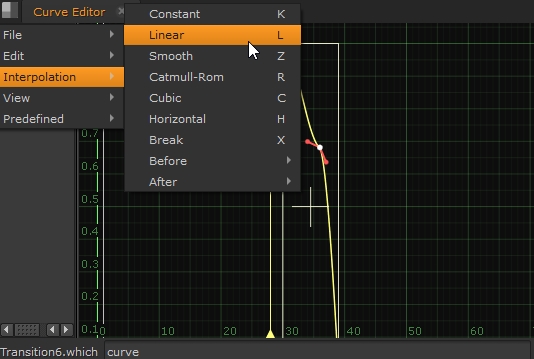
The Curve Editor also has some preset curves that you can apply to keyframes:
-
Select all the keyframes by pressing Ctrl/Cmd+A.
-
Right-click in the Curve Editor and select Interpolation to display the available presets.
See Using the Curve Editor for more information on the Curve Editor and keyframes.