Performing a Color Match
O_ColourMatcher has two different modes you can use to perform a color match: Basic mode and Local Matching mode. Both modes require an O_DisparityGenerator and an O_OcclusionDetector node upstream of the O_ColourMatcher node.
To perform a color match, complete the following steps:
|
2.
|
Select Ocula > Ocula 4.0 > O_ColourMatcher to insert an O_ColourMatcher node after the O_DisparityGenerator and O_OcclusionDetector nodes. |
|
3.
|
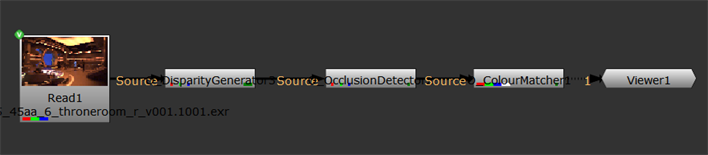
Connect a Viewer to the O_ColourMatcher node. Your node tree should now look something like this: |
|
|
O_ColourMatcher node tree.
|
|
4.
|
In the O_ColourMatcher controls, select the two views you want to use for the color match under View to Use. The two views you select are mapped for the left and right eye. |
|
5.
|
From the Match menu, select either Left to Right or Right to Left depending on the direction in which you want to perform the color match. |
|
6.
|
Select the required mode from the Mode dropdown in the O_ColourMatcher controls. See O_ColourMatcher Controls for more information about the different modes. |
|
7.
|
Adjust the O_ColourMatcher controls to get the best possible result. See O_ColourMatcher Controls for more information about the controls. |
Editing Color Match Results
If you can see areas where the color match is wrong, make sure they are included in the upstream occlusion mask. You can edit the occlusion mask in two ways:
• Adjust O_OcclusionDetector controls.
• Use a RotoPaint node before O_ColourMatcher and manually edit the mask by using the paint tool to add occluded regions into the mask_occlusion channel.