O_DepthToDisparity Example
This example shows you how to calculate a disparity map for a stereo pair of images using O_DepthToDisparity.
You can download the script used here from our website. For more information, please see Example Images.
Step by Step
| 1. | Start Nuke and select File > Open to import the gherkin.nk script. |
| 2. | This script has the left and the right view set up in the Project Settings. In the Node Graph, there is a stereo camera node. |
| 3. | Select Image > Read to import gherkin.exr and attach a Viewer to the image. |
The image is a render of a 3D scene. It already includes the left and the right view, and a depth channel for both views.
| 4. | Select Ocula > Ocula 4.0 > O_DepthToDisparity to insert an O_DepthToDisparity node between the Read node and the Viewer. Make sure the Read node is connected to the Depth input of O_DepthToDisparity. |
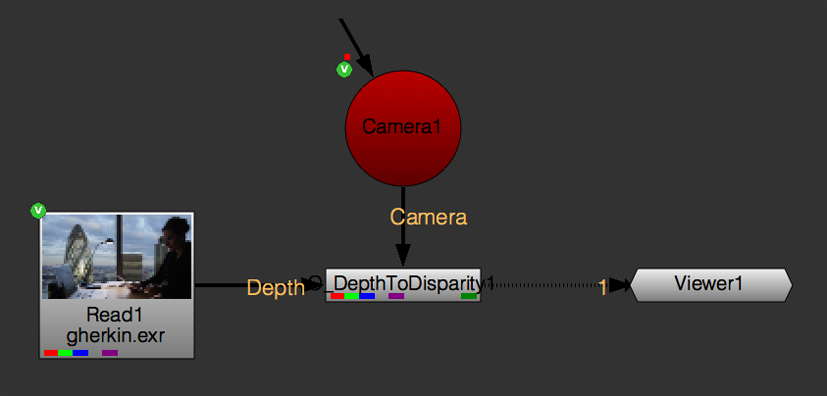
| 5. | Connect the Camera node to the Camera input of O_DepthToDisparity. This node is the camera the 3D scene was rendered with. Your node tree should now look something like the one shown below. |
| 6. | Use the channel menus in the top left corner of the Viewer to display one of the disparity channels. |
O_DepthToDisparity calculates the disparity map and stores it in the disparity channels.
| 7. | Temporarily decrease the gain value in the Viewer to see detail in the disparity channels and then switch back to viewing the rgba channels. |
| 8. | To evaluate the quality of the disparity map, select Ocula > Ocula 4.0 > DisparityReviewGizmo. |
The default settings show that the disparity map is pretty good, with clearly defined depth edges picked out in red. See DisparityReviewGizmo for more information.

It is worth noting that the results achieved with O_DepthToDisparity are usually better than those achieved with O_Solver and O_DisparityGenerator for rendered 3D scenes, though this is not the case with non-CG footage.