Live Rendering with the Hydra Viewer
The Hydra Viewer features a Monitor Layer, enabling you to view a render over the top of your scene displayed in the Hydra Viewer.
For a full overview of this feature, please refer to The Monitor Layer section of this topic.
Note: For background information, see the following pages:
Using the Monitor Layer and Monitor Tab
Controlling Live Rendering
Controlling Live Rendering in the Scene Graph
Live Render from Viewer Camera
Once a Live Render has been started, you can use the Live Render from Viewer Camera button  to change the active Hydra Viewer camera to the camera that is being used in the live render. This means that the camera defined in the RenderSettings node when can be overridden to the active Hydra Viewer camera.
Note: The Live Render from Viewer Camera button changes the render camera but does not start a live render, there must already be an active live render for this button to have an effect.
When starting a Live Render, only the camera is added to the Live Render Working Set which means that only changes made to the camera trigger updates to the Live Render. If you want the Live Render to update after adjustments to other locations, these locations must be added to the Live Render Updates Working Set by checking the appropriate box in the Live Render Updates ![]() working set of the scene graph.
working set of the scene graph.
For more information, see Controlling Live Rendering in the Scene Graph.
Live Rendering with the Monitor Layer
The Monitor Layer is a new feature of Katana 3.5 which allows you to toggle a render view directly in the Hydra Viewer, overlaying the geometry. This feature is especially useful when working with live renders, as your render overlay will be constantly updated as you make changes to the scene or as you zoom, pan and rotate within the viewer. This allows for more precision while you are working, as you don't need to switch back and forth between the Monitor tab and the Hydra Viewer tab.
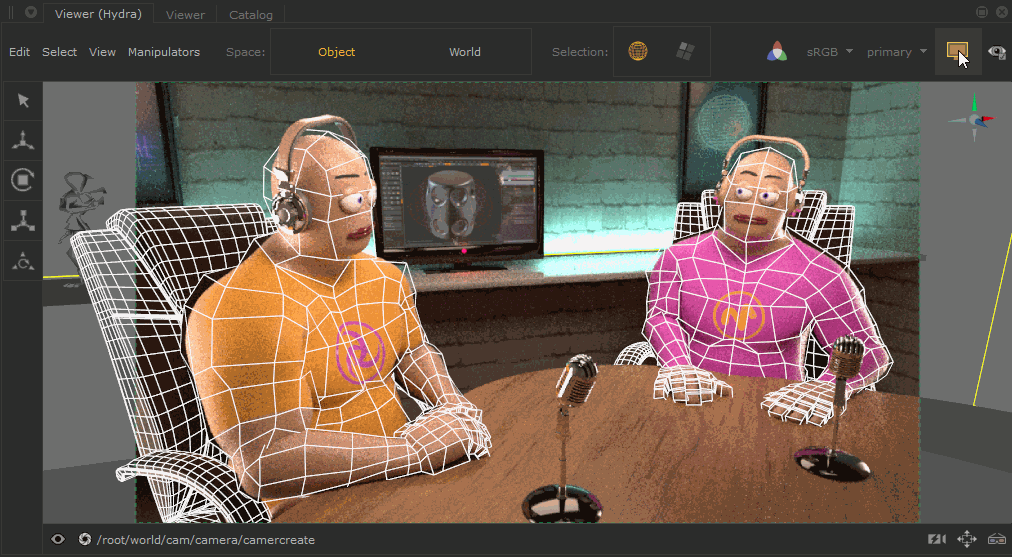
While the Monitor Layer is activated, you can still make selections within the viewer and the selection feedback is integrated with the rendered image.
The Monitor Layer creates a smoother workflow for artists, as you can maximize the Hydra Viewer tab and have a more focused UI, giving full editing control.
Using Monitor Layer in the Hydra Viewer
To turn on the Monitor Layer in the Hydra Viewer tab, click the Monitor Layer button  , or press ` on the keyboard.
Note: You must have started a render for the overlay to appear. For more information about rendering, see Performing a Render.
Once turned on, the following additional controls are shown in the Hydra Viewer tab:
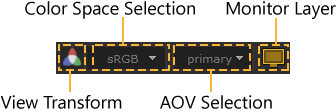
- Monitor Layer button - Use this button to toggle the Monitor Layer on and off. When on the button will appear yellow
 , and when off the button will appear gray .
 - AOV selection button - Use this dropdown to select which AOV to display in the Monitor Layer.
Note: You can cycle through the AOVs in the Monitor Layer using Shift+Page Down to move through the list from first to last, and Shift+Page Up to move from last to first. You can also use Shift+Home to toggle between the default AOV and a previously selected AOV.
- Color Space selection button - Use this dropdown to select which color space you would like to view your render in.
- View Transform toggle button - Use this button to toggle on and off the view transform to the selected Color Space.