Search is based on keyword.
Ex: "Procedures"
Do not search with natural language
Ex: "How do I write a new procedure?"
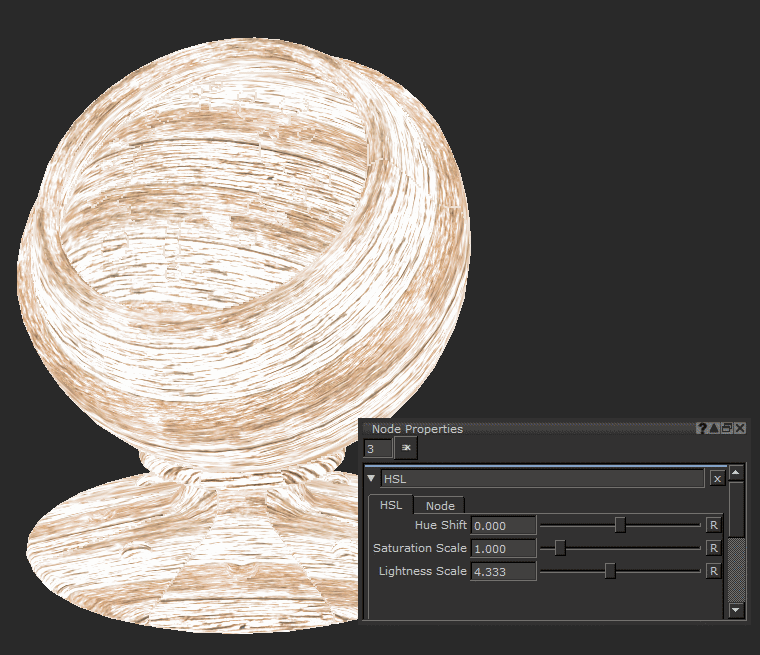
HSL Node
Access: Nodes > Filter > HSL Node
The HSL node manipulates three texture input settings: Hue, Saturation, and Lightness making it ideal for color corrections on your textures. This is a really crucial feature if you’re trying to balance reference images with others that you have gotten from elsewhere.
Manipulating the Hue Shift and Saturation Scale allows you to adjust images to match the look of the rest of your scene.
The HSL node is very similar to the HSV Node, which lets you manipulate Value Scale rather than Lightness Scale. Lightness Scale has a maximum of a value of 1, whereas using the HSV node's Value property gives you values over 1.
|
|
|
|
|
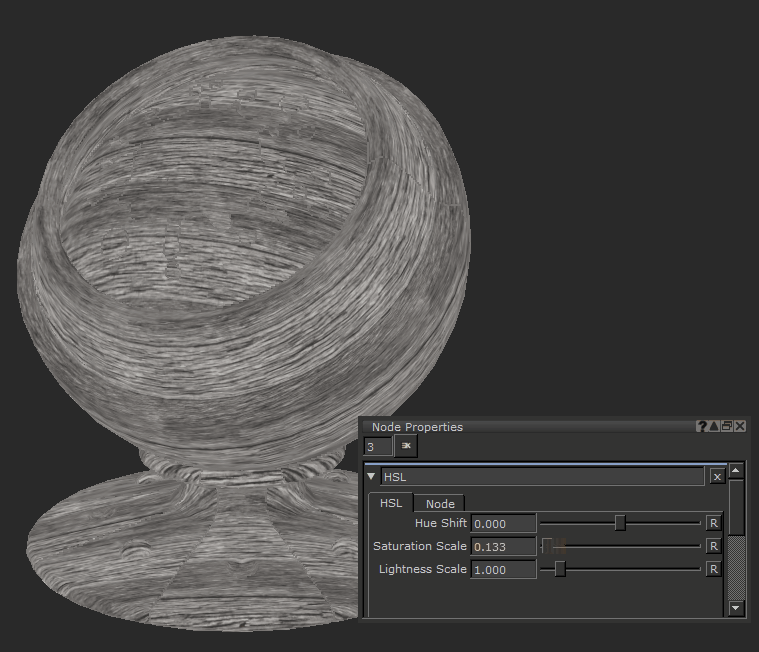
HSL node with a Hue Shift value of 0.0. |
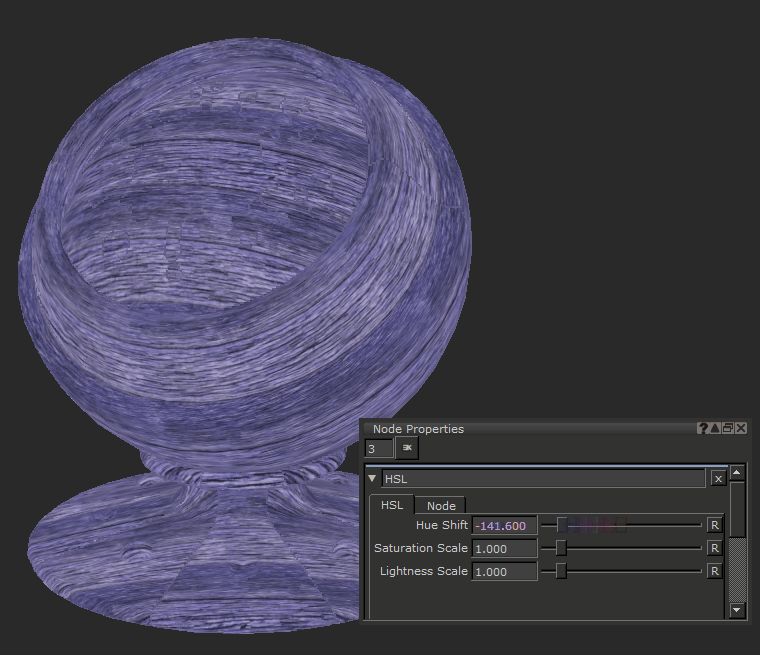
HSL node with a Hue Shift value of -141.0. |
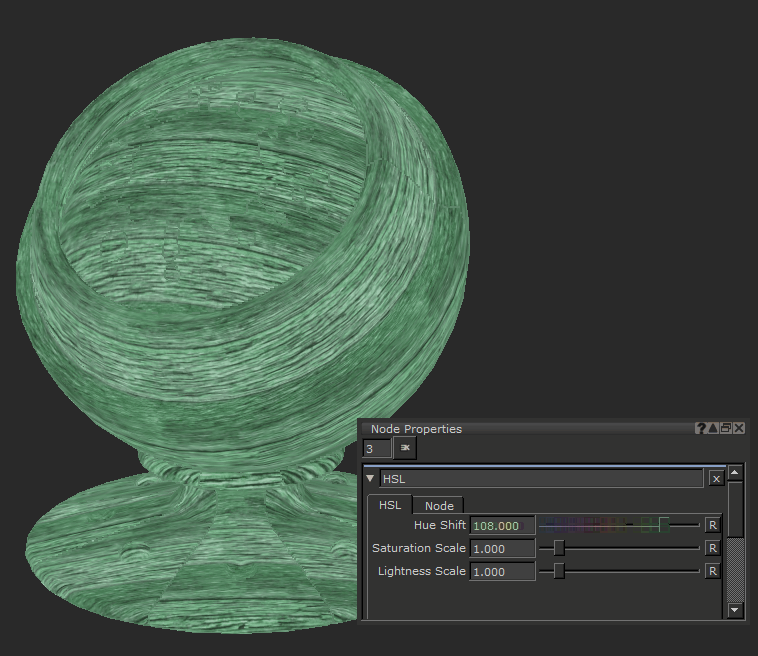
HSL node with a Hue Shift value of 84.0. |


Note: The HSL’s Lightness scale increase highlights and midtones at the cost of saturation, so sometimes it may be useful to try the HSV node instead.
HSL Node Inputs
Input: What the HSL node adjusts.
HSL Node Properties
|
Hue Shift text field, slider |
Default: 0.000 |
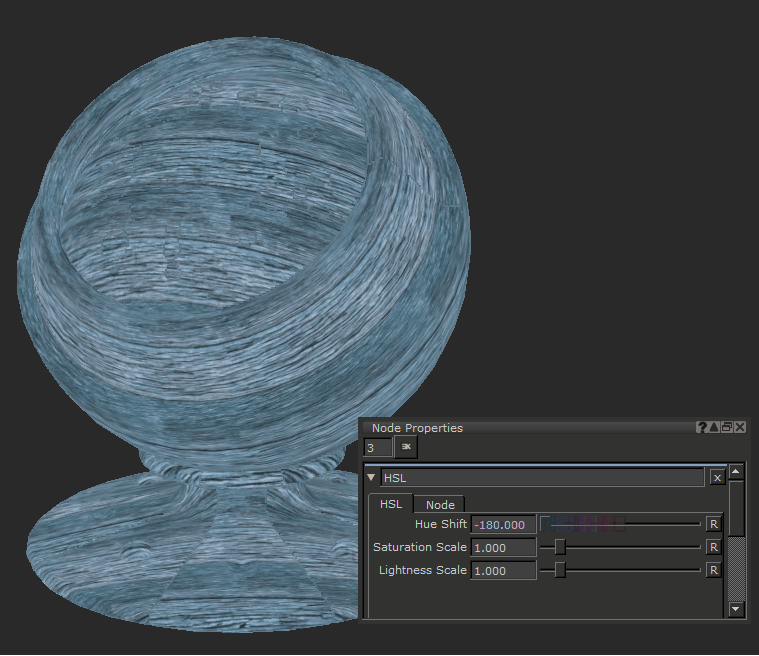
Changes the hue of the input. Moving the Hue Shift slider cycles through the color spectrum.
|
||||||
|
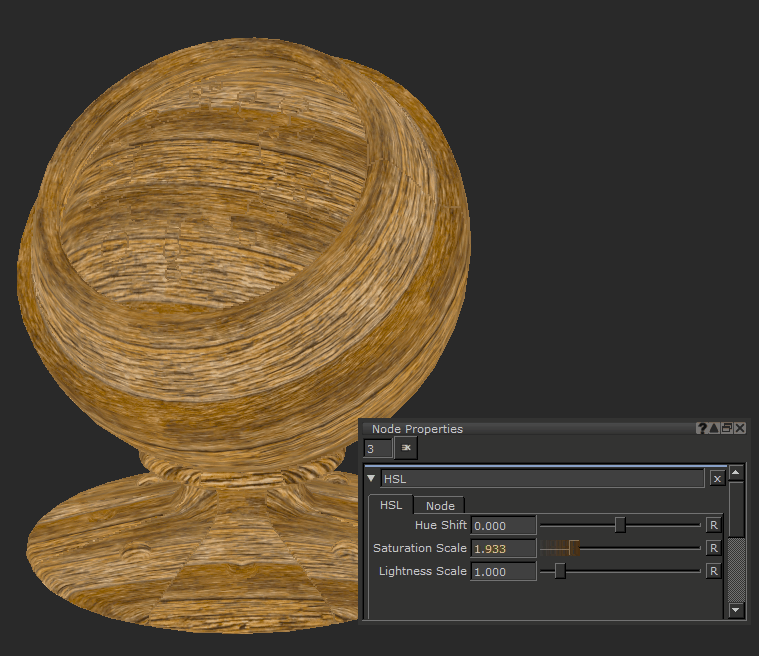
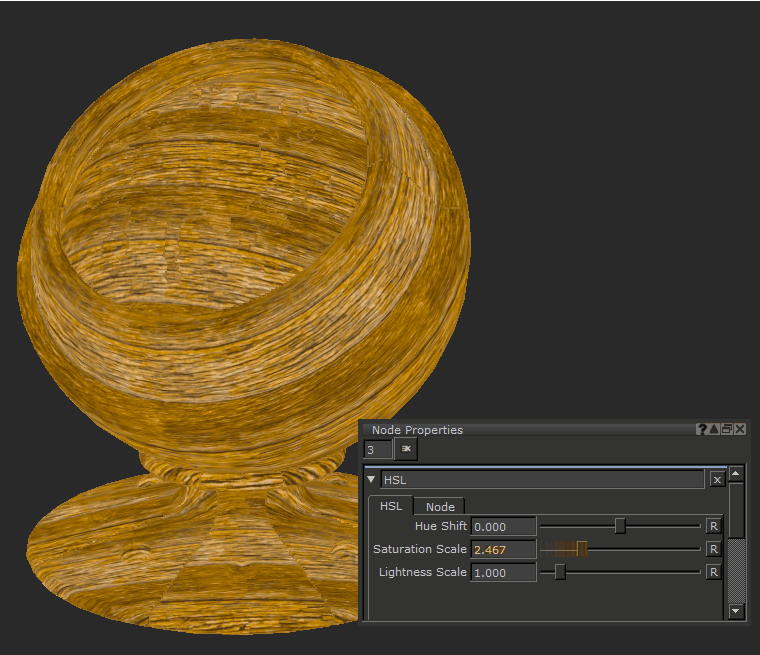
Saturation Scale text field, slider |
Default: 1.0 |
Multiplies the output saturation. For example, a value of 2 gives you twice saturated an output. A value of 0.5 results in half as much saturation. Setting the slider to 0 outputs a grayscale result.
|
||||||
|
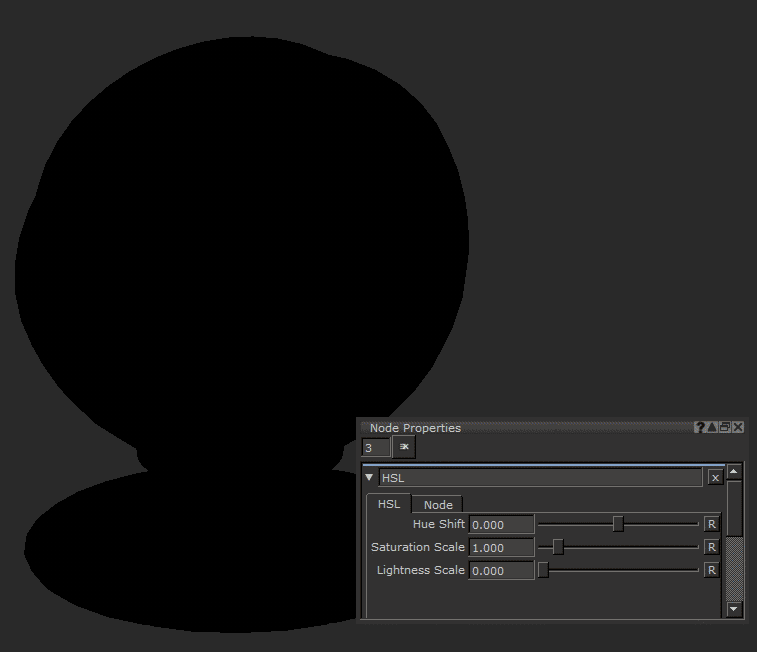
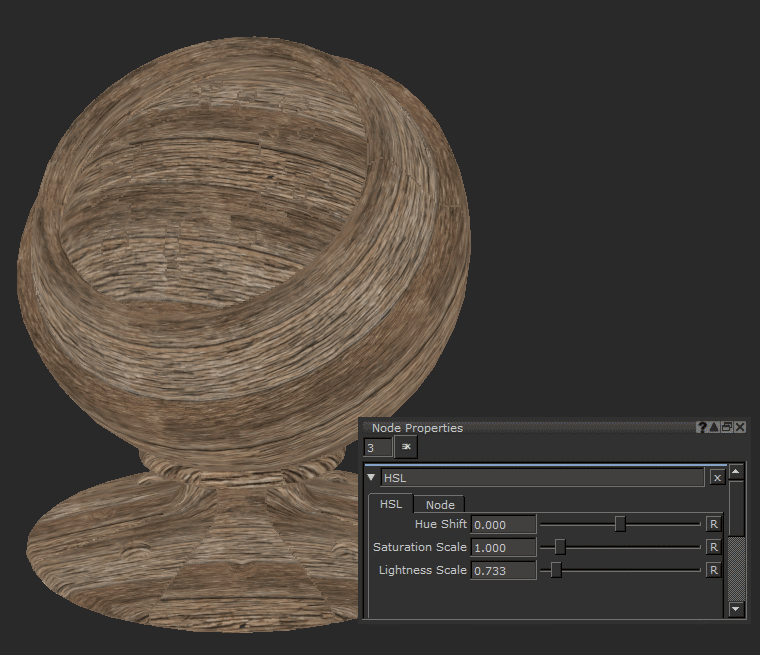
Lightness Scale text field, slider Default: 1.0 |
Multiplies the amount of lightness the output has. Lightness Scale increases the color value at the cost of hue and saturation For example, a value of 2 gives you twice as light an output. A value of 0.5 results in half as much saturation. Setting the slider to 0 outputs a grayscale result.
|
HSL Node Workflow Example
Color Correcting Reference with the HSL
The HSL node is great for changing the color of images that don’t match the rest of your reference. This is a speed boost to your workflow, rather than having to make changes in photo editing software.
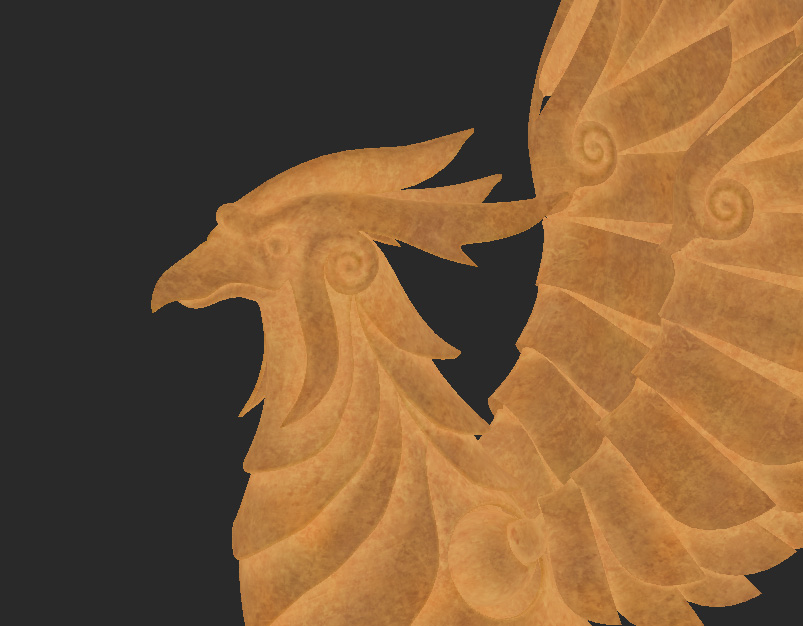
The base color map.
In the example, the base color map is fairly plane. There is a tiled rust texture to merge on top, but the metal base already built up has warm orange and yellow tones.
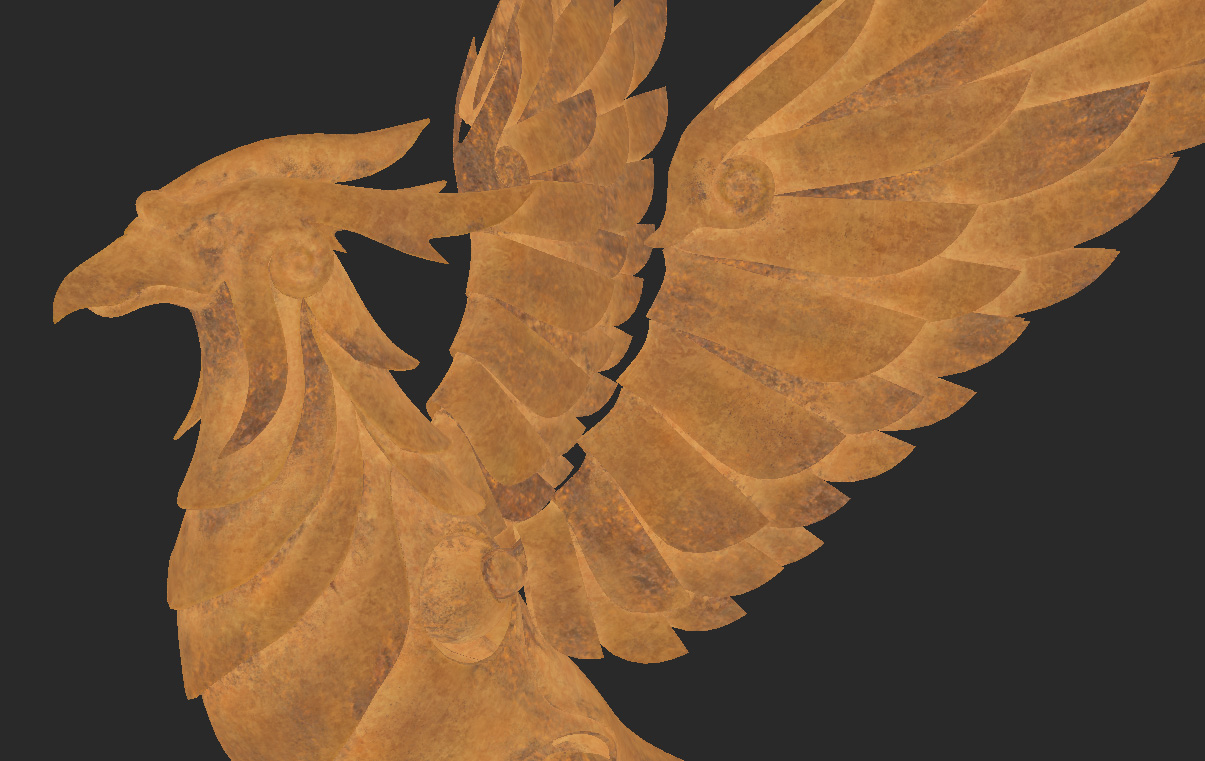
In the following example, there is very little variation between the base metal and the warmth of the rust when adding the rust on top. Using a HSV node allows you to add some contrast.
There is very little variation in the base color map.
The default tiled texture blends too well and doesn’t look like rust compared to the current base color.
To rectify this, you can add an HSL node to bring the Hue Shift down to make it warmer and look like a rustier version of the base. Saturation Scale is then increased slightly and the Lightness Scale is reduced to make it darker.
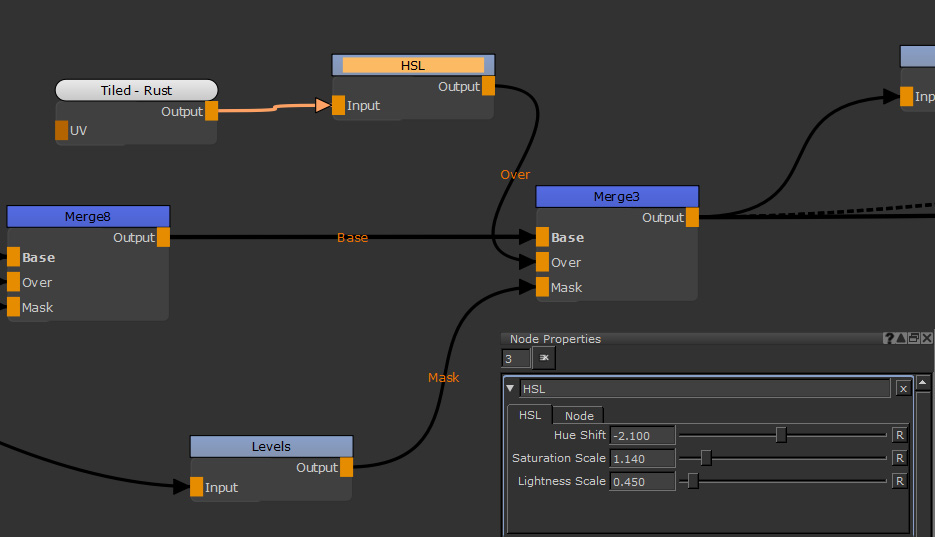
A HSL node with Hue Shift reduced slightly, Saturation Scale increased, and Lightness Scale reduced.
To rectify this, you can add an HSL to bring the Hue Shift down to make it warmer and look like a rustier version of the base. Saturation Scale is then brought up slightly and the Lightness Scale is brought down to make it darker.
The mask texture of the merge node can then be hand painted, letting you decide where the rust is.
|
|
|
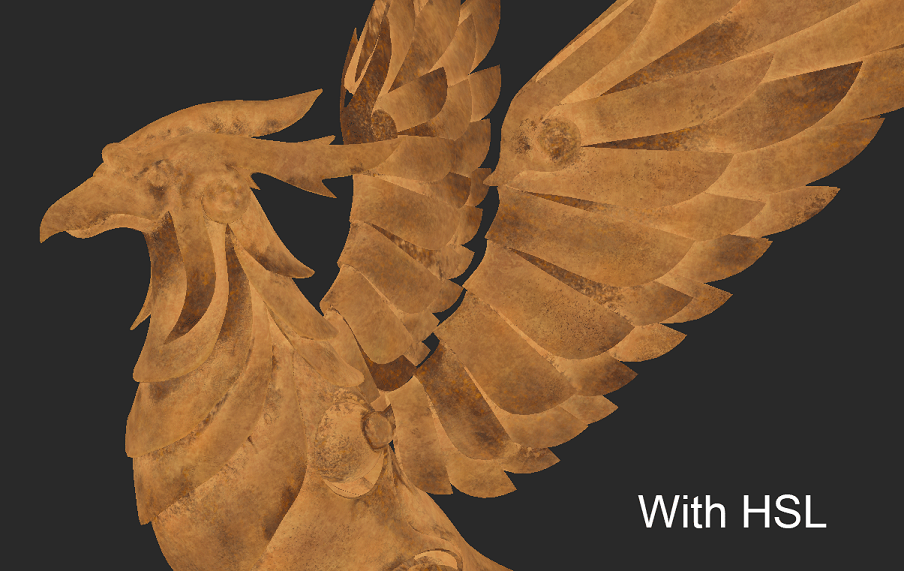
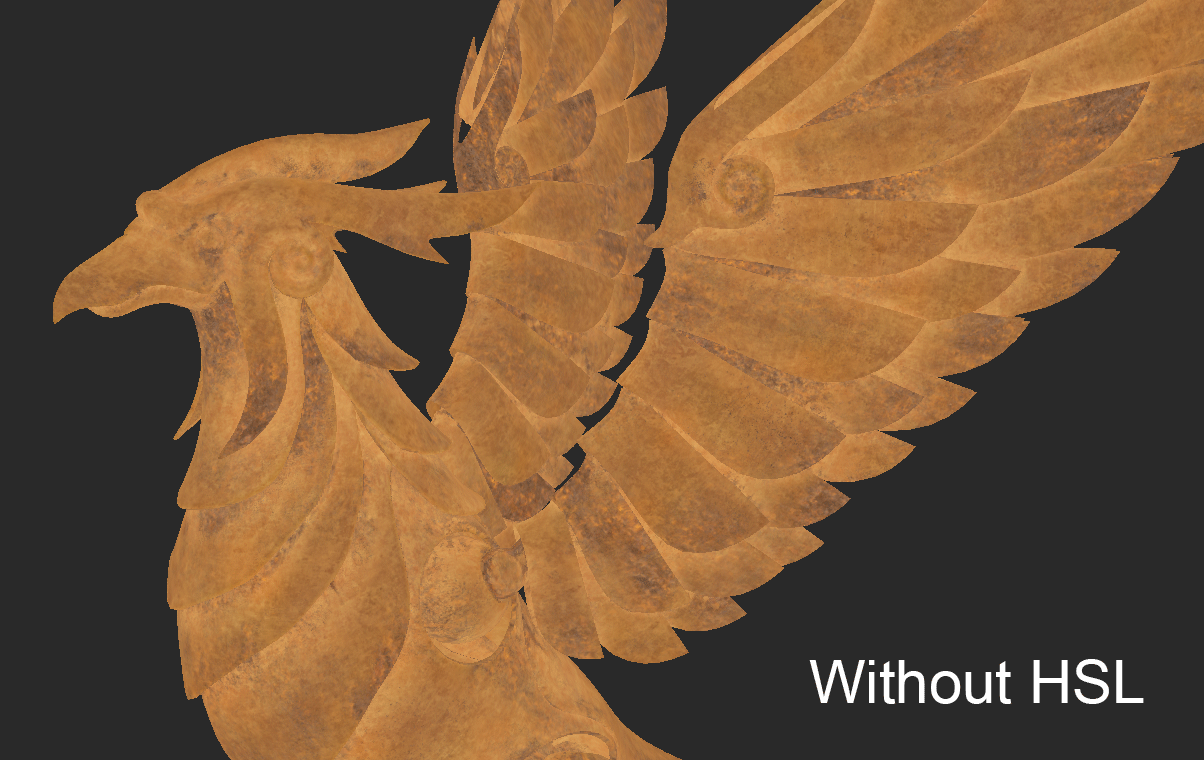
Without the HSL node, the darks of the rust image do not fit well as they have very little contrast to the rest. Using the three sliders of the HSL node, you can create something that represents a real world reference.
Creating a Secondary Channel from a Color Channel with the HSL
Because an HSL node can desaturate a color texture and create a grayscale version, it is really useful for creating secondary maps from your Base Color channel. Secondary maps such as Specular roughness or Bump, should line up with your painted texture mask details. You can create a secondary map by adding an HSL node and setting the Saturation Scale to 0.
Then you can start grading parts with masks to get a secondary map correctly balanced to how you would want that channel to look. For more on how to do that, see the Levels Node topic.
Related Nodes
Sorry you didn't find this helpful
Why wasn't this helpful? (check all that apply)
Thanks for your feedback.
If you can't find what you're looking for or you have a workflow question, please try Foundry Support.
If you have any thoughts on how we can improve our learning content, please email the Documentation team using the button below.
Thanks for taking time to give us feedback.