Search is based on keyword.
Ex: "Procedures"
Do not search with natural language
Ex: "How do I write a new procedure?"
Shuffle Node
Access: Nodes > Filter > Shuffle
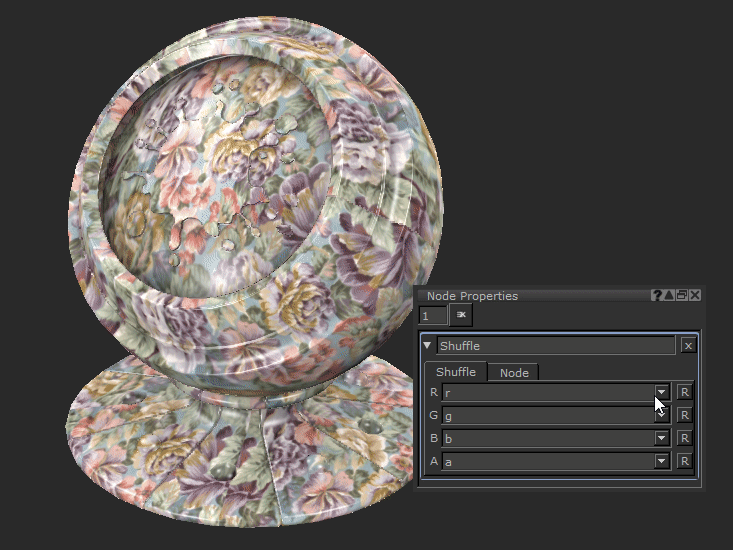
Shuffling the red channel of a fabric tiled texture.
The Shuffle node is a node that lets you rearrange different color channels of the texture into other color channels. Certain situations and operations require this operation.
By shuffling the red, green, blue and alpha of a texture is especially useful for shuffling out channel packed images. A channel packed image is one that has multiple grayscale images placed in the different color channels of an image. Since a mask is just grayscale data, you can put those values into the R, G, B, and alpha channels, optimizing your textures since you can get 3 masks into a single exported image. In your renderer you just need to unpack it to use the correct channel as the mask rather than all three combined.
You can also get a black and white image of a single channel to use for masking, which would give you a different result to standard desaturation.
Shuffle Node Inputs
Input: The texture to be adjusted by the Shuffle node.
Shuffle Node Properties
|
R Checkbox |
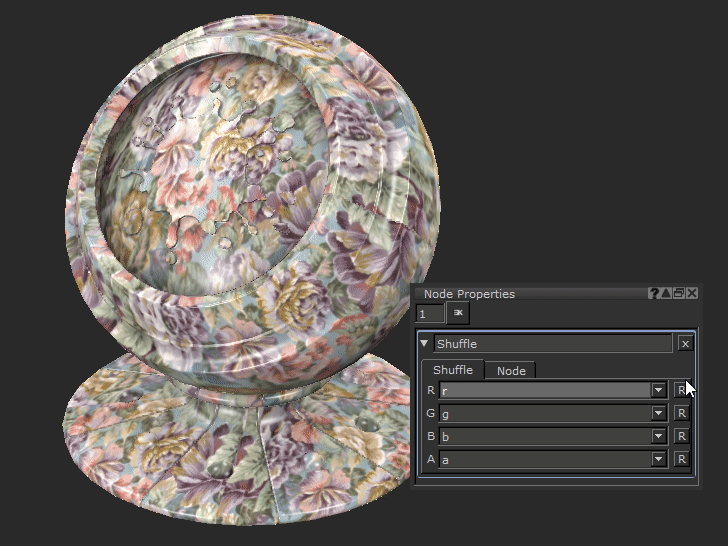
Rearranges the red channel input, allowing you to shuffle in another channel’s values to the red values instead.
If you set R, G, and B to the same output you get a grayscale output of that channel. This is especially useful for channel packed images to get out the individual masks. By default the Shuffle node outputs each channel as itself causing no change. |
|
G Checkbox |
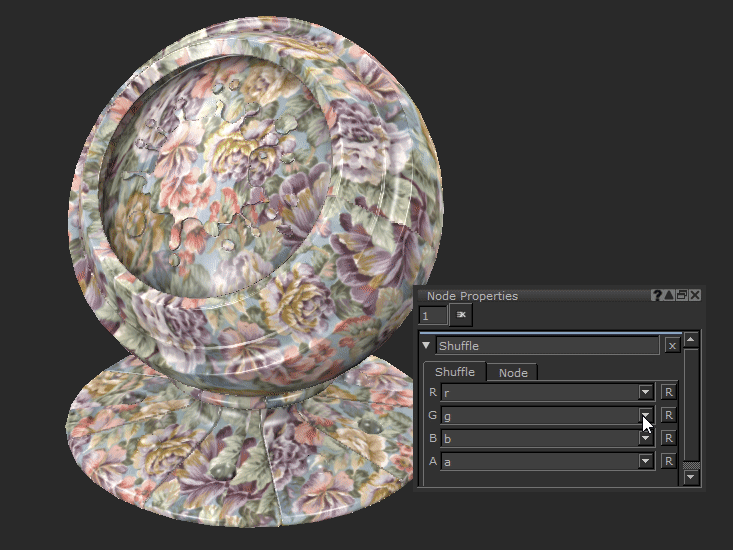
Rearranges the green channel input, allowing you to shuffle in another channel’s values to the green values instead.
If you set R, G, and B to the same output you get a grayscale output of that channel. This is especially useful for channel packed images to get out the individual masks. By default the Shuffle node outputs each channel as itself causing no change. |
|
B Checkbox |
Rearranges the blue channel input, allowing you to shuffle in another channel’s values to the blue values instead.
If you set R, G, and B to the same output you get a grayscale output of that channel. This is especially useful for channel packed images to get out the individual masks. By default the Shuffle node outputs each channel as itself causing no change. |
|
A Checkbox |
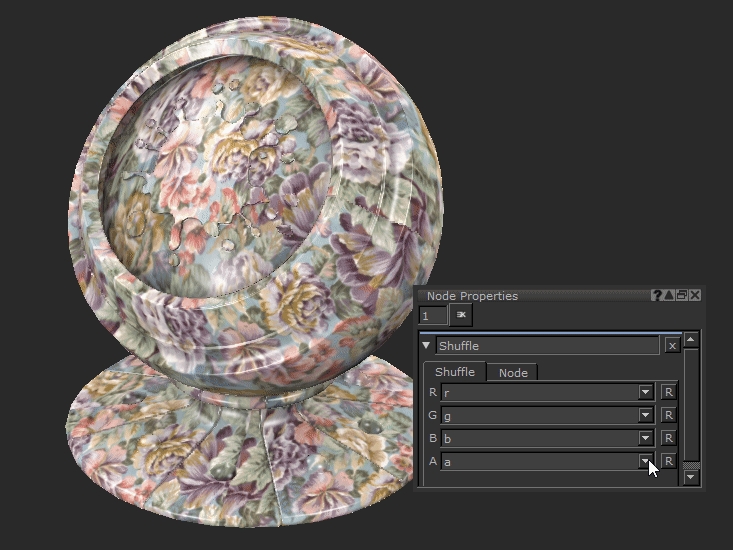
Rearranges the alpha channel input, allowing you to shuffle in another channel’s values to the alpha values instead.
If you set R, G, and B to the same output you get a grayscale output of that channel. This is especially useful for channel packed images to get out the individual masks. By default the Shuffle node outputs each channel as itself causing no change. |

Shuffle Node Workflow Example
Shuffling out Channel Packed Masks
In the example we have a channel packed texture that has been imported into a Paint node. To learn more about this, see the Color Switch Node.
If you are working with other users on a project it could well be the case that you get handed their masks, and if they are working in an optimized way, you could well get masks packed together.
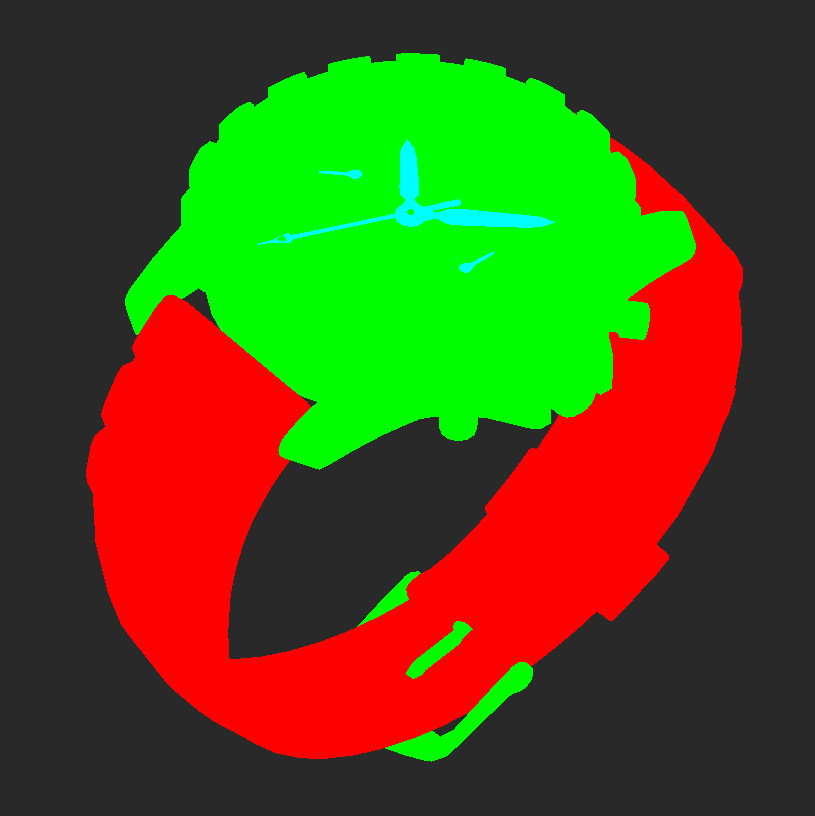
3 masks in a single texture using the 3 different color channels, also known as a channel packed image.
This watch asset has 3 masks, one for the leather strap, another for all the metal and a third for the watch hands. They have been imported into a Paint node but we need to split them out into black and white masks to be able to use them individually in Mari.
To unpack these 3 masks you can place down a Shuffle node into your Node Graph. First, to get out the mask in the red channel, a Shuffle node with the R, G, and B all outputting as r gives you the correct texture.

Tip: You can set down a different Shuffle node for the green and blue masks, but doing the same but with g and b respectively.
|
|
|
|
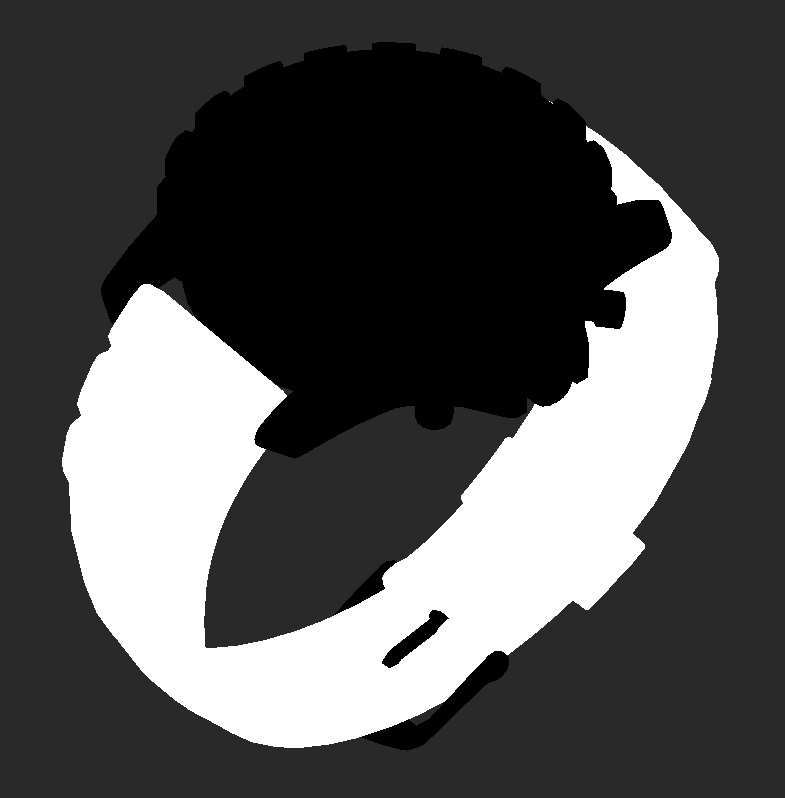
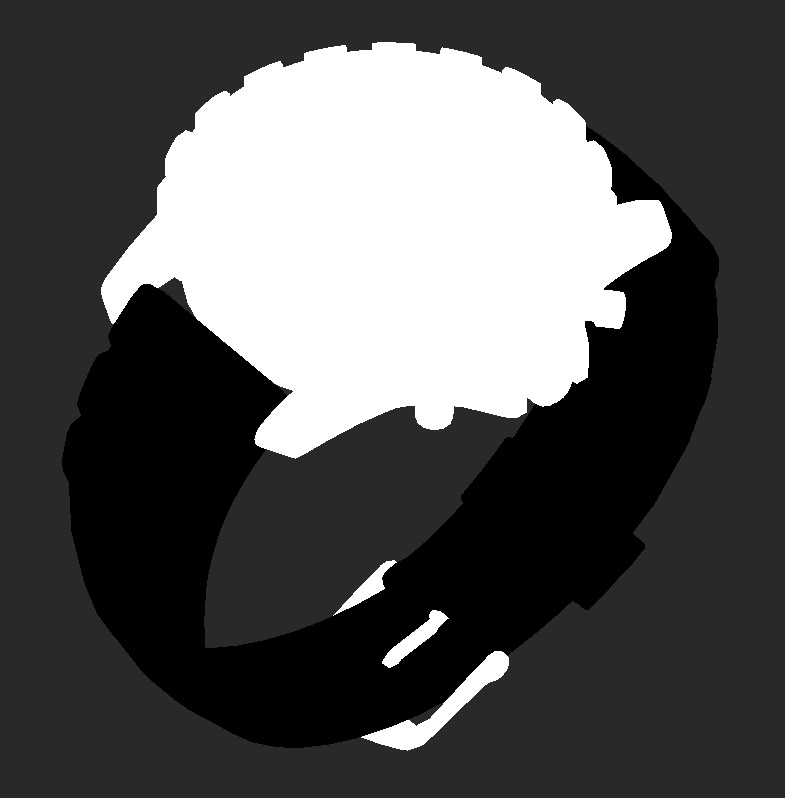

The 3 masks shuffled out with the Shuffle node.
Channel packing doesn’t just have to be masks. In games design, where optimization is key, you may have your Specular Roughness, Metallic, and Ambient Occlusion all in a single image as they are all grayscale data maps.
To see how to create the channel packed masks, check out the Color Switch Node.
Related Nodes
Sorry you didn't find this helpful
Why wasn't this helpful? (check all that apply)
Thanks for your feedback.
If you can't find what you're looking for or you have a workflow question, please try Foundry Support.
If you have any thoughts on how we can improve our learning content, please email the Documentation team using the button below.
Thanks for taking time to give us feedback.