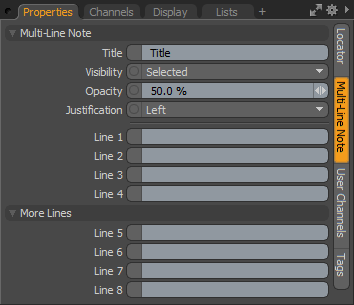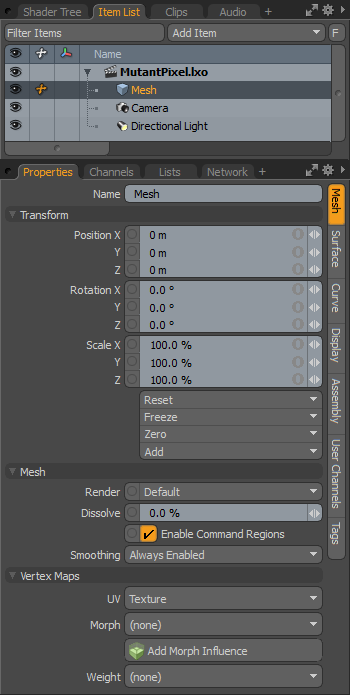
• Name - displays the current item name. You can easily change it by clicking within the field and typing the new name.
The following Transform options are available for the Mesh Item:
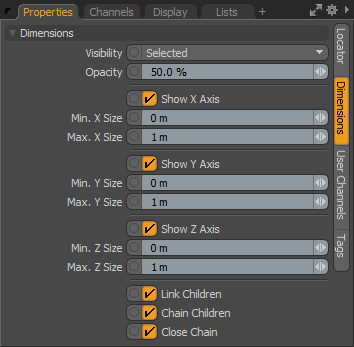
• Position - an item transform that allows you to numerically position the item in XYZ space. By default, Position transforms originate from the item's Center position.
• Rotation - an item transform that allows you to numerically set the rotation of the item. By default, Rotation transforms originate from the item's Center position.
• Scale - an item transform that allows you to numerically set the size of the item. By default, Scale transforms originate from the item's Center position.
• Reset - resets the selected transform values to (0,0,0) returning the items back to their default state.
• Freeze - returns the item's Center position to the world space center (0,0,0) without changing the position of the Mesh Item itself.
• Zero - resets the chosen transform property values to 0, leaving the Center position and mesh position intact. This is done by adding an additional transform item to the Mesh Item's channels with an inverted version of the current values. This is useful to allow, for example, a joint to have a base value of 0,0,0 but still be located away from the World Origin.
• Add - adds additional Transform items to the associated item or, if they do not yet exist, it simply adds them. Transform items are the channel groups that store the actual transform values controlling any item's position, rotation, and/or scale. You can add as many Transform items as desired for any transform property desired. Adding additional Transform items produce an additive effect where each transform group is evaluated before the next, and so on. Additional item transforms are evaluated in their order in the channels list, from the bottom upwards.
It should be noted that by default, new items do not have any transform items associated with them (even though they are visible here within the Properties panel). This is useful as an optimization, as only the necessary transforms are created on an as-needed basis, reducing scene overhead. There are several actions that add these base transform items. One is by simply transforming the target item with one of the various transform tools or by editing the values input fields. This action causes the particular transform item to be added automatically to the Channels viewport list. Die to this fact, you may need to specifically create item transforms when Referencing, because in order to override the channels in the Master scene, they must first exist.
The following Mesh options are available for the Mesh Item:
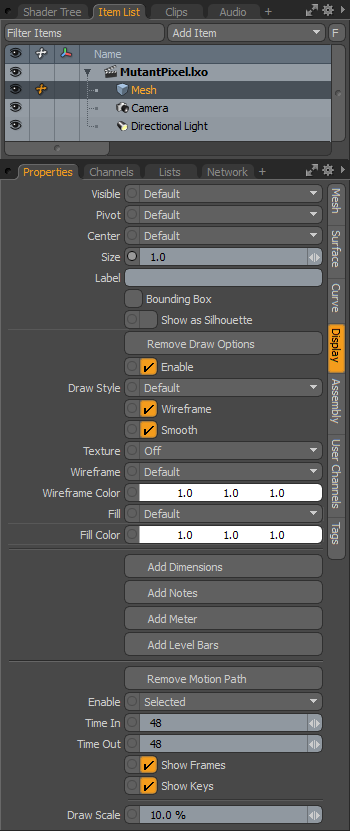
• Render - allows you to select from three choices: when set to Default, you can enable/disable Mesh Items using the visibility column (eye icon) of the Item List, when the mesh layer is visible, it contributes to the final rendered scene, and when invisible, it does not. On some instances you may prefer to fix this state, setting the mesh as On (enabled) or Off (disabled), regardless of layer visibility. These controls are also useful for workflows that auto-toggle visibility, saving you from manually enabling mesh layers for test renders.
• Dissolve - controls the visibility of an item layer when rendering. At 0% the item renders normally, utilizing the Shader Tree settings. Values above 0% fade the visibility of the item layer, ramping toward 100%, where the item would be completely invisible.
• Enable Command Regions - can be used to toggle the automatic Command Regions functionality. When enabled, command regions work as defined; when disabled, command region definitions are ignored.
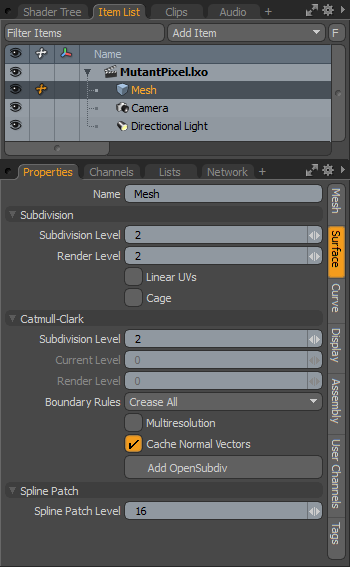
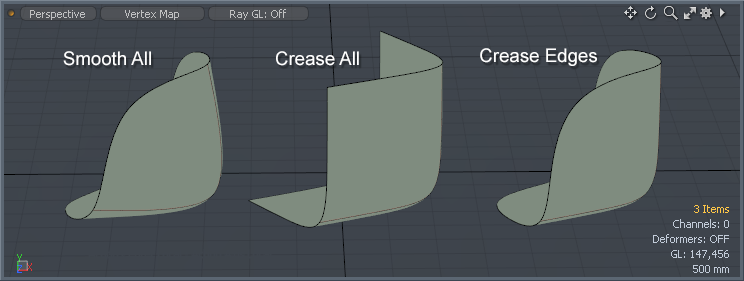
• Smoothing - a performance-enhancing option that allows you to control the Smoothing applied to a Mesh Item on an individual basis. When disabled, the reduced evaluation overhead can be useful to help to increase performance in heavy scenes. Always Enabled smooths the entire layer at all times, Disabled with Deformers disables any smoothing only when a deformer is attached to the item layer, and the last option, Always Disabled, eliminates smoothing for the item at all times.
The following Vertex Maps options are available for the Mesh Item:
• UV - provides a convenient means to select the current UV map that is visible in the 3D Viewports. It also allows the ability to easily create a new map by selecting the New option. For more information, reference the Vertex Maps topic.
• Morph - provides a convenient means to select the current active Morph map. It also allows the ability to easily create a new map by selecting the New option.
• Add Morph Influence - automatically creates a Morph Influence with the selected Morph map, that is connected to the current mesh. Morph deformers are only visible in viewports that have the Enable Deformers option enabled.
• Weight - provides a convenient means to select the current Weight Map that is visible in the 3D Viewports. It also allows the ability to easily create a new map by selecting the New option.