Modo Bridge for Unreal Engine
Modo has the ability to communicate with the Unreal Engine in real-time and allows you to transfer meshes, Instances, textures, materials, and cameras between Modo and the Unreal Engine.
Installing the Modo Bridge Plug-in
Installing from Epic Games Launcher
To install the Modo Bridge plug-in for Unreal from the Epic Games Launcher:
| 1. | Start Epic Games Launcher, then click Marketplace and search for Modo Bridge. |
| 2. | On the Content Detail page, click the Free button to download the plug-in, then click Install to Engine to automatically install it to the Unreal Engine. |
Tip: If you currently have an older version of the Epic Game Launcher installed, you can quickly update to the latest Unreal Engine. With the Epic Games Launcher running, on the left panel, click Library and then click Add Versions at the top of the view. Locate the latest version and click Install. 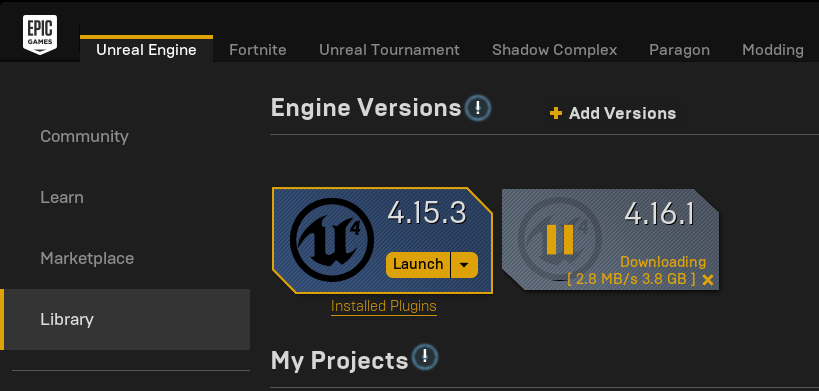
Installing Modo Bridge as a Project Plug-in
This process installs Modo Bridge plug-in as a project plug-in. This means that the plug-in is installed for the current project only, and you need to install it again for each new project you'd like to use it in.
| 1. | Copy the Plugins\ModoBridge folder to the Plugins folder of your Unreal project: <Your Unreal Project>\Plugins\ |
Note: If you don't have a Plugins folder, you need to create one.
For example, for Unreal Engine 4.16 the path looks like this:
Windows:
C:\Users\<user>\Documents\Unreal Projects\MyProject\Plugins\
Mac OS:
/Users/<username>/Documents/Unreal Projects/<Your Unreal Project>/Plugins/
Note: Create the Plugins folder, if it does not exist.
| 2. | When you open the Unreal Editor, the plug-in loads automatically. |
Note: If the plug-in is not loaded automatically, load the project in the Unreal Editor and enable Edit > Plugins > Modo Bridge Plugin.
Note: You need to re-install the plug-in for every new project in which you need it.
Installing Modo Bridge as an Unreal Engine Plug-in
This process installs the Modo Bridge plug-in as an Unreal Engine plug-in, which means that once installed, the plug-in is used in all new projects.
Note: Due to module dependencies used by the Modo Bridge, some constraints in Unreal Engine 4 may prevent the plug-in from working properly. Therefore, if this installation doesn't work for you, please install Modo Bridge as a project plug-in, as described in Installing Modo Bridge as a Project Plug-in.
| 1. | Copy the Plugins\ModoBridge folder to the Plugins folder of the Unreal Engine files: <Unreal4 install location>\Engine\Plugins\ |
For example, for Unreal Engine 4.16 the path looks like this:
Windows:
C:\Program Files\Epic Games\EU_4.16\Engine\Plugins\
Mac OS:
/Users/Shared/Epic Games/UE_4.16/Engine/Plugins/
| 2. | When you open the Unreal Engine 4 editor, the plug-in is loaded automatically. |
Installing Modo Material Importer (Optional)
You can also install the Modo Material Importer plug-in on your Unreal Engine client to transfer material updates.
For more information, see Installing the Material Importer.
Note: If the plug-in is not loaded automatically, load the project in the Unreal Editor and enable Edit > plugins > Modo Material Importer Plugin.
Compiling Modo Bridge from Source with Unreal Engine
This process compiles the plug-in source with Unreal Engine 4 for your operating system and installs Modo Bridge plug-in as a project plug-in or as an Unreal Engine plugin.
Compiling with a new C++ Unreal Engine project
| 1. | Create a new C++ project to compile the plug-in source. |
| 2. | Download the plug-in package from here and extract it. |
| 3. | Copy the ModoBridge folder to the Plugins folder of your new C++ Unreal project: <Your Unreal Project>\Plugins\ |
Note: If you don't have a Plugins folder, you need to create one.
For example, for Unreal Engine 4.20 the project Plugins path looks like this:
Windows:
C:\Users\<user>\Documents\Unreal Projects\MyProject\Plugins\
Mac OS:
/Users/<username>/Documents/Unreal Projects/<Your Unreal Project>/Plugins/
| 4. | Open the C++ project in your IDE of choice and start the compiling process. |
To start the compiling process on Windows:
Open the C++ Unreal project and in the Visual Studio 2015 or 2017 main menu click Build > Build Solution.
To start the compiling process on Mac OS:
Open the C++ Unreal project and in the XCode main menu, click Product > Build.
| 5. | When compiling is finished, copy the ModoBridge folder from the new C++ Unreal project Plugins folder to the Plugins folder of your Unreal project, or to the Plugins folder of your Unreal Engine. Copying to the Plugins folder of your Unreal Engine enable the plug-in for all Unreal projects. |
For example, for Unreal Engine 4.20 the path looks like this:
Windows:
C:\Program Files\Epic Games\EU_4.20\Engine\Plugins\
Mac OS:
/Users/Shared/Epic Games/UE_4.20/Engine/Plugins/
Compiling with the Unreal Engine source
Note: Compilation with Unreal Engine source may take longer.
| 1. | Follow the instructions on how to download and build Unreal Engine from source. |
| 2. | Download the plug-in package from here and extract it. |
| 3. | Copy the ModoBridge folder to the Plugins folder of the Unreal Engine files: <Unreal4 install location>\Engine\Plugins\ |
For example, for Unreal Engine 4.20 the project Plugins path looks like this:
Windows:
C:\Program Files\Epic Games\EU_4.20\Engine\Plugins\
Mac OS:
/Users/Shared/Epic Games/UE_4.20/Engine/Plugins/
| 4. | Open the Unreal Engine C++ project in your IDE of choice and start the compiling process. |
To start the compiling process on Windows:
Open the C++ Unreal project and in the Visual Studio 2015 or 2017 main menu click Build > Build Solution.
To start the compiling process on Mac OS:
Open the C++ Unreal project and in the XCode main menu, click Product > Build.
| 5. | When compiling is finished, open the Unreal Editor to automatically load the plug-in. |
Configuring the Server and Client
Both the Modo server and the Unreal Engine client must use the same port number and corresponding addresses to communicate with each other. The following topics outline the setup and connection process.
Configuring Modo Preferences
To configure Modo:
| 1. | Launch Modo. |
| 2. | Click Systems > Preferences and expand Application on the left panel. |
| 3. | Under Foundry Link Settings, in the Address field, type the TCP server IP address. |
By default the TCP server address is 127.0.0.1. This is the loopback Internet Protocol (IP) address used to point back to your computer's TCP/IP network configuration.
| 4. | In the Port field, type the port number for your TCP connection. |
By default, the Port number is 12000.
Starting the Communication between Modo and the Unreal Engine Client
Note: You must enable the TCP protocol communication on the Modo server or on the Unreal Engine client.
To enable communication on the Modo server:
| 1. | Launch Modo. |
| 2. | In the top-right corner of the UI, click Kits, then click the Modo Bridge button. |
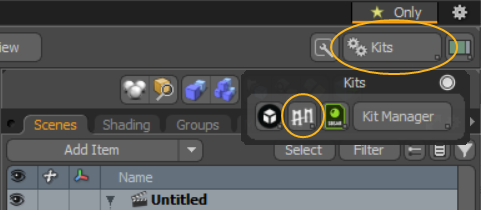
This opens the Modo Bridge options.
Note: For more information on each option, see Modo Bridge.
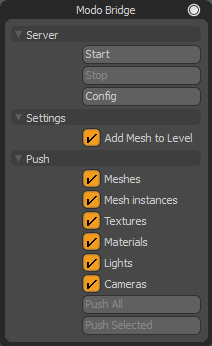
| 3. | Under Server, click Start. |
The Modo Bridge server is connected to the IP address and port specified in the Preferences and waits for incoming client connections.
To enable communication on the Unreal client:
| 1. | Launch Epic Games and then click Launch Unreal Engine. |
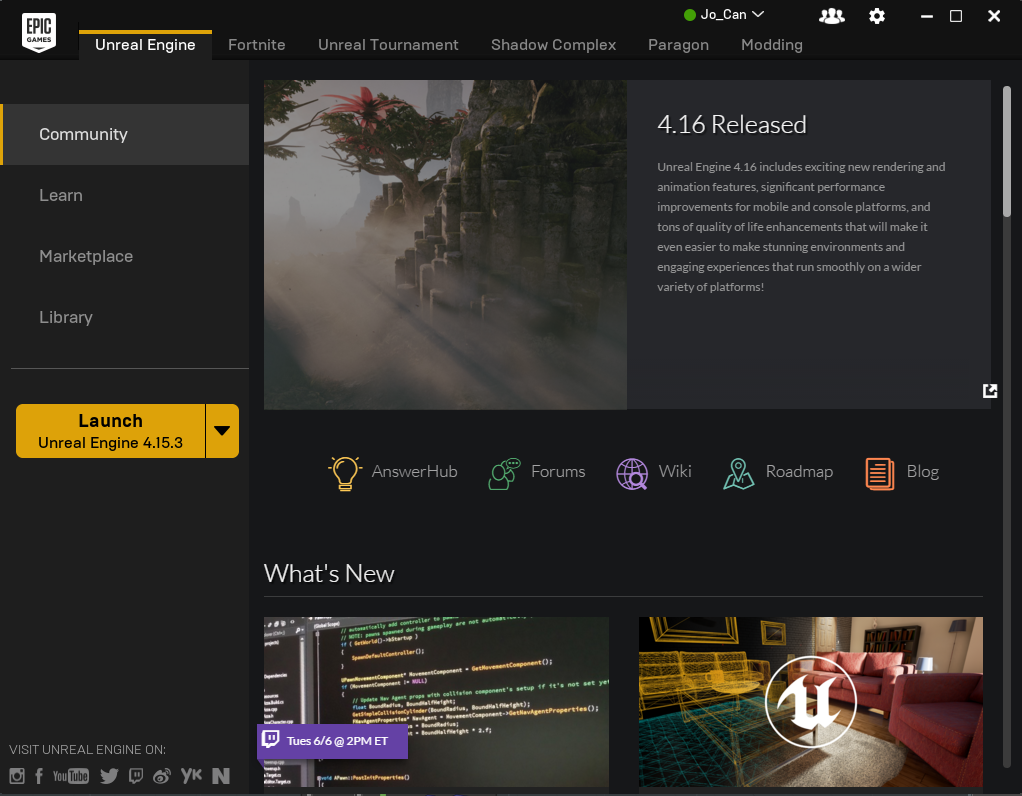
The Projects tab displays MyProjects.
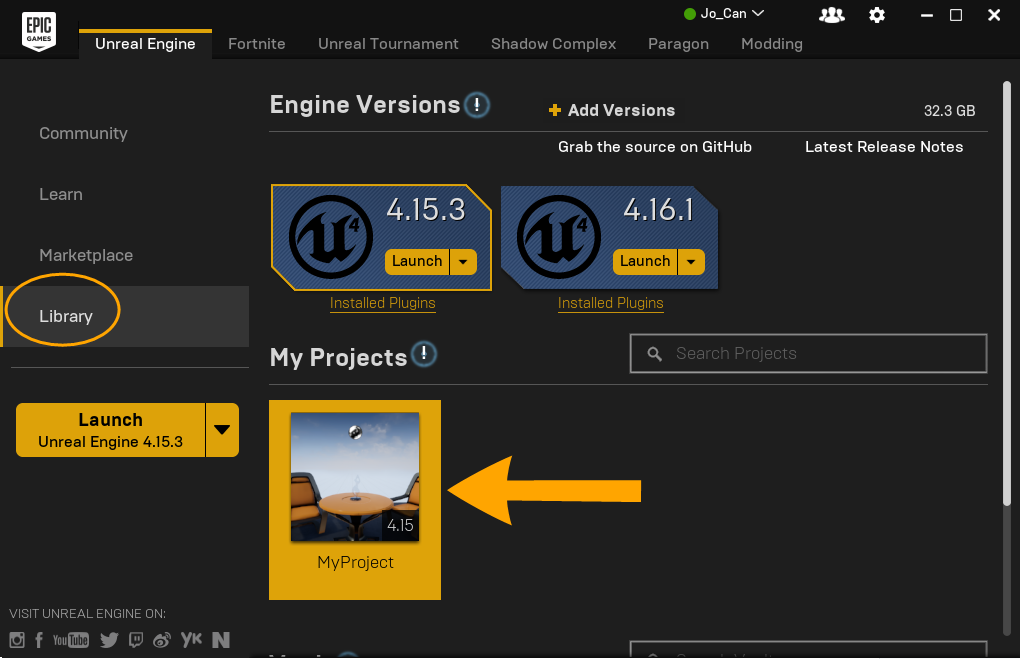
| 2. | On the left panel, click Library and then click MyProject. |
| 3. | In the Unreal Engine menu bar, click Edit > Project Settings. |
This opens the Project Settings dialog
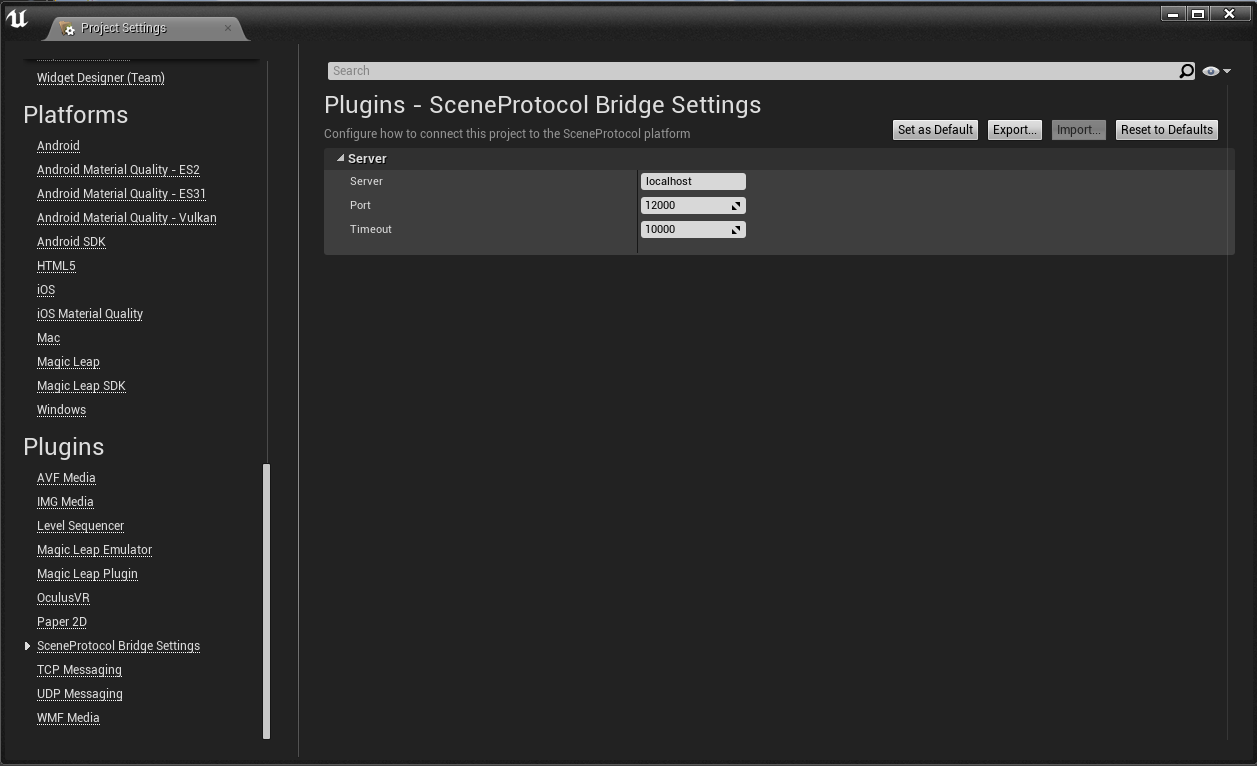
| 4. | Under Plugins, click Scene Protocol Bridge Settings and enter the Server, Port, and Timeout information. |
Note: The information used by the Modo server is automatically displayed.
| 5. | On the top of the Unreal Engine Editor, click Modo Bridge and click Client Start. |
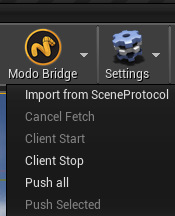
The Unreal client connects to the server's IP address and port. The communication between Modo and Unity is now established.
Using the Modo Bridge Plug-in
Updates made in both applications, Modo and the Unreal Engine client, are transferred simultaneously using the Push functionality. You have the ability to select individual geometry items or selected polygons, edges, or vertices, materials, and textures to transfer them to the other application.
The following procedures provide workflow examples.
Creating Geometry and a Material
First, let's load an example scene containing basic primitives and assigned materials.
| 1. | Launch Modo and open the Model layout. |
If you don't have a scene, you can download our example scenes and load unreal_bridge_example_scene.lxo.
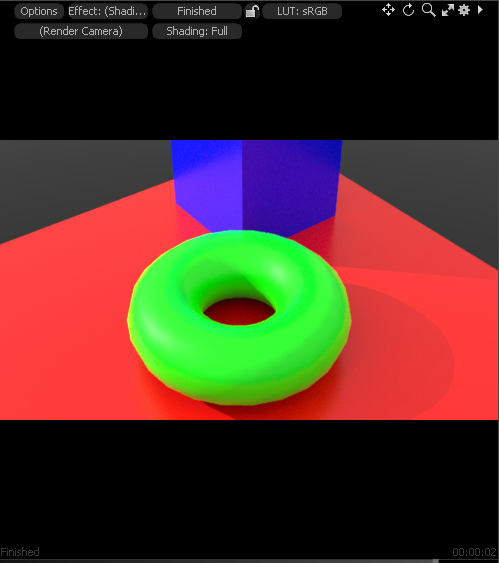
| 2. | Click Render > Open Preview (alternatively press F8) and click the arrow to render your scene. |
These are the mesh items and the assigned materials that we will use to transfer to the Unreal Engine client.
Push the Scene From Modo to the Unreal Engine Client
In this procedure, we will walk you through the process of transferring Modo geometry and materials to the Unreal Engine client.
Note: You must complete the steps of Configuring the Server and Client before doing the following procedure.
To push a scene from Modo:
| 1. | In Modo, in the top-right corner, click Kits, then click the Unreal Engine |
This opens the Modo Bridge.

| 2. | Under the Push category, enable Meshes, and click Push All. |
| 3. | Open your Unreal Engine project. |
The Modo geometry is added to your scene.
| 4. | Next, update your materials by enabling Push > Materials and clicking Push All or select the materials you want to update and click Push > Push Selected. |
Note: If the materials are not assigned to geometry, empty materials are created, otherwise, existing materials are used.

All transferred assets are stored on the Unreal Engine client in the Content Browser in the Scene Protocol folder.
Tip: You can push the Camera from Modo to the Unreal Engine client, if you want to have the same view in both applications.
If you have textures applied to geometry in your scene, enable Push > Textures and then click Push All. The textures are then found and assigned to the appropriate materials.
Push a Transformed Static Mesh from Unreal to Modo
In this procedure, we will walk you through the process of changing the position of one of the mesh items in Unreal and transferring the updates back to Modo.
Tip: You can use the Modo Material Importer plug-in to export modified materials made in Unreal and then import them into Modo.
To push a transformed mesh from Unreal:
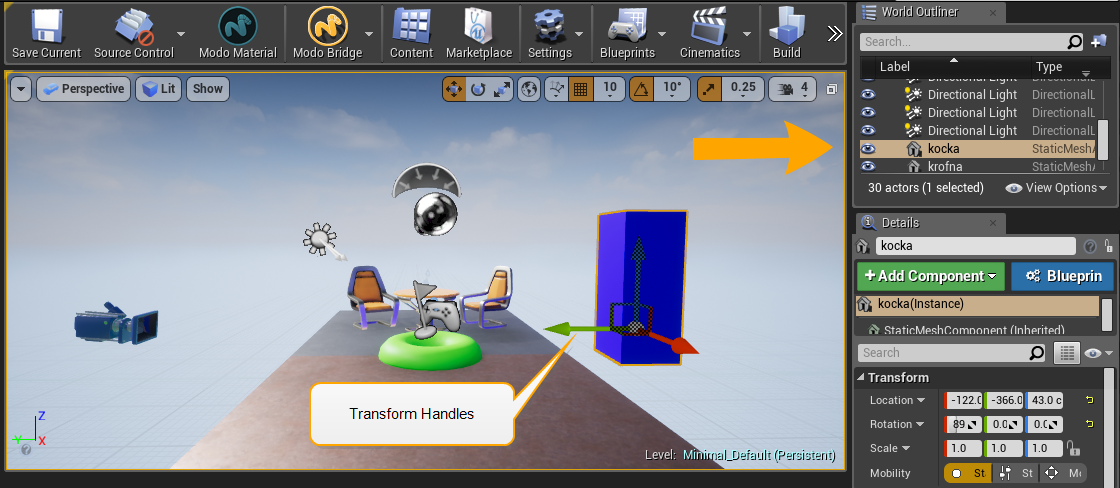
| 1. | With the Unreal Engine Editor open and your project displayed, on the right panel select the Kocka item. |
| 2. | Use the transform handles in the view to move this item to a new location. |
The Kocka item is displayed in a new position in your project scene.
| 3. | On top right corner of the interface, click Save Current. |
| 4. | On the top of the Unreal Engine Editor, click Modo Bridge and click Push Selected. |
| 5. | Open your Modo session to view the updates. |
Push Transformed Polygons from Modo to Unreal
In this procedure, we will walk you through the process of transforming a selection of Polygons in Modo, using the Bevel tool, and transferring the changes to Unreal.
Tip: You can also transform Edges and Vertices on a Mesh item in Modo and push your changes back to the Unreal Engine client.
To push transformed polygons from Modo:
| 1. | In Modo, while in Model layout, click Polygons to change your selection mode. |
| 2. | Select one polygon on the kocka mesh item. |
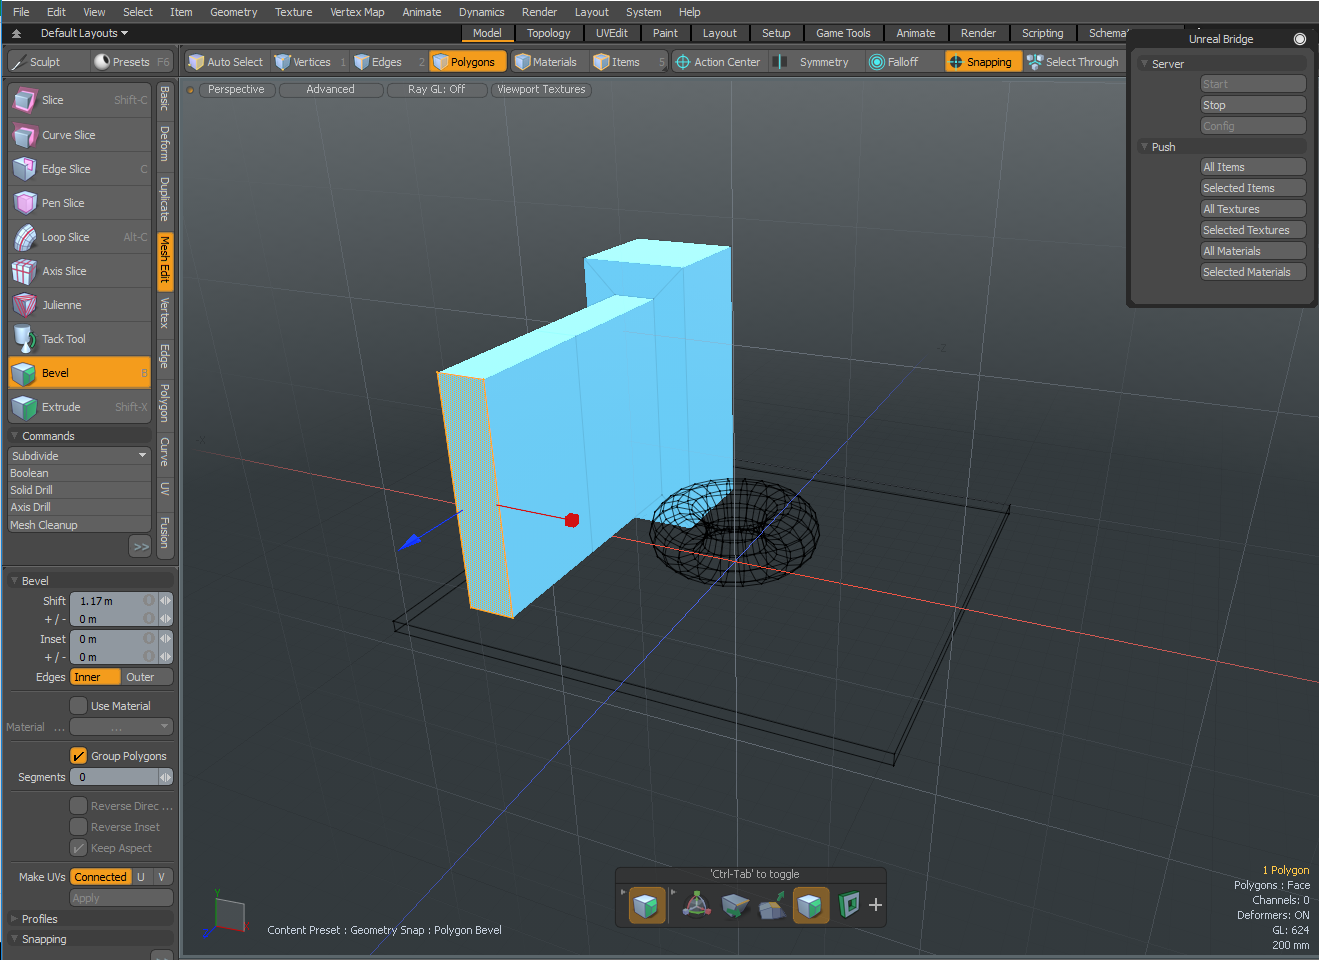
| 3. | On the Toolbar, located on the left panel, open the Mesh Edit sub-tab and click Bevel. |
| 4. | Click and hold the transform handle and drag. |
The selected polygon is updated.
| 5. | Click File > Save. |
| 6. | From the Modo Bridge options, click Push > All Items. |
| 7. | Open the Unreal Engine client. |
The mesh is updated in the Unreal Engine client.

Push a UV Map from Modo to Unreal
In this procedure, we will walk you through the process of transferring a UV Map from Modo to Unreal.
Note: Modo meshes pushed into the Unreal Engine client have auto generated UVs applied to the Light Map, which always overwrites UV Channel 1. You can disable this behavior by turning off the auto generator for the Light Map in Unreal Engine 4.
To push a UV map from Modo:
| 1. | In Modo, change your layout to UVEdit. |
| 2. | On the Toolbox, located on the left panel, open the UV sub-tab and select Map > (new). |
The Create New Vertex Map windows displays.
| 3. | Type a name for your Vertex Map, ensure the Vertex Map Type is set to UV Map, and then click OK. |
Tip: You can also use other Vertex Map Types, such as RGB Map and set the Color value. This data can also be pushed to the Unreal Engine client. To see the color specified for the RGB Map in Unreal, open the StaticMesh item in the Content Browser > Meshes directory and click Vert Colors.
| 4. | On Items tab, on the right panel, select kocka and krofna. |
| 5. | On the Toolbox, located on the left panel, click Project. |
| 6. | Click File > Save. Alternatively, press Ctrl/Cmd + S. |
| 7. | In the Modo Bridge options window, click Push > All Items. |
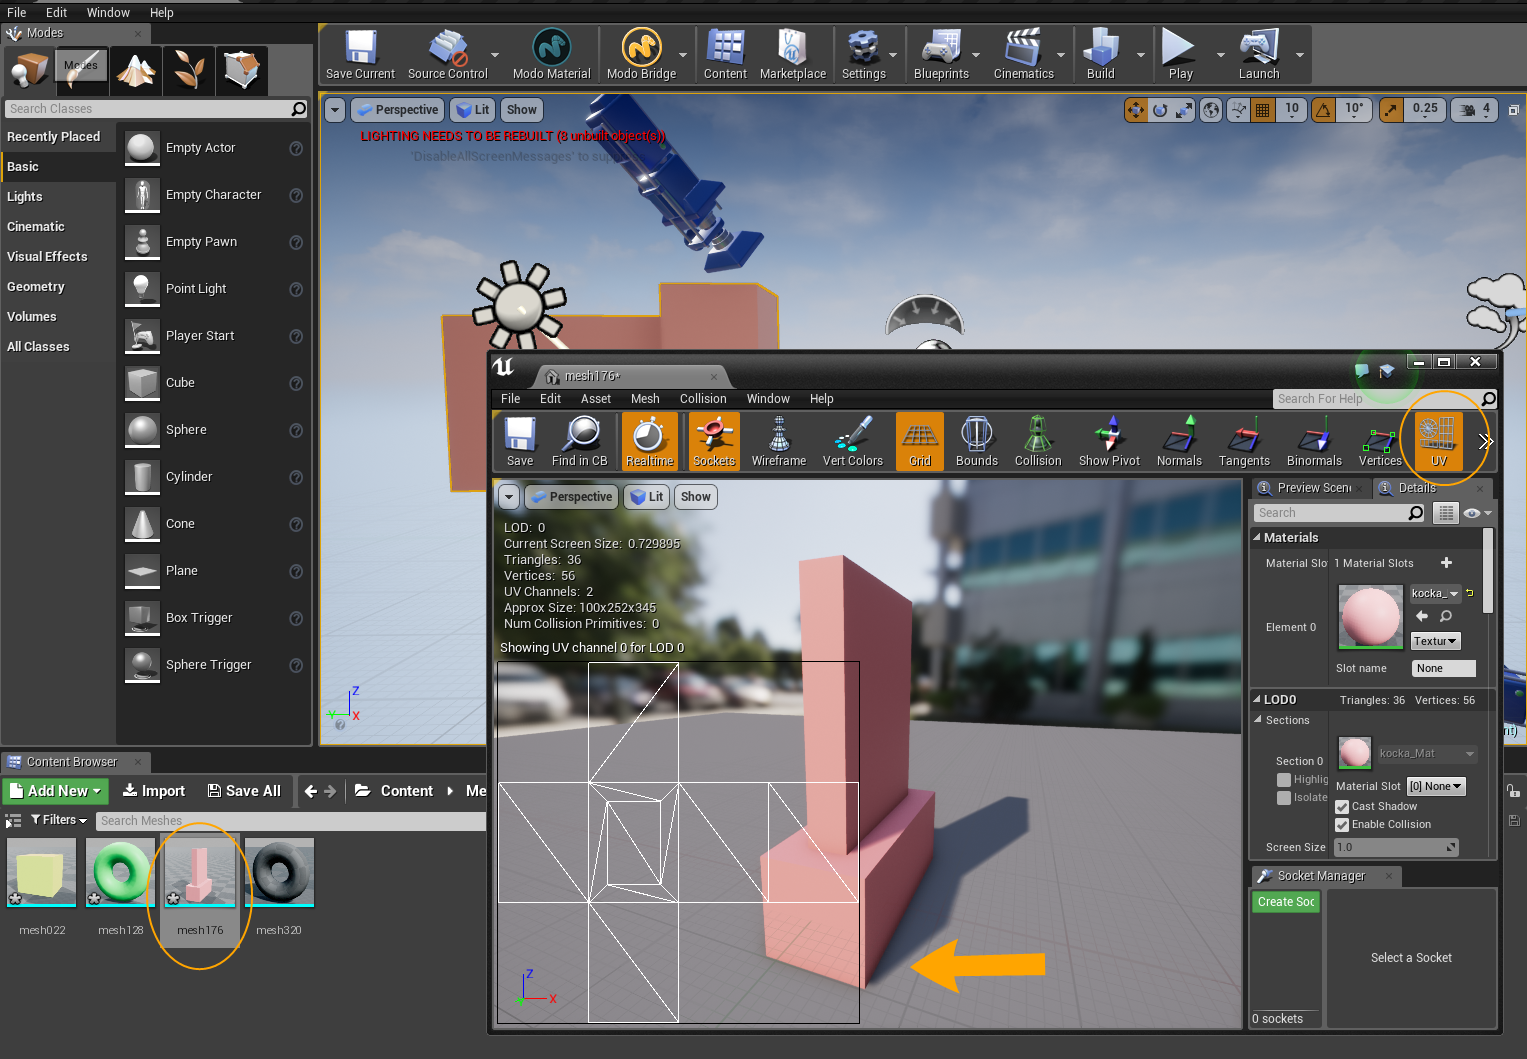
| 8. | Open your Unreal Engine client, in the Content Browser located at the bottom of the view, open Content > Scene Protocol > Meshes and double-click on a Mesh item. |
| 9. | In the preview window, click UV. |
The UV Map displays.