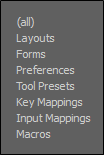
Customizing Your Layout
Modo provides one of the most flexible UIs of any 3D application, providing a variety of controls that allows you to customize the program to your liking. Understanding how to tweak an existing layout can be better explained with a run through of making a layout from scratch. When creating a completely custom layout, the first thing to do is define a new layout. This also ensures that the system defaults are not mistakenly changed. To do this, follow the steps below.
| 1. | In the menu bar, click on Layout > New, and in the pop-up window, enter a unique name and make sure the As Copy of Current Layout option is disabled. |

| 2. | Click OK. |
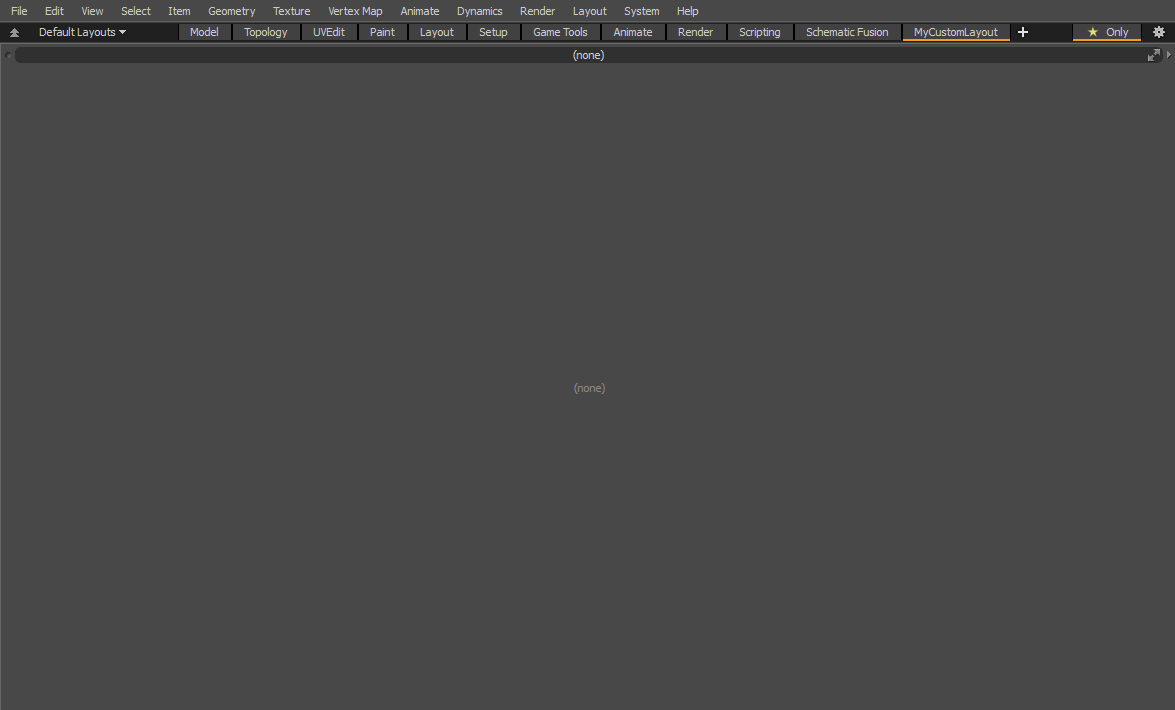
This creates the named layout in the menu bar under Layouts and automatically switches to it. You are now presented with a completely blank workspace.
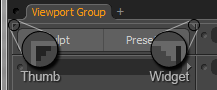
The controls to customize the layout are all that are left within the viewport. In the upper left corner below the menu bar, you can see the Thumb (![]() ), a tiny shaded dot next to the title bar. All viewport frame specific controls reside here. On the opposite side of the title bar rests the Widget (
), a tiny shaded dot next to the title bar. All viewport frame specific controls reside here. On the opposite side of the title bar rests the Widget (![]() ), a small right facing arrow. This controls the contents of a frame. You can right-click on each of them to open a pop-up menu. Every window has these controls making it easy for you to modify any layout to your liking.
), a small right facing arrow. This controls the contents of a frame. You can right-click on each of them to open a pop-up menu. Every window has these controls making it easy for you to modify any layout to your liking.
To continue the exercise, recreate a single tab of the default tabbed layout. To do this, you need to divide the interface.
| 3. | Select the Widget, and from the menu, choose Viewport Group. |
This nests two viewports inside one another. Now you have two widgets on the right.
| 4. | From the upper viewport's Widget menu, select Tabbed Viewport. |
This creates the tabbed interface, where each tab can hold a completely different layout.
| 5. | In the nested viewport below, right-click the Thumb, and choose the Split Vertical option. |
This divides the window into two equal sized viewports stacked on top of one another.
| 6. | To resize the viewports, hover the mouse pointer directly over the border between the frames, then click and drag to position the edge in a new location. |
Dragging the border toward the top makes the first viewport.
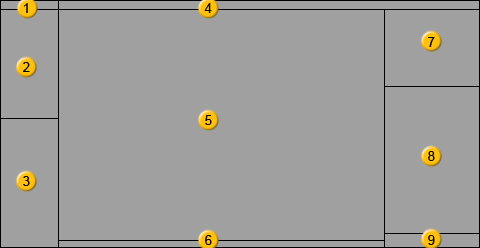
| 7. | To finish off, continue dividing the windows using the split commands found under the Thumb. Follow this diagram, splitting viewports horizontally or vertically, as necessary. |
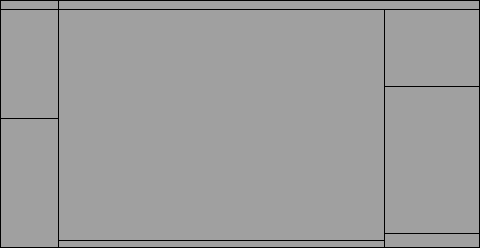
Split the topmost bar horizontally once, and the lower window twice, resulting in three columns. Split each of those columns vertically once, with an additional split in the right column. Position the viewport frames, so the layout loosely mimics the above template.
Note: If you accidentally split a viewport, you can delete viewport panes in Thumb > Delete.
Next, the windows need to be populated with premade interface content. The most common viewports are easily accessible from the Widget on the right side of the title bar of each viewport. You can add content by right-clicking the Widget of the window you would like to populate and selecting the viewport type from the popup menu.
Let's traverse the layout in a top to bottom, and left to right fashion filling in the viewports.
| 1. | In the first viewport, select Form View in the Widget menu. |
This changes the window to a generic form but it still looks empty.
| 2. | From the Widget again, choose Viewport Settings > Sculpt and Presets Quick Access. |
This adds the quick access buttons to the viewport. but the title bar is a bit in the way.
| 3. | To remove the title bar, right-click the thumb and select the Min Header option to minimize it. |
The Thumb and the Widget become tiny triangles in the corners of the window, as illustrated below.
This window is ready, so move on to the next one.
| 4. | Right-click the widget and select Toolbars > modo Tools and again, minimize the header. |
| 5. | Below that window in the next frame's Widget, select Properties > Tool Properties and then minimize the header. |
For the remaining windows, the menus are as follows:
| 1. | For Window 4, select Widget > Form View and Widget > Viewport Settings > modo Modes. |
| 2. | For Window 5, select Widget > 3D Edit > 3D Model View. |
| 3. | For Window 6, select Widget > Status Feedback. |
| 4. | For Window 7, add some tabs: select Widget > Tabbed Viewport, right-click on the tab itself and choose Data Lists > Item List. |
| 5. | Click the + icon on the right of the tab and then choose Data Lists > Shader Tree, that adds an additional tab. |
Window 8 serves multiple purposes, with nested viewports, similar to the main window.
| 6. | Select Widget > Application > Viewport Group, set the upper Widget to Tabbed Viewport and split the lower window into three even sized viewports. |
| 7. | In the top viewport, set Widget > Data Lists > Vertex Map List. |
| 8. | In the next window, set Widget > Data Lists > Tool Pipe and in the third, set Widget > Info > Info and Statistics. |
| 9. | Next, across the top of the group, add an additional tab, as in step 6 above, and select Widget > Properties > Item Properties. |
| 10. | Minimize the header in all the viewports you just created, forgoing the rest of the tabs for now. |
| 11. | For Window 9, select Widget > Utility > Command History. |
This re-creates the Model view of the default interface, from a blank slate. Make sure to save it again in the menu bar, selecting Layout > Save command.
Between the commands of the Thumb and the Widget, a great deal of customization power can be wielded. Any Modo viewport can be recalled from the Widget, although some are available only within the Viewport Settings sub-menu choices.
Note: Many viewports change when scaled, providing slightly different ways of interacting with the information contained in them. These options can be useful in setting up interfaces that mimic other popular applications. A thorough understanding of the common viewports helps in achieving your intended result.
Watch this video to learn how to save customized settings. The same workflow applies to the current version of Modo.
Saving Your Custom Preferences
Depending on the workflow you typically use, you may want to customize your Preferences. For example, set the default image format to use PNG 16-bit. Each time you upgrade your version of Modo, these preference changes can be used again without having to reconfigure your environment.
To change and save your preferences:
| 1. | Click Systems > Preferences. |
| 2. | Make the appropriate changes and then close the Preferences dialog. |
| 3. | Click File > Config Export, name your file, and click Save. |
The Export Config Fragment dialog displays.
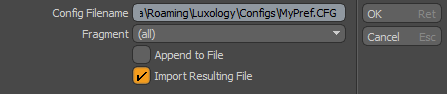
| 4. | Specify the following options and then click OK. |
|
Config Filename |
Allows you to specify the location to save your configuration file to and to name your file. By default, this file is saved to the following directory: Windows: C:\Users\'user name'\AppData\Roaming\Luxology\Configs Mac OS: /Users/qa/Library/Preferences/ Tip: Each time you make a change in your Preferences, save your changes as individual configuration files. Ensure that you have enabled the Append to File option to save your changes in your main configuration file. Then quit and restart your session of Modo to ensure there are not issues. Continue to save each preference change as individual files. Once all your changes are made and tested on restart, and these accumulated changes launch each time you start Modo. |
|
Fragment |
Allows you to specify where you have made changes in your configuration file. The following options area available:
|
|
Enable this option if the same configuration file already exist to append these changes to that file without overriding it. |
|
|
Import Resulting File |
By default, this option is enabled to import the changes made to the configuration file automatically into your scene when you launch Modo. |