To add motion blur using ScanlineRender:
| 1. | In the ScanlineRender node’s controls, go to the MultiSample tab. |
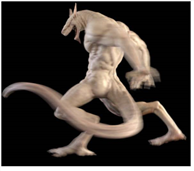
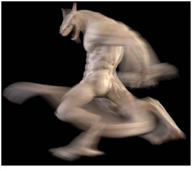
| 2. | Increase the samples value to sample the image multiple times over the shutter time. The higher the value, the smoother the result, but the longer the render time. |
|
|
|
| Samples set to 5. | Samples set to 15. |
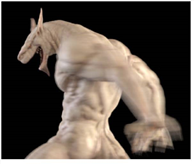
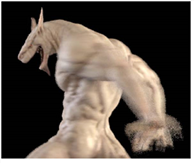
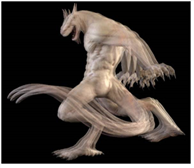
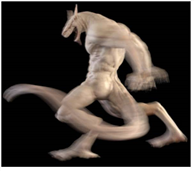
| 3. | In the shutter field, enter the number of frames the shutter stays open when motion blurring. For example, a value of 0.5 would correspond to half a frame. Increasing the value produces more blur, and decreasing the value less. |
|
|
|
| Shutter set to 20. | Shutter set to 40. |
| 4. | Adjust the shutter offset using the shutter offset dropdown menu. The different options control when the shutter opens and closes in relation to the current frame value. Select: |
• centered - to center the shutter around the current frame. For example, if you set the shutter value to 1 and your current frame is 30, the shutter stays open from frame 29.5 to 30.5.
• start - to open the shutter at the current frame. For example, if you set the shutter value to 1 and your current frame is 30, the shutter stays open from frame 30 to 31.
• end - to close the shutter at the current frame. For example, if you set the shutter value to 1 and your current frame is 30, the shutter stays open from frame 29 to 30.
• custom - to open the shutter at the time you specify. In the field next to the dropdown menu, enter a value (in frames) you want to add to the current frame. To open the shutter before the current frame, enter a negative value. For example, a value of -0.5 would open the shutter half a frame before the current frame.
| 5. | To add randomness to the distribution of samples in time so they don’t produce regularly spaced images, adjust randomize time. This affects all samples except the first and the last one. The larger the value, the larger the time difference between the samples. |
| 6. | Set sample diameter to the diameter of the circle that the samples for each pixel are placed in for antialiasing. The larger the value, the more pixels are jittered. |
| 7. | If rendering has become very slow, you can approximate multi-sample rendering and reduce render times by using stochastic samples. This sets the number of samples, per pixel, to use in stochastic estimation (0 is disabled). Lower values result in faster renders, while higher values improve the quality of the final image. |
Note that rather than setting stochastic samples to a very large value, you may want to leave it at a relatively low value and increase samples instead.
Stochastic sampling is based on Robert L. Cook’s Stochastic Sampling in Computer Graphics, available in ACM Transactions on Graphics, Volume 6, Number 1, January 1996.
|
|
|
| Stochastic samples set to 0 (disabled). |
Stochastic samples set to 5. |
| 8. | To distribute the samples uniformly over the shutter time, enable uniform distribution. This gives the same importance to all samples over the shutter time, and produces more accurate results for stochastic multi-sampling. |
For more information on the ScanlineRender node, see Rendering a 3D Scene.