(everything in focus).
The 3D Viewer displays the scene using an OpenGL hardware render. When you build a scene, Nuke renders high-quality output from the perspective of the camera connected to the ScanlineRender node. The rendered 2D image is then passed along to the next node in the compositing tree, and you can use the result as an input to other nodes in the script.
If there is a Deep node downstream, the ScanlineRender node also outputs deep data. See Using ScanlineRender to Generate Deep Data.
To render out a scene:
| 1. | Make sure the rendering camera is connected to the ScanlineRender node. |
| 2. | Toggle the Viewer back to 2D. |
| 3. | Connect the output of the ScanlineRender node to the appropriate 2D nodes in your script. |
You can affect the rendered output by adjusting the various controls of the ScanlineRender node.
You can, for example, select the projection mode to do different renderings of the scene, or change the global ambient color. The global ambient color is the overall color added to the areas that are not illuminated. Without this color, these areas appear black.
From the projection mode dropdown menu, select:
• render camera to use the projection type of the render camera. This option is selected by default.
• perspective to have the camera’s focal length and aperture define the illusion of depth for the objects in front of the camera.
• orthographic to use orthographic projection (projection onto the projection plane using parallel rays).
• uv to have every object render its UV space into the output format. You can use this option to cook out texture maps.
• spherical to have the entire 360-degree world rendered as a spherical map.
Drag the ambient slider, or enter a value between 0 (black) and 1 (white) in the input field.
Use the overscan slider or field to set the maximum additional pixels to render beyond the left/right and top/bottom of the frame. Rendering pixels beyond the edges of the frame can be useful if subsequent nodes need to have access outside the frame. For example, a Blur node down the node tree may produce better results around the edges of the frame if overscan is used. Similarly, a subsequent LensDistortion node may require the use of overscan.
You can use the properties on the MultiSample tab to add motion blur to your 3D scene. For more information, see Adding Motion Blur to the 3D Scene.
| 1. | In the ScanlineRender node’s controls, go to the MultiSample tab. |
| 2. | Increase the samples value to sample the image multiple times over the shutter time. The higher the value, the smoother the result, but the longer the render time. |
| 3. | Increase focus diameter. |
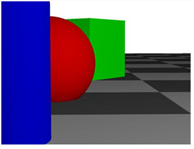
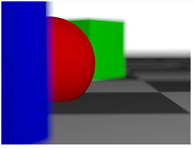
When this is set to 0, everything in the scene is in focus, creating a pinhole camera effect. When you increase the value, objects near to or far away from the camera start to appear out of focus.
|
|
|
| Focus diameter set to 0 (everything in focus). |
Focus diameter set to 2. |
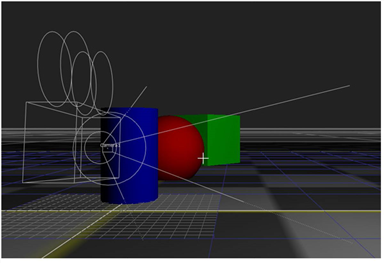
| 4. | To set the distance from the camera that remains in focus, use focal distance in the Camera controls, on the Projection tab. If you press Tab to switch to the 3D Viewer, a cross in the Viewer indicates the focal distance, making it easier to see which areas in the scene are in focus. |
|
|
| The cross in the 3D Viewer indicates the current focal distance. In this case, focal distance is set to a value that ensures the red sphere stays in focus. |
| 5. | Simulating depth of field in this manner requires a lot of samples and can be computationally expensive. If this is the case, you can enable stochastic samples to speed up the render at the expense of a noisier image. This sets the number of samples, per pixel, to use in stochastic estimation (0 is disabled). Lower values result in faster renders, while higher values improve the quality of the final image. |
Note that rather than setting stochastic samples to a very large value, you may want to leave it at a relatively low value and increase samples instead.
Stochastic sampling is based on Robert L. Cook’s Stochastic Sampling in Computer Graphics, available in ACM Transactions on Graphics, Volume 6, Number 1, January 1996.