You can create deep data in Nuke by:
• sampling a regular 2D image sequence at multiple frames to create several samples for each pixel in a single deep frame. See Converting a 2D Image Sequence to a Deep Frame Using Input Frames.
• converting a regular 2D image to a deep image with a single sample for each pixel at the depth defined by the depth.Z channel. See Converting a 2D Image to a Deep Image.
• recoloring depth samples using a regular 2D color image. See Recoloring Depth Data.
• adding a ScanlineRender node to a 3D scene and connecting a Deep node downstream. See Using ScanlineRender to Generate Deep Data.
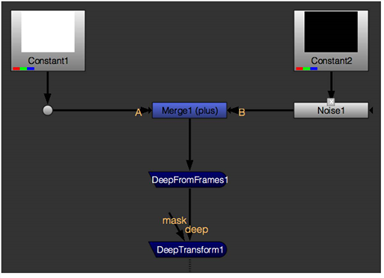
You can use the DeepFromFrames node to create depth samples from input frames.
| 1. | Connect the DeepFromFrames node to your footage. The deep image is created by placing each frame at increasing depths. |
| 2. | To adjust the results, use the controls in the properties panel: |
• samples - the number of samples to create per pixel in the output deep image.
• frame range - the range of frames to use for one deep image. For example, with the default samples value (5) and frame range value (1-9) DeepFromFrames sample at times 1, 3, 5, 7 and 9.
• premult - check to premultiply the samples.
• split alpha mode - select additive to perform a straight division by the number of samples or multiplicative to split the alpha so that it can be returned to its original value if flattened later on (using the DeepToImage node, for example). If you select additive, the alpha can’t be returned to its original value.
• zmin - the depth to assign to the first sample of each deep pixel output, corresponding to the first frame in the range.
• zmax - the depth to assign to the last sample of each deep pixel output, corresponding to the last frame in the range.
|
|
| A simple setup for creating a deep fog element. |
Using the DeepFromImage node, you can convert a regular 2D image to a deep image with a single sample for each pixel at the depth defined by the depth.Z channel.
| 1. | Connect DeepFromImage to the footage you want to convert to a deep image. |
| 2. | Use the premult input box in the properties panel to select whether you want the input channels to be premultiplied or not. |
| 3. | Uncheck the keep zero alpha box if you want to drop any samples with a zero alpha value from the resulting deep image. By default, the box is checked and the resulting deep image contains the zero alpha samples. |
| 4. | You can also specify the depth using the z control in the properties panel. In that case, check the specify z box to indicate you don’t want to use a depth channel from the input. |
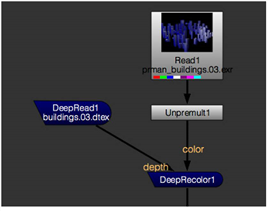
Use the DeepRecolor node to merge deep buffer files that only contain opacity for each sample with a standard 2D color image. DeepRecolor spreads the color at each pixel of the input 2D image across all the samples of the corresponding pixel in the deep input.
| 1. | Connect your deep source to the depth input of the DeepRecolor node, and your 2D image to the color input. You might want to add an unpremultiply node between your color input and the DeepRecolor if your 2D image is premultiplied. |
| 2. | In the properties panel, you can select which channels you want to use from the color input image. |
In the example below, DeepRecolor takes an unpremultiplied .exr image and uses it to color the .dtex file’s deep samples.
| 3. | If at this point the alpha from the final high-quality flat render doesn’t match the alpha represented by the deep samples (for example, as a result of the compression that usually happens to deep files on disk or some change to the shader), you can check target input alpha. This means the color input’s alpha is distributed amongst the deep samples, so that the final resulting alpha after flattening of the deep data matches the color input’s alpha. |
If you leave target input alpha unchecked, Nuke distributes the color to each sample by unpremultiplying by the color image’s alpha and then remultiplying by the alpha of each sample. In this case, the alpha from DeepRecolor may not match the alpha from its color input.
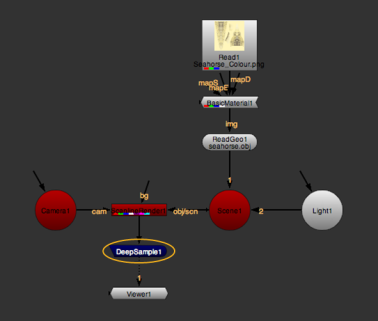
The ScanlineRender node outputs deep data if there is a Deep node downstream.
| 1. | Create a 3D scene and attach a ScanlineRender node to it to render the scene as a 2D image. |
NOTE: Deep compositing only supports the over blend mode. As a result, if there is a BlendMat node in the 3D scene, its operation always appears to be set to over when converted to Deep.
| 2. | Add a node from the Deep menu downstream from ScanlineRender. |
| 3. | If you don't want deep samples with an alpha value of 0 to contribute to the output, open the ScanlineRender properties and make sure that drop zero alpha samples is enabled. |
| 4. | Adjust the rest of the ScanlineRender properties as usual. For example: |
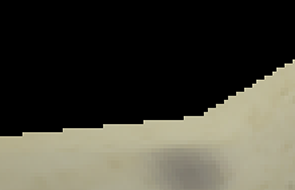
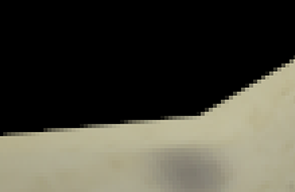
• If you see any aliasing artifacts in the render, go to the MultiSample tab and increase samples. This increases the number of deep samples per pixel.
Alternatively, you can set antialiasing to low, medium, or high on the ScanlineRender tab.
|
|
| Samples set to a low value. | Samples set to a high value. |
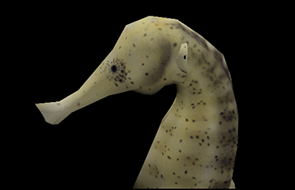
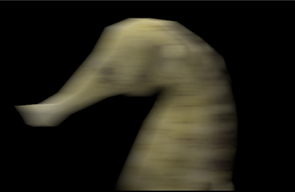
• If you want to add motion blur to your 3D scene, increase the samples value to sample the image multiple times over the shutter time.
In the shutter field, enter the number of frames the shutter stays open when motion blurring. If rendering becomes very slow, you can approximate multi-sample rendering and reduce render times by increasing stochastic samples.
|
|
| Without motion blur. | With motion blur. |
For more information on the ScanlineRender properties, see Rendering a 3D Scene.
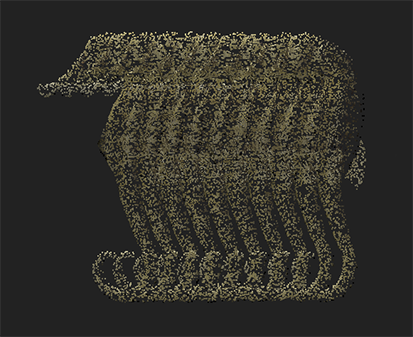
TIP: You can use a DeepToPoints node after ScanlineRender to create a 3D point cloud that represents the motion in the scene. For more information on DeepToPoints, see Creating a Point Cloud from a Deep Image .