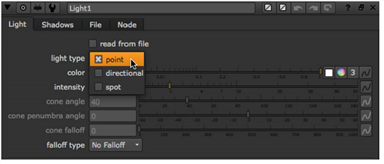
The Light node includes the DirectLight, Point, and Spotlight nodes, so you can set it to act as any of these three nodes. The advantage of using a Light node in this way is that if you want to change the light type later, you can do so without setting up a new node. For example, you might insert a direct light, but then realize that what you actually need is a spot light. If you inserted the direct light using a DirectLight node, you need to delete this node and insert a SpotLight node instead. However, if you inserted the direct light using a Light node, you can simply change the light type from directional to spot in the Light controls.
TIP: The node can also be used to import lights from .fbx files. This is described under Importing Lights from FBX Files.
| 1. | Select 3D > Lights > Light to insert a Light node into your script. |
| 2. | In the Light controls, select the light type you want to use: point, directional, or spot. The controls are enabled and disabled according to the light type you select. For example, if you chose directional light, you get the same controls that appear on the DirectLight node. |

| 3. | Adjust the controls as necessary. For information on the functions of the controls, refer to the following: |
• If you selected point as the light type, see Inserting Point Lights.
• If you selected directional as the light type, see Inserting Direct Lights.
• If you selected spot as the light type, see Inserting Spot Lights.