A cube is the familiar six-sided polyhedron. You can transform any of its sides (and, of course, texture it with clips).
|
|
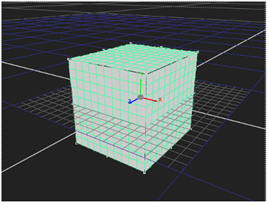
| A cube object. |
| 1. | Click 3D > Geometry > Cube to insert a Cube node. |
| 2. | Drag the Cube node’s img pipe to the Read node containing the clip you want to use as a texture. |
| 3. | Drag one of the Scene node’s numbered pipes to the Cube node to place the cube in the scene. |
| 4. | Use the cube object’s transform controls to manipulate the position, scale, and rotation of the cube in 3D space. For more information, see Transforming from the Node Properties Panel. |
| 5. | Translate any of the cube’s sides to alter its shape. |
| 1. | If necessary, double click on the Cube node to display its parameters (and thereby select the object in the scene). |
| 2. | Increment or decrement the cube fields. (Assuming a positive z view of the object, x refers to the left side; y, the bottom side; n, the back side; r, the right side; t, the top side; and f, the front side.) |
Or drag on any side order to translate it relative to the current angle of view.