The RotoPaint properties panel includes a set of controls that you mainly need when you're editing the attributes of a paint stroke. You can find most of these under the Stroke tab in the properties panel.
Both on the Stroke and RotoPaint tabs, you can set the source control to a specific color or the input you want to pull pixels from for Clone and Reveal brushes. Select:
• color - to use a specific color in your stroke/shape.
• foreground - to pull pixels from the RotoPaint’s bg input, including any strokes/shapes drawn on it. This input is mainly used with cloning.
• background - to pull pixels from the bg input, not including any strokes/shapes drawn on it.
• background 1, background 2 or background 3 - to pull pixels from the bg1, bg2, or bg3 input.
On the Stroke tab, select the type of brush you want to use for the stroke. From the brush type dropdown, select:
• paint - to use a normal paint brush.
• smear - to use a smear brush on the plate.
• blur - to blur your plate with the brush stroke. You can adjust the strength of the blur effect using the effect slider.
• sharpen - to sharpen your plate with the brush stroke. You can adjust the strength of the sharpening effect using the effect slider.
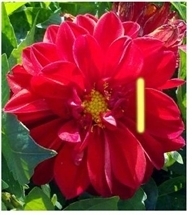
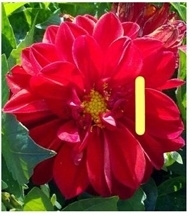
On the Stroke tab, you can set the size of the stroke using the brush size slider. You can also tie a stroke’s size to pen pressure by checking the size box next to pressure alters.
|
|
|
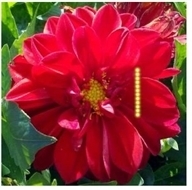
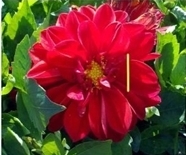
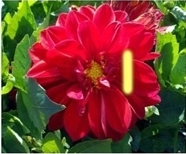
| A low brush size value. | A higher brush size value. |
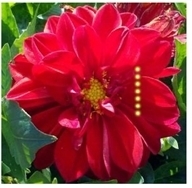
The brush spacing slider adjusts the distance between paint brush dabs. A higher setting increases the space between dabs, creating a dotted line effect when painting. A lower setting decreases the distance and creates a solid brush stroke.
|
|
|
| A low brush spacing value. | A higher brush spacing value. |
On the Stroke tab, you can set the hardness of the stroke using the brush hardness slider.
|
|
|
| A low brush hardness value. | A higher brush hardness value. |
You can also tie a stroke’s hardness to pen pressure by checking the hardness box next to pressure alters.
When you are animating a stroke or a part of it over a range of frames, you can use the write on sliders under the Stroke tab in the properties panel to adjust the order in which the dabs on the stroke appear over these frames.
• write on start - slide to choose where along the stroke length the paint begins. 0 is the start of the stroke, 1 is the end.
• write on end - slide to choose where along the stroke length the paint ends.