Search is based on keyword.
Ex: "Procedures"
Do not search with natural language
Ex: "How do I write a new procedure?"
Contact Support
Managing Dialogue
Adding dialogue to your panels is a necessary step in creating more complete sequences. Dialogue helps put a sequence into context and lends more story information to the panels. Dialogue can be added and amended in both the Edit and Dialogue workspaces, and can also be displayed in the Pitch workspace when presenting a sequence.
Dialogue in Edit Workspace
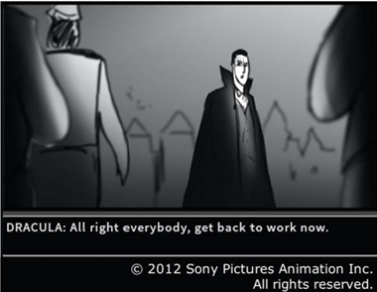
Within the Edit workspace, you can both view and edit the dialogue for accompanying panels. The dialogue is not displayed with the panel in the Sequence Editor pane. Instead, the dialogue can be found within the Viewer. If you select multiple panels before updating the dialogue, the update is applied to all selected panels, but the Viewer only displays the last panel you selected.
Additionally, panel dialogue can be instanced. Instancing makes it easier to edit dialogue snippets for all instanced panels. For more information about instancing, see Instancing Panels.
Dialogue in Dialogue Workspace
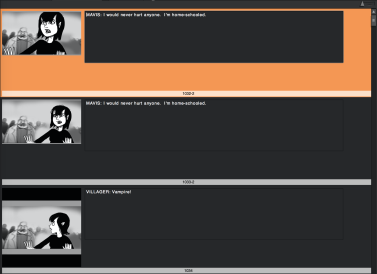
The Dialogue workspace is set out a little differently to the Edit workspace. Instead of displaying panels in the Sequence Editor pane with dialogue appearing below the Viewer, the Sequence Editor pane is populated with tiles that show both the image thumbnail and the dialogue entry box.
You can still view the dialogue within the Viewer, so long as the Dialogue button is active, however, it is easier to see which panels have dialogue and which don’t simply by scrolling through the list in this workspace.
Though you can still edit the dialogue as described in Editing Dialogue, you can also write or paste text into the entry box directly in the Sequence Editor pane. As with the Viewer dialogue box, you can use the same cut, copy, and paste functionality for adding, changing, or removing text.
When making changes to dialogue, ensure that you click Save on the Workspace toolbar before closing Flix 5. You can still switch between workspaces, and your changes in the Dialogue workspace are retained, but save often to prevent any lost work, should something go wrong.
Dialogue in Pitch Workspace
The only options for dialogue in the Pitch full screen Viewer is whether the dialogue is visible or not and whether it appears on the top or the bottom of the screen. Refer to the section on Pitching Sequences for more details on displaying dialogue in Pitch workspace, and the Pitch hotkeys.
Adding Dialogue
Dialogue can be added and amended in both the Edit and Dialogue workspaces, and can also be displayed in the Pitch workspace when presenting a sequence, see Viewing Pitch Dialogue.
Note: When making changes to dialogue, ensure that you click Save on the Workspace toolbar before closing Flix 5. You can still switch between workspaces, and your changes in the Dialogue workspace are retained, but save often to prevent any lost work, should something go wrong.
Adding Dialogue in the Edit Workspace
| 1. | Select the panel to which you want to add dialogue. |
The panel is displayed in the Viewer.
Tip: If you select multiple panels before adding dialogue, the dialogue is added to all selected panels, but the Viewer only displays the last panel you selected.
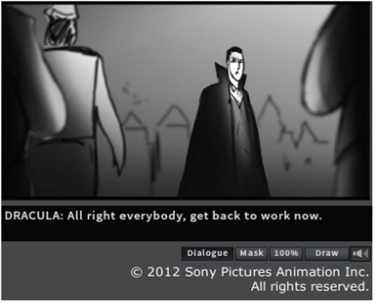
| 2. | Ensure that the Dialogue button in the Viewer Controls pane is active. |
You can tell if it’s active because the button appears darker gray and dialogue appears beneath the panel in the Viewer.
| 3. | Either press Tab or click on the dialogue entry box, directly beneath the displayed panel in the Viewer. |
The cursor flashes in the dialogue entry box to notify you that you can begin typing.
| 4. | Type new dialogue or paste text from the clipboard if you have cut or copied text from another source. |
| 5. | Press Save. |
Note: If you cannot click in the dialogue entry box, or the cursor does not flash when you press the Tab key, the dialogue on that particular panel may be locked against editing.
Note: In Edit workspace, when editing dialogue, press Shift+Return to go to the next panel's dialogue entry box. Similarly, press Ctrl/Cmd+Left/Right to switch to the previous/next panel’s dialogue entry box.
Adding Dialogue in the Dialogue Workspace
You can add dialogue to one panel or multiple panels at once.
Note: As with adding dialogue in the Edit workspace, if you can't click in the dialogue entry box on the panel tile, the dialogue on that particular panel may be locked against editing.
Adding Dialogue to One Panel
| 1. | Ensure that the Dialogue button in the Viewer Controls pane is active. |
| 2. | Select the panel tile to which you want to add dialogue. |
The panel is displayed in the Viewer and the cursor is automatically moved to the dialogue entry box on the tile.
| 3. | Begin typing in the tile's dialogue entry box or paste text from the clipboard if you have cut or copied text from another source. Alternatively, you can type in the entry box beneath the Viewer, as you would to add dialogue in the Edit workspace. |
The dialogue is added to the selected panel.
You can enter multiple lines of dialogue within the same space. Press Enter to begin a new line within the dialogue entry box.
Tip: You can press Tab to move to the next dialogue entry box.
| 4. | Press Save. |
Adding Dialogue to Multiple Panels
To add dialogue to multiple panels at once:
| 1. | Ensure that the Dialogue button in the Viewer Controls pane is active. |
| 2. | Select the required panels throughout the sequence. |
| 3. | In the tile's dialogue entry box or the dialogue entry box beneath the Viewer, enter the dialogue or paste text from the clipboard if you have cut or copied text from another source. You can enter multiple lines of dialogue within the same space. Simply press Enter to begin a new line within the dialogue entry box. |
The dialogue is added to all selected panels.
| 4. | Press Save. |
Editing Dialogue
Dialogue can be added and amended in both the Edit and Dialogue workspaces, and can also be displayed in the Pitch workspace when presenting a sequence, see Viewing Pitch Dialogue.
Note: When making changes to dialogue, ensure that you click Save on the Workspace toolbar before closing Flix 5. You can still switch between workspaces, and your changes in the Dialogue workspace are retained, but save often to prevent any lost work, should something go wrong.
Editing Dialogue in the Edit Workspace
To edit dialogue in the Edit workspace, do the following:
| 1. | Ensure that the Dialogue button in the Viewer Controls pane is active. |
You can tell if it’s active because the button appears darker gray and dialogue appears beneath the panel in the Viewer.
| 2. | To edit existing dialogue, select a panel from the Sequence Editor pane. |
Note: If you select multiple panels before editing the dialogue, the edits are applied to all selected panels, but the Viewer only displays the first panel you selected.
The image in the Viewer is updated and existing dialogue is displayed in the dialogue entry box.
| 3. | Either click in the dialogue entry box or press Tab on the keyboard. |
| 4. | Begin typing or paste text from the clipboard into the dialogue entry box. |
| 5. | You can cut, copy, paste, or delete dialogue by either: |
• right-clicking in the dialogue entry box and selecting Cut, Copy, Paste, or Delete from the dropdown menu, or
• selecting the dialogue and pressing Ctrl/Cmd+X to cut, Ctrl/Cmd+C to copy, Ctrl/Cmd+V to paste, or Backspace to delete.
Tip: You can double-click on a word to select it or triple-click on a word to select all the text at once.
| 6. | Press Save. |
Editing Dialogue in the Dialogue Workspace
To edit dialogue in the Dialogue workspace, do the following:
| 1. | Ensure that the Dialogue button in the Viewer Controls pane is active. |
You can tell if it’s active because the button appears darker gray and dialogue appears beneath the panel in the Viewer.
| 2. | To edit existing dialogue, select one or more panels from the Sequence Editor pane. |
Note: If you select multiple panels before editing the dialogue, the edits are applied to all selected panels, but the Viewer only displays the last panel you selected.
The image in the Viewer is updated and existing dialogue is displayed in the dialogue entry box.
| 3. | Either click in the dialogue entry box beneath the Viewer or in the tile's dialogue entry box in the Sequence Editor pane. |
| 4. | Begin typing or paste text from the clipboard into the dialogue entry box. |
| 5. | You can cut, copy, paste, or delete dialogue by either: |
• right-clicking in the dialogue entry box and selecting Cut, Copy, Paste, or Delete from the dropdown menu, or
• selecting the dialogue and pressing Ctrl/Cmd+X to cut, Ctrl/Cmd+C to copy, Ctrl/Cmd+V to paste, or Backspace to delete.
Tip: You can double-click on a word to select it or triple-click on a word to select all the text at once.
| 6. | Press Save. |
Viewing Pitch Dialogue
To toggle the visibility of dialogue in the Pitch full screen Viewer, click on the Dialogue button in the Viewer Controls pane. To adjust where it appears on the full screen Viewer when dialogue is active, press Tab within the Pitch view. This toggles it between the top and the bottom of the Viewer.
Note: For more information about the Pitch workspace or controls in full screen mode, see Pitching Sequences.
Reviewing Dialogue
| 1. | To view existing dialogue, ensure that the Dialogue button in the Viewer Controls pane is active. You can tell if this button is active because it appears dark gray and a dialogue box appears beneath the image in the Viewer. |
| 2. | Select a panel from the Sequence Editor panel. |
The image in the Viewer is updated and if there is any dialogue associated with the panel, this appears in the dialogue box in the lower portion of the Viewer.
Note: If there is no dialogue for the selected panel, the dialogue box still appears with the Viewer but there is no dialogue included within it. This allows you to go back and add dialogue at any time.
Exporting Dialogue
You can export dialogue from Flix 5 to a specified location as a .txt file. For more information about how to export dialogue, refer to Exporting Dialogue as a Text File.