Open topic with navigation
Using the Reveal Tool
The Reveal tool lets you pull pixels from background elements onto the current plate. The Reveal tool requires at least two inputs (see Connecting the RotoPaint Node); otherwise, your strokes draw in white. You can also view which input you are using as the source for your strokes in the Source column in the stroke/shape list.
|

|

|
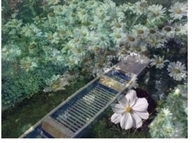
| The current plate. |
The source input. |

|
| Painting with the Reveal tool. |
To Use the Reveal Tool
|
1.
|
Right-click the Clone tool in the RotoPaint toolbar and select the Reveal tool  . . |
|
2.
|
In the RotoPaint tool settings at the top of the Viewer, set the paint source dropdown menu to the input you want to pull pixels from. (For information on the available options, see Selecting a Source Image.) |
|
5.
|
You can also reveal pixels from another frame of the input clip by using the time offset slider to define which frame you want to reveal from. See Editing Clone or Reveal Attributes. |
|
6.
|
If you want, you can view your revealing source image in a Viewer overlay. To do this, check the onion box in the RotoPaint tool settings and enter an onion skin value to adjust the opacity of the overlay. This can help you better see what you are revealing from the source image. You can also toggle the hotkey T to enable or disable onion skin. |
|

|
|
| Onion skin disabled. |
Onion skin enabled. |