Working with Nodes
Nodes are the basic building blocks of any composite. You can create a new compositing script by inserting and connecting nodes to form a network of operations. These operations concatenate and allow you to manipulate your images.
Note: Not all nodes are supported in all versions of products. For a run down of supported nodes, see Meet the Nuke Product Family.
Adding Nodes
You can add nodes using the Toolbar, the Tab menu, or the right-click menu. When you add a node, Nuke automatically connects it to the currently selected node.
Using the Toolbar
| 1. | Select the existing node that you want the new node to follow by clicking on it. |
| 2. | Click an icon on the Toolbar and select a node from the menu that appears. For example, if you want to add a Blur node, click the Filter icon and select Blur. |
Note: You can press the middle-mouse button on a menu icon to repeat the last item used from that menu. For example, if you first select a Blur node from the Filter menu, you can then add another Blur node by simply pressing the middle-mouse button on the Filter icon.
Using the Tab Menu
Tip: See Using the Tab Menu for more detailed information.
| 1. | Select the existing node that you want the new node to follow by clicking on it. |
| 2. | Press the Tab key and start typing the name of the node you want to create. |
This opens a prompt displaying a list of matches.
| 3. | To select the node you want to add from the list, you can either click on it, or scroll to it with the Up and Down arrow keys and press Return. |
Note: To add the last node created using this method, simply press Tab and then Return.
Using the Right-Click Menu
To add a node using the right-click menu, do the following:
| 1. | Right-click on an existing node that you want the new node to follow. |
| 2. | From the menu that opens, select the node you want to add. |
Note: You can also add nodes using keyboard shortcuts. Most menus in the Toolbar include a note of the relevant keyboard shortcut next to the item in question.
Adding a New Branch of the Node Tree
To add a node in a new branch of the Node Tree, do the following:
| 1. | Select the existing node that you want the new node to follow by clicking on it. |
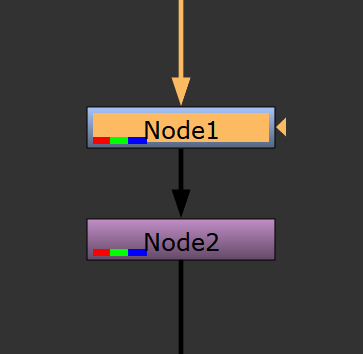
| 2. | Hold down Shift and create the node using the Toolbar, Tab menu, or right-click menu. To add a node in a new branch with the Tab menu, press the Tab key first, then hold down Shift when selecting the new node. |
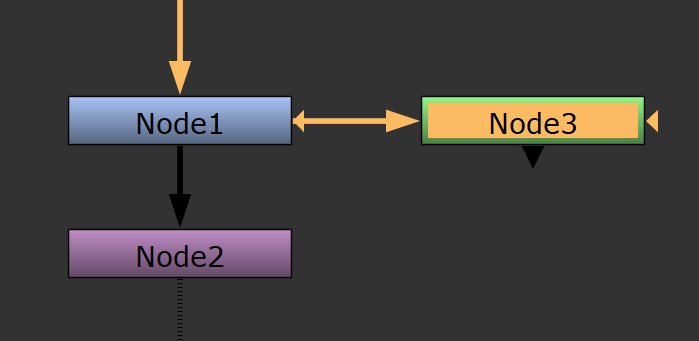
The node is added after the selected node in a new branch of the node tree.
Selecting Nodes
Nuke offers a number of options for selecting nodes. Selected nodes are highlighted in a color that is defined in the Preferences dialog. See Preferences for more information.
|
Type of Selection |
How to Make the Selection |
||||||
|
Select a single node |
To select a single node, simply click on it. |
||||||
|
Select multiple nodes |
To select multiple nodes, you can either press Shift while clicking on each node you want to select, or click and drag in the workspace to draw a marquee around the nodes you want to select. |
||||||
|
Select all upstream nodes |
Press Ctrl/Cmd while dragging a node. Nuke selects all nodes that feed data to the selected node. You can also Ctrl/Cmd+Shift+click to select more nodes without clearing the current selection. |
||||||
|
Select all nodes in a node tree |
Click on a node in the Node Graph and select Edit > Select Connected Nodes (or press Ctrl/Cmd+Alt+A). This selects all nodes in the node tree, whether they are upstream or downstream from the current node. Nodes in any other node trees are not selected. |
||||||
|
Select all nodes in a script |
Select Edit > Select all (or press Ctrl/Cmd+A). |
||||||
|
Select nodes by name |
A dialog is displayed.
Tip: When typing the above alphanumeric search string, you can use asterisks (*) and question marks (?) as wild cards. An asterisk stands for multiple alphanumeric characters. A question mark represents just one character. |
||||||
|
Invert a selection |
Select Edit > Invert Selection. |
Replacing Nodes
To replace a node in Nuke, simply hold down Ctrl/Cmd and create a new node. See below for more details.
To Replace One Node with Another
| 1. | In the Node Graph, select the node you want to replace by clicking on it. |
| 2. | Hold down Ctrl/Cmd and create a new node using the Toolbar, a right-click menu, or the Tab menu. To replace a node with the Tab menu, press the Tab key first, then hold down Ctrl/Cmd when selecting the new node. |
The new node replaces the selected node in the Node Graph.
Note: Note that you cannot replace nodes in this manner if you are using a keyboard shortcut (such as B for the Blur node) to create the new node.
Renaming Nodes
There are a couple of ways to rename a node in Nuke.
To rename a node, you can either:
| 1. | Double-click on the node to open its properties panel. |
| 2. | In the title field on top of the Properties panel, you should see the current name of the node. Delete that name and enter a new name in its place, |

OR
| 1. | Click on the node in the Node Graph to select it. |
| 2. | Press N. |
| 3. | Enter a new name for the node in the rename field that appears on top of the node. |
Editing Nodes
To copy, paste, and perform other editing functions in the Node Graph, you can use the standard editing keys (for example, Ctrl/Cmd+C to copy, and Ctrl/Cmd+V to paste). You can copy nodes to files or memory. Copied nodes inherit the values of their parent, but these values, unlike those in cloned nodes, are not actively linked. Copied nodes allow you to assign different values to the original and the copy.
When you paste nodes, Nuke automatically connects them to the node that is selected before the paste operation. If you don’t want to connect anything, click on a blank area of the workspace to deselect any selected nodes before pasting.
|
Type of Edit |
How to Preform It |
||||||||||||
|
Copy nodes to the clipboard |
To copy nodes to the clipboard:
|
||||||||||||
|
Copy nodes to files |
To copy nodes to files:
|
||||||||||||
|
Cut Nodes |
To cut nodes:
Nuke removes the node(s) from the script and writes the node(s) to the clipboard. |
||||||||||||
|
Paste nodes from the clipboard |
To paste nodes from the clipboard:
Nuke adds the nodes to the script, connecting them to the selected node. |
||||||||||||
|
Load nodes from files |
To load nodes from files:
Nuke adds the nodes described by the file to the selected node. |
Cloning Nodes
You can clone nodes directly into the Node Graph or copy clone nodes in preparation for pasting pasting them elsewhere in a script. Cloned nodes inherit the values of their parent, but unlike copied nodes, they also maintain an active link with their parents’ values. If you alter the values of a node that has been cloned, the clone automatically inherits these changes.
Clones are helpful for maintaining consistent setups across multiple elements. For example, you might use clones to apply an identical film grain setup to a series of elements shot on the same stock. If you need to make changes to the setup, these changes would automatically ripple throughout the script.
Note: You cannot clone gizmos. This applies to both gizmos created in your facility and the nodes in the Nuke default Toolbar that are, in fact, gizmos, such as the LightWrap node, the Grain node, and the IBK nodes. For more information on gizmos, see the Configuring Nuke chapter.
Cloning a Node
To clone nodes, do the following:
| 1. | Select the node or nodes you want to clone. |
| 2. | Click Edit > Clone. |
Nuke clones the node(s), while maintaining an active link to the parental node(s). The clone has the same name as the original node and is indicated with an orange line connecting the clone to its parent node.
Note: Expression links between nodes are not shown if the node is cloned. For clarity, only the clone link is drawn in the Node Graph. See Linking Expressions for more information.
Copying a Node as a Clone
You can copy a node as a clone and paste it in a different location, by doing the following:
| 1. | Select the node or nodes you want to clone. |
| 2. | Click Edit > Copy as Clones (or press Ctrl+K). |
Decloning a Node
To declone nodes, do the following:
| 1. | Select the node or nodes you want to declone. |
| 2. | Click Edit > Declone (or press Alt+Shift+K). |
Nuke removes the clone status of the selected nodes.
Linking Nodes
A more efficient way to copy nodes is to use Link Nodes.
Link Nodes allow you to make a linked copy of a node, and have changes updated in both nodes, whilst optionally being able to override any of the knobs.
To create a Link Node:
| 1. | Select the node you want to make a link node from and press Alt+L, or go to the menu bar and select Edit > Link. |
| 2. | A Link Node will be created. |
| 3. | A yellow square indicates that the knob is overridden. |
For more information on how to use these nodes see, Using Link Nodes.
Disabling and Deleting Nodes
Nuke allows you you to disable, re-enabe, and delete nodes in your Node Graph.
| Action | Instructions | ||||||
|
Disable node |
To disable nodes:
Nuke disbales the node’s effect on the data stream. |
||||||
|
Re-enable node |
To re-enable nodes:
|
||||||
|
Delete nodes |
To delete nodes:
Nuke removes the node(s) from the script. |
Connecting Nodes
When you add or paste nodes into a script, Nuke automatically generates pipes between the currently selected node and the new nodes. As you build up a script, you’ll need to move these pipes, or run new pipes between nodes. In Nuke, you make such modifications by dragging on the back end of the pipe (the end without the arrowhead).
Disconnecting Nodes
You can disconnect nodes by either dragging the head or tail of the connecting arrow to an empty area of the workspace, or selecting the lower node in the tree and pressing Ctrl/Cmd+D.
Shake to Disconnect Nodes
You can disconnect a node or selection of nodes by grabbing the selection and shaking the pointer. The sensitivity of the shaking required to disconnect nodes is controlled by a preference under Panels > Node Graph. You can also disable shake to disconnect nodes in the same panel.
Reconnecting Nodes
You can reconnect a node by dragging the head or tail of the connecting arrow and drop it over the center of the node that want to connect.
Note: Nuke distinguishes the dual inputs that may run into a Merge node with the labels A and B. A refers to the foreground element, and B to the background element. Nuke always copies from the A input to the B. This means that if you later decide to disable the node associated with an A input, the data stream keeps flowing because, by default, it uses the B input.
Tip: It’s good organization practice to keep all the B inputs vertical in your node graph, as well as bringing in all the A inputs from the left and any masks from the right.
Duplicating a Connecting Arrow
To duplicate a connecting arrow, hold Shift and drag the connecting arrow on top of the node you want to create a connection to. Nuke duplicates the connecting arrow, leaving the original connection untouched.

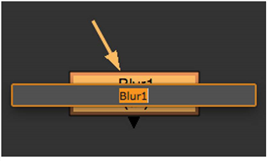
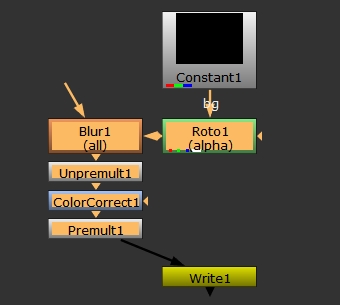
Adding Nodes Between Nodes
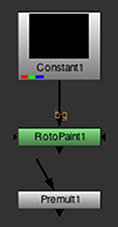
To add a node between two connected nodes, drag the node into the space between the already connected nodes. As you do so, you see the link between these two nodes become active. When that happens, release the node you are dragging and it is automatically placed and connected between the two nodes.
You can also drag a node stack onto an existing connection. This action places the nodes between existing nodes in the pipeline.
|
|
|
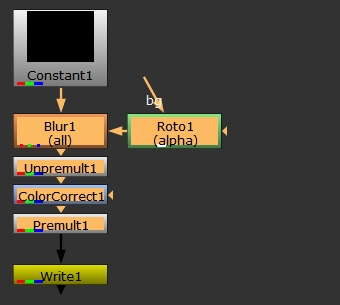
The pointer position is important when you connect nodes this way. In the example, the Blur node at the top of the stack is under the pointer. If the Roto node was under the pointer, the connection would look like this.
Bending Connecting Arrows
To bend connecting arrows, do the following:
| 1. | Select the node before the connector you want to bend. |
| 2. | From the Toolbar, select Other > Dot. |
A dot appears after the selected node, causing a bend in the connector.
| 3. | Drag the dot as necessary to reposition the bend. |
Tip: You can also add a dot to an existing connection by pressing Ctrl/Cmd and clicking on the yellow dot that appears on the connecting arrow.
Node Indicators
There are several indicators that can appear on the nodes in the Node Graph, depending on what you are doing. The following table describes what each indicator means.
|
Indicator |
Where it appears |
What it means |
|
|
|
The wide rectangles indicate the channels the node processes. The thin rectangles indicate the channels that are passed through the node untouched. |
|
|
|
The node’s effect is limited by a mask from either the node’s primary input or output. |
|
|
|
The node has been disabled by pressing D or by selecting Edit > Node > Disable/Enable. |
|
|
|
The node has been disabled using an expression. |
|
|
|
The node has been cloned. The indicator appears on both the parent and the child node. |
|
|
|
One or more of the node parameters are animated over time. |
|
|
|
One or more of the node parameters are being driven by an expression. |
|
|
|
You are working with a multi-view project and have split off one or more views in the node’s controls. |
|
|
|
You are working with a multi-view project and have split off one or more views in the node’s controls, dots also appear on the node to indicate which views have been split off. For example, if you are using red for the left view and split off that view, a red dot appears on the node. |
|
|
|
The full effect of the node is not in use, because you have adjusted the mix slider in the node’s controls. |
|
|

|
The node is a linked copy of another node. |

|

|
The linked node has an override. |


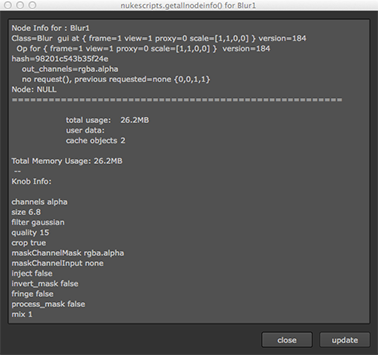
Displaying Node Information
You can obtain more detailed information from any node by selecting that node and then pressing the I key. This displays an information window associated with that node, particularly useful when troubleshooting.
Customizing the Node Display
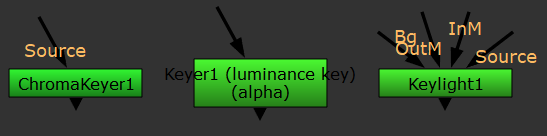
You can modify the color, name, and notes that a particular node displays. Doing so can make it easier for other artists to decipher the intent of your script. For example, you might color all nodes green that relate to keying.
Modifying Node Display Characteristics
To modify a node's display characteristics, do the following:
| 1. | Double-click on the node in the Node Graph to display its properties in the Properties pane. |
| 2. | Click the Node tab at the top of the dialog in the Properties pane. Its attributes are displayed: |
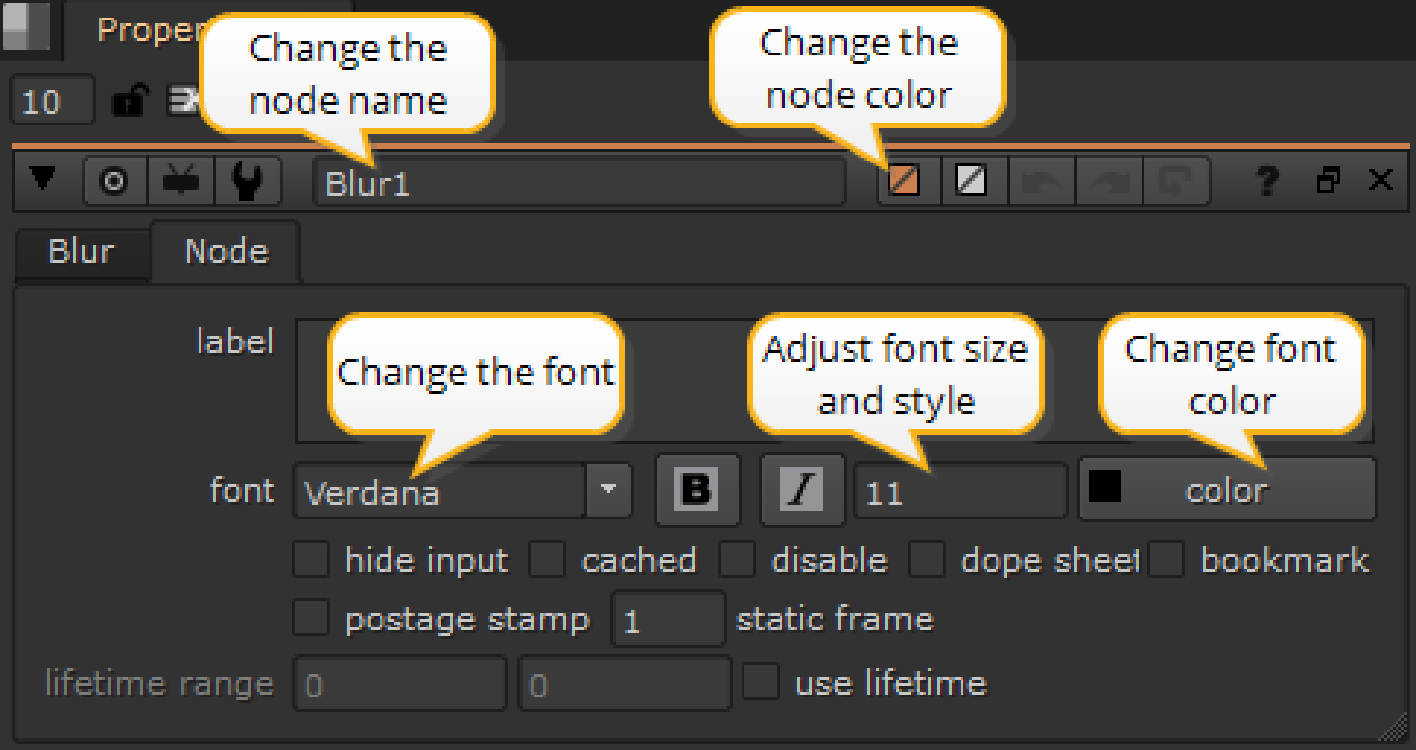
In the node's properties, you can also do the following:
• Select the hide input checkbox to conceal the node’s incoming pipe. This can enhance the readability of large scripts.
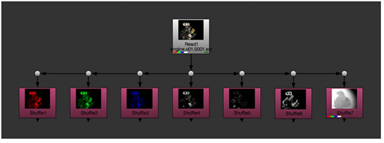
• Select the postage stamp checkbox to display a thumbnail render of the node’s output on its surface. You can also press Alt+P on the Properties pane or on the node, to toggle postage stamps.
If you want the postage stamp to display a fixed frame (rather than update to match the current frame), enter the frame to display in the static frame field. For this to work, you also need to press Shift+S to open the Preferences dialog, go to Panels > Node Graph, and ensure the postage stamp mode dropdown is set to Static frame. Note that if the frame number you use is outside the frame range for the node, it is clamped to the first or last frame in the range.
Tip: You can also have Nuke automatically color code nodes for you based on their function. See Preferences.
Creating Node Tool Sets
If you find yourself creating the same set of nodes repeatedly, you can create a custom tool set in the Nuke toolbar. This allows you to quickly and easily create the set of nodes from the ToolSets menu.
Tool sets can be shared between artists if they are using a centralized .nuke folder. This needs to be accessed through a NUKE_PATH environment variable that you can set up (see Configuring Nuke for more information).
To create a tool set do the following:
| 1. | In the Node Graph, select any number of nodes (or just one node). The nodes don’t have to be connected to each other. |
| 2. | Click  (ToolSets) on the toolbar and select Create. You can also right-click on the Node Graph and select ToolSets > Create. The CreateToolSet dialog appears. You can also access your tool sets by pressing Tab and searching for them in the search field. (ToolSets) on the toolbar and select Create. You can also right-click on the Node Graph and select ToolSets > Create. The CreateToolSet dialog appears. You can also access your tool sets by pressing Tab and searching for them in the search field. |
| 3. | In the ToolSets menu dropdown, select the menu where you’d like to place your new tool set. Then give it a name in the Menu item field and click Create. |
By default, your new tool set goes under the ToolSets menu, but if you’d like to create a subfolder for the tool set, you can do that by specifying the folder name before the tool set name, separated by a forward slash, in the Menu item field. For example, entering Roto/BasicRoto would create a subfolder called Roto in the ToolSets menu, and place a new tool set by the name of BasicRoto in it.
There are some tool sets for creating particles, for instance, that are built in to Nuke. These can also be found in the ToolSets menu. To prevent confusion between built-in tool sets and tool sets that you’ve created, if you happen to create a tool set folder with the same name as a built-in one, Nuke adds [user] in front of the folder name for clarity.
| 4. | To delete a tool set you’ve created, you can click ToolSets > Delete in the toolbar and select the tool set you want to remove. |